
Do you want to add some character and style to your kitchen without spending a lot of money? A great way to do this is by grouting a kitchen backsplash. This is a simple DIY project that can be completed in just several simple steps! This article will walk you through the process of grouting a kitchen backsplash. It will provide tips and tricks for making the process easy and headache-free.
What is a Kitchen Backsplash?
There are many different types of materials used for backsplashes, including tile, stone, marble, glass, stainless steel, and more. It is important to consider your needs when choosing a material for your backsplash. For example, if you need extra protection from splashes and spills in the kitchen then tile or stone may be right for you. If you’re looking for an easy-to-clean surface with minimal maintenance then glass or stainless steel could be a good choice.
When installing a backsplash it is important to keep a few things in mind. First, be sure to measure the area accurately and make any necessary cuts before attaching the backsplash. It is also important to take into account any appliances or fixtures that may be in the way when installing your backsplash. Additionally, it’s a good idea to use waterproof grout and sealant around the edges to ensure that water does not seep through and cause moisture damage.
Finally, consider how you want to style your kitchen once the backsplash has been installed. Backsplashes come in many different colors, patterns, and textures so there are plenty of options out there for any type of kitchen design theme. From classic subway tile designs to modern glass mosaics and everything in between, you can find a backsplash that will help create the perfect look in your kitchen [1].
Why Should You Grout a Kitchen Backsplash?
Grouting a kitchen backsplash is an important step in the installation process. Grouting helps to seal and protect your new tile from moisture, dirt, and grime. It also adds a decorative touch to your kitchen by providing contrast and texture that looks great with any style of tile.
What Do You Need for Grouting a Kitchen Backsplash?
Materials Needed
If you are going to grout a kitchen backsplash by yourself, you will need the following materials:
- Grout – Choose a color that works well with your kitchen decor;
- Waterproofing sealant – This is especially important if you are grouting around a sink;
- Sponge and clean clothes – These will be used to wipe up any excess grout;
- Grout float or trowel – The best tool for applying grout evenly;
- Bucket of water – To mix the grout in, as well as to keep tools from drying out during installation;
- Latex gloves – To protect your hands from getting stained by the grout mixture;
- Safety glasses – To protect your eyes from dust and debris caused by sanding the backsplash tiles;
- Mask – To avoid breathing in any dust created during the project;
- Tile saw or wet saw – If you need to cut any of your backsplash tiles for a perfect fit;
- Caulk gun – To apply sealant around fixtures and sinks, if needed;
- Grout sealer – This will help protect your grout from moisture and staining;
Types of Grout
When grouting a kitchen backsplash, it’s important to choose the correct type of grout for the job. Depending on what type of tile you are using and the size of your tiles’ joints, you will need either sanded or unsanded grout.
Sanded Grout: This type of grout is most commonly used on floors and walls with larger grout joints greater than 1/8 inch wide. It also works well with natural stone tiles as it has more flex when drying.
Unsanded Grout: This type of grout should be used for smaller joints such as those found in mosaics and glass tiles. Unsanded grout is less likely to scratch delicate tile surfaces but is not as durable for larger grout joints.
To choose the right type of grout for your kitchen backsplash, consider some factors such as the size of the grout joints and the type of tile. For example, if your tiles are made of glass, you would want to use unsanded grout. On the other hand, if you have larger joints, sanded grout is usually the better choice.
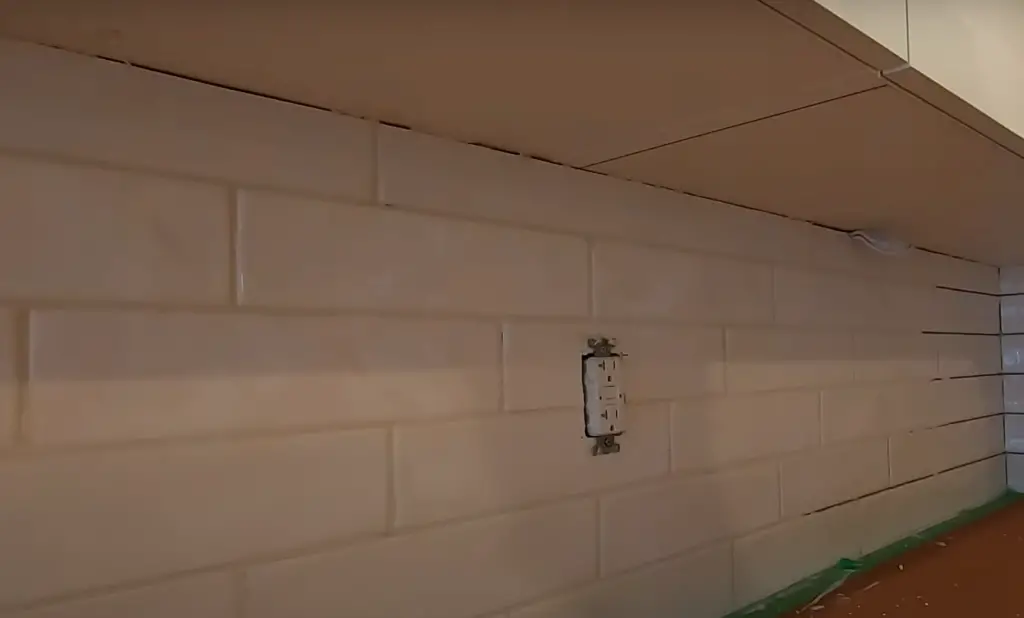
6 Steps For Grouting Tile Backsplash
1. Prepare the Area
The first step when grouting tile backsplash is to prepare the area. This includes cleaning the wall and any existing grout. To clean the wall and any existing grout, use a damp sponge. Once the wall is clean, inspect each tile for levelness and adhesion. Any tiles that are not secure should be fixed before proceeding.
2. Mix the Grout
The next step is to mix the grout according to the manufacturer’s instructions. Use a drill-mounted mixer or an electric hand-held mixer on low speed and add water slowly until you have achieved your desired consistency. The grout should resemble a thick cake batter when it’s finished mixing. Allow the grout to sit for 15 minutes so that it can reach its peak performance before using it.
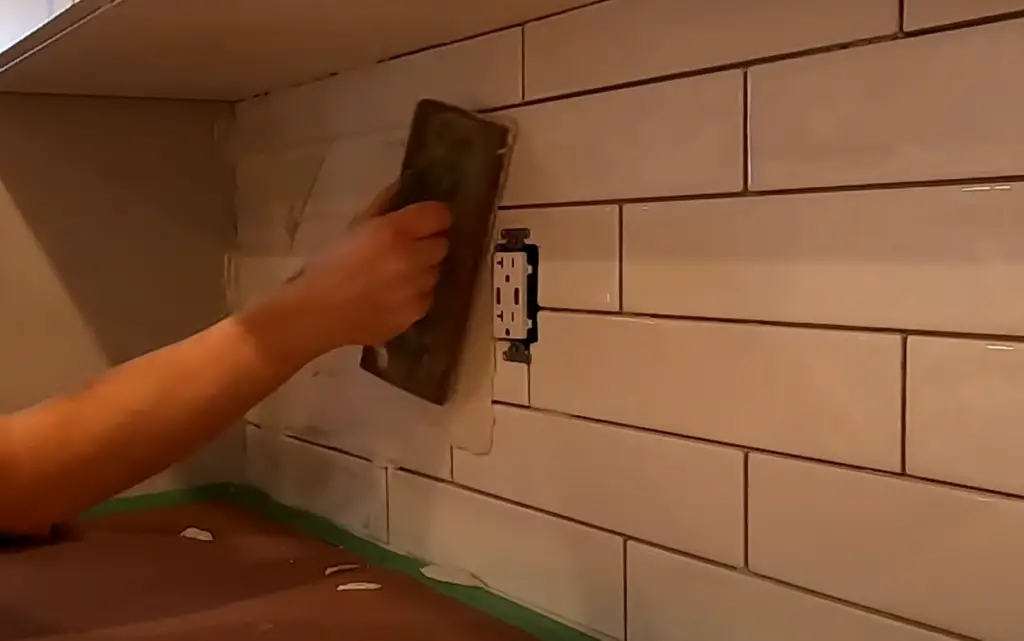
3. Apply the Grout
Using a rubber grout float, scoop up a small amount of grout and begin to apply it onto the wall in a circular motion. Fill all the joints between the tiles with grout, focusing on pressing it into each joint as you go. Once you have applied the grout to the entire area, use your rubber spatula to scrape off any excess grout from the surface of the tiles.
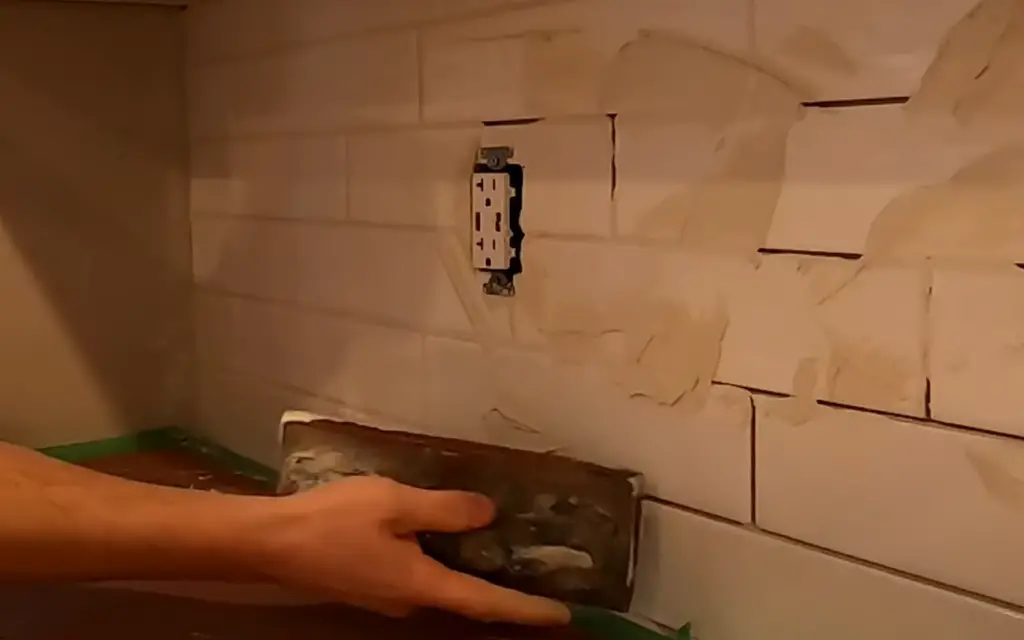
4. Remove Excess Grout
Once you are finished applying and scraping off excess grout, take your damp sponge and wipe away any remaining bits of grout that may be on the tile’s surface. Make sure to move in one direction when wiping with your sponge and keep rinsing out your sponge regularly so that no pieces of grout remain.
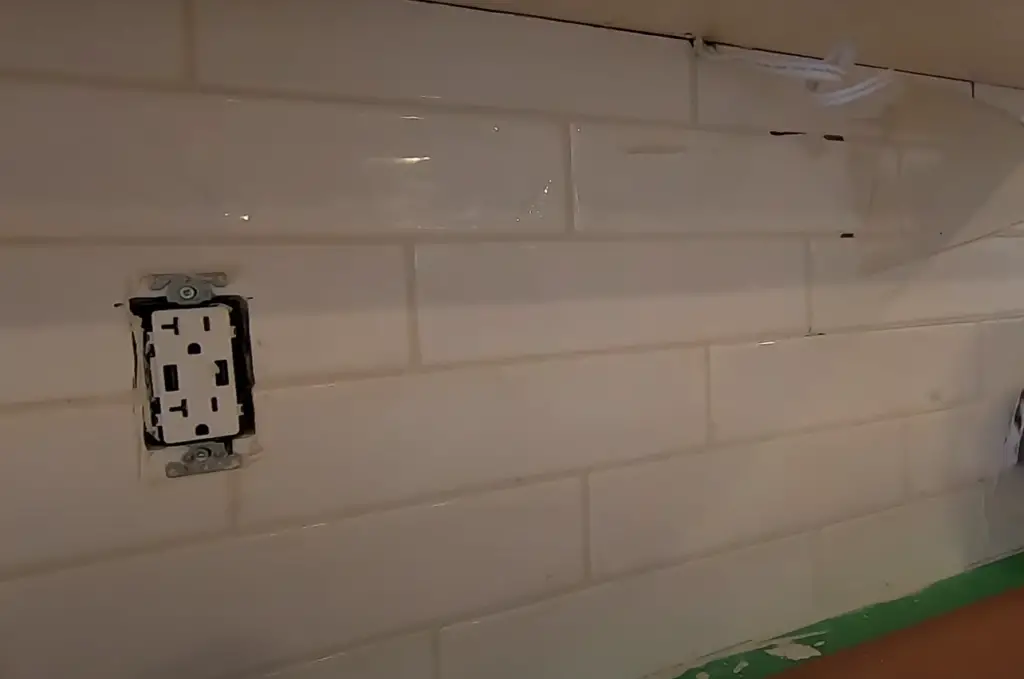
5. Allow Grout to Set
Once all the excess grout has been wiped away from the surface of the tile, allow the grout to set for at least 24 hours before continuing to the next step. If the grout doesn’t seem to be completely dry, give it more time. The effectiveness of the drying process depends on the type of grout you are using, the temperature and humidity in your area, and other factors such as ventilation.
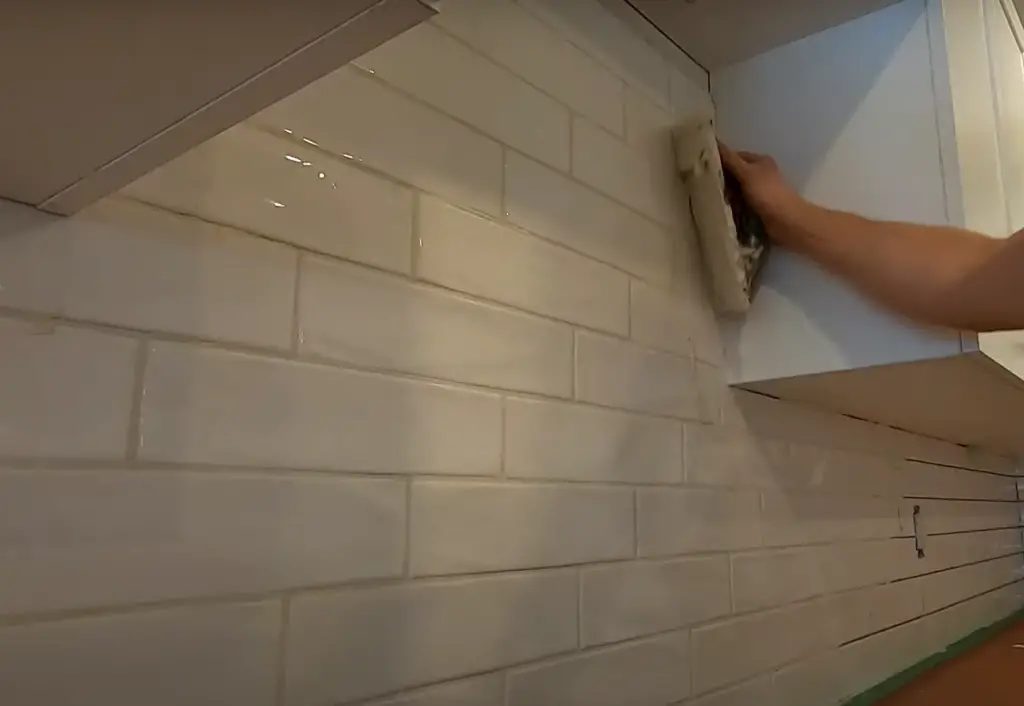
6. Seal the Grout
The final step in grouting a tile backsplash is sealing the grout. This will ensure that your grout remains waterproof and lasts for years to come. To seal your grout, use an aerosol-style sealer and spray it evenly over all of your tiles and joints. Make sure to stay at least 6 inches away from each tile while spraying and don’t forget to apply two coats of sealer for optimal protection. Once your sealer is dry, your tile backsplash is complete [2].
How to Maintain Kitchen Tiles?
If you want extra protection against dirt and stains, consider sealing your kitchen tiles with a sealant designed for the material. Additionally, ensure any spills are wiped up quickly and take care when moving heavy furniture so as not to scratch or chip the tile. Following these simple steps will help you keep your kitchen tiles looking great for years to come.
Finally, make sure to inspect your kitchen tiles regularly for any signs of damage and repair them as needed. If a tile is cracked or chipped, replace it immediately as this can lead to water damage or mold growth if left unchecked. By taking the time to properly maintain your kitchen tiles, you’ll be able to enjoy their beauty and functionality for many years [3].
Design Ideas for Kitchen Backsplash
A backsplash is an important part of any kitchen design. It not only provides a decorative and protective layer between the countertop and wall but can also be used to express your style.
Whether you’re looking for a classic tile backsplash or something more modern, here are some ideas to help you get inspired for your next kitchen renovation:
- Subway Tile Backsplash – This classic look never goes out of style! Choose from various colors and sizes to create a timeless yet stylish look in your kitchen. A great option for traditional or farmhouse kitchens;
- Mosaic Backsplash – A mosaic backsplash can provide both color and texture to your space! Mix and match different tiles for an eclectic look or choose just a few coordinating colors to create a subtle but eye-catching backsplash;
- Metallic Backsplash – Metallics are all the rage in kitchen design these days! Choose from stainless steel, aluminum, copper, and more for a modern and on-trend look;
- Glass Tiles – If you’re looking for something bold yet timeless, glass tile is perfect! These tiles come in various sizes and shapes to fit any vision you may have for your space;
- Natural Stone Backsplash – For those who prefer a rustic feel in their kitchen, natural stone is the way to go. From marble to granite to travertine, you can pick the stone that best suits your style;
- Patterned Backsplash – If you’re looking to add some visual interest and texture to your kitchen, consider a patterned backsplash. Choose from intricate designs or stick with geometric shapes for an unexpected twist;
- Brick Backsplash – This timeless option is perfect for rustic, industrial, or farmhouse-style kitchens. It adds texture and character without being too busy or overwhelming. Plus, it’s easy to clean;
No matter what look you’re going for in your kitchen design, there is sure to be a backsplash option out there for you. With so many options available, the possibilities are endless! Get creative and explore all the possibilities for your kitchen backsplash [4].
FAQ
How do you grout the backsplash in the kitchen quickly?
The best way to grout a backsplash in the kitchen quickly is to use premixed grout. This type of grout comes ready to use and can be spread on the surface with a trowel without having to mix it with water first. It also dries quickly, so you can get your project done in no time!
Are kitchen backsplashes expensive?
The cost of a kitchen backsplash depends largely on the material chosen for the job. Some materials such as ceramic tile or marble may be more costly than others like vinyl or glass. The size of the backsplash will also influence the price, as larger areas require more material and labor costs associated with installation. In general, you can expect to spend anywhere between $ 200-500 for an average-sized backsplash.
What is the best material for a kitchen backsplash?
The best material for a kitchen backsplash depends on your design preferences and budget. Some popular materials used include ceramic tile, marble, granite, glass, vinyl, and metal. Each of these materials has its unique look and feel that can add character to any kitchen space. Consider what type of feel you want in your kitchen before making your final decision.
What kind of grout do you use on a kitchen backsplash?
The type of grout you use on a kitchen backsplash will depend on the material chosen for the job. For ceramic tile, marble, or granite, you should use unsanded grout. For glass tile or smaller spaces, you can choose to use either sanded or unsanded grout. Be sure to read the product directions carefully before starting your project!
How do I clean my kitchen backsplash?
The best way to clean your kitchen backsplash depends on the material it is made from. If it is a tile surface such as ceramic or porcelain, then dampen a cloth with warm water and mild soap and gently wipe down the surface. For natural stone surfaces such as marble or granite, use a specially formulated stone cleaner and a soft cloth to avoid any damage. Glass surfaces can be wiped down with warm water and vinegar or a glass cleaner for the best results. Be sure to read the manufacturer’s instructions for proper cleaning methods before starting your project.
How long do you leave grout before wiping off excess?
The amount of time you should leave grout before wiping off the excess will vary depending on the type of grout used and the surface it is being applied to. For unsanded grout, allow the mixture to sit undisturbed for about 10-15 minutes before removing any excess with a damp sponge. For sanded grouts, wait about 20-30 minutes before wiping away any extra. Always read the manufacturer’s instructions for proper application techniques.
What else can be done around kitchen backsplashes?
There are many ways to customize your kitchen backsplash beyond just choosing materials and colors! You could add decorative elements such as tile inserts, mosaic patterns, or even custom artwork to give your space an added touch of personality. You can also add lighting around the backsplash to draw attention to it or even incorporate storage solutions, such as shelves or cabinets, for a more practical approach. There are endless possibilities when it comes to designing your kitchen’s backsplash!
What is the best way to seal a kitchen backsplash?
The best way to seal a kitchen backsplash depends on the material chosen for the job. For natural stone surfaces, you should use a penetrating sealer that will help prevent staining and water damage. For ceramic tile or glass tiles, you can use either an acrylic-based sealant or clear coat grout sealer for added protection against dirt and moisture buildup.
What happens if you put grout on top of the grout?
If you put grout on top of existing grout, it can cause a variety of issues. The new grout may not adhere properly to the existing layer and will eventually start to crumble and crack over time. This can lead to moisture buildup beneath which can cause damage to the underlying material. For this reason, it is best to remove any old or damaged grout before applying a fresh layer.
What tools do I need to install a backsplash?
The tools needed for installing a backsplash depend on the type of material chosen. Generally speaking, you will need tile nippers or a wet saw for cutting tiles, sponges for cleaning surfaces, a notched trowel for applying adhesive, a grout float and scraper for applying grout, and a rubber grout float for wiping off excess grout. It is also recommended to have a level and measuring tape on hand as well to ensure accuracy when installing your backsplash. You will also need the appropriate materials such as tiles, adhesive, sealant, and grout along with any tools required for those specific tasks.
Useful Video: How to Grout a Kitchen Backsplash
Conclusion
Grouting the kitchen backsplash is a relatively easy task that anyone can take on as long as they have the right supplies and knowledge. With careful attention to detail and patience, almost anyone can create an attractive grout line when completing their kitchen backsplash project. Grouting your kitchen backsplash is not a difficult job and the results can be very rewarding. This helps you save money while giving your kitchen a beautiful makeover. As long as you follow instructions carefully, you’ll be able to complete this proactive undertaking with ease and get great results in the end.
References:
- https://www.flooringamerica.com/blog/what-is-backsplash-tile#
- https://www.jimthehandyman.com/grout-tile-backsplash-like-pro/
- https://fantasticcleaners.com.au/blog/easy-ways-to-clean-kitchen-tiles/
- https://www.homesandgardens.com/ideas/kitchen-backsplash-ideas