
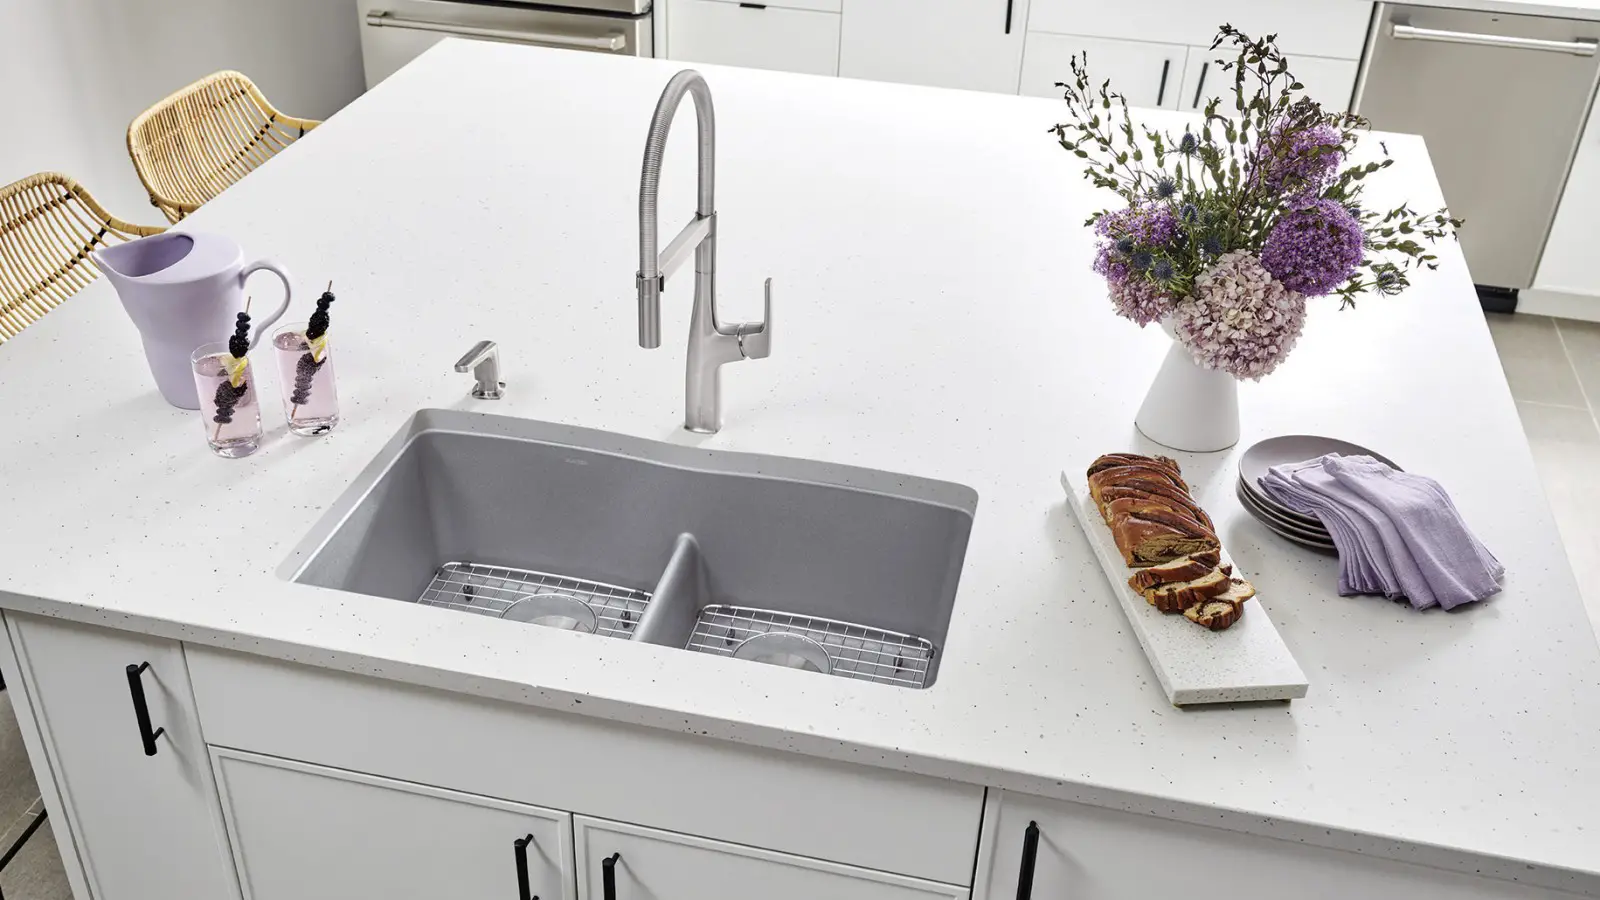
Installing an undermount kitchen sink is a great way to give your kitchen a modern and stylish look. It’s also easier to clean than traditional drop-in sinks, as there are no edges or rims around the sink. Although it may seem intimidating at first, installing an undermount kitchen sink is actually quite simple if you follow the right steps.
What Is An Undermount Kitchen Sink?
An undermount kitchen sink is a type of sink that is mounted below the countertop, instead of sitting on top of it. This gives your kitchen a sleek and modern look, and makes cleanup easier than with traditional drop-in sinks. Undermount sinks are typically made from stainless steel or granite, and come in various sizes to fit any kitchen.
Advantages Of An Undermount Kitchen Sink
Undermount kitchen sinks are becoming increasingly popular due to their sleek and modern look. They offer numerous advantages, including:
- Easy Cleaning: With an undermount sink, the rim is hidden so cleaning is much easier than with traditional top mounted sinks.
- Increased Counter Space: Undermount sinks allow for a much larger countertop area, as the sink itself is mounted beneath the countertop surface.
- Improved Aesthetics: An undermount sink gives a sleek, modern look to any kitchen.
- Durability: Undermount sinks are usually made of stainless steel or stone which makes them incredibly durable and long lasting. [1]
How To Install An Undermount Kitchen Sink?
An undermount kitchen sink is a great way to enhance the look of your kitchen and make it easier to keep your countertops clean. Installing an undermount sink requires cutting out a portion of the countertop, so it’s important to understand how to do it before beginning.
Necessary Tools
Before getting started, you’ll need to have some essential tools and materials on hand to help make the installation as smooth and successful as possible.
- Undermount kitchen sink
- Sink mounting kit or hardware
- Silicone caulk and caulk gun (for sealing)
- Putty knife (for cleaning)
- Screwdriver
- Pencil
- Level
- Hammer
- Drill and drill bits
- Pliers
- Sandpaper
- Tape measure
Removing The Old Sink
Before you can install the undermount sink, the old sink needs to be removed. If the sink is connected with clips, use a screwdriver to remove them and then release any caulk that may have been used around the rim of the old sink. To lift out the old sink, place something soft and strong (like a towel) under the sink and then use a lever to lift it up. Gently slide out the old sink from its housing.
Installation Of New Sink
- Locate the mounting clips in the under-mount sink kit and install them into the sink’s sides.
- Place the sink onto the countertop, making sure that it is aligned properly with your cutout hole.
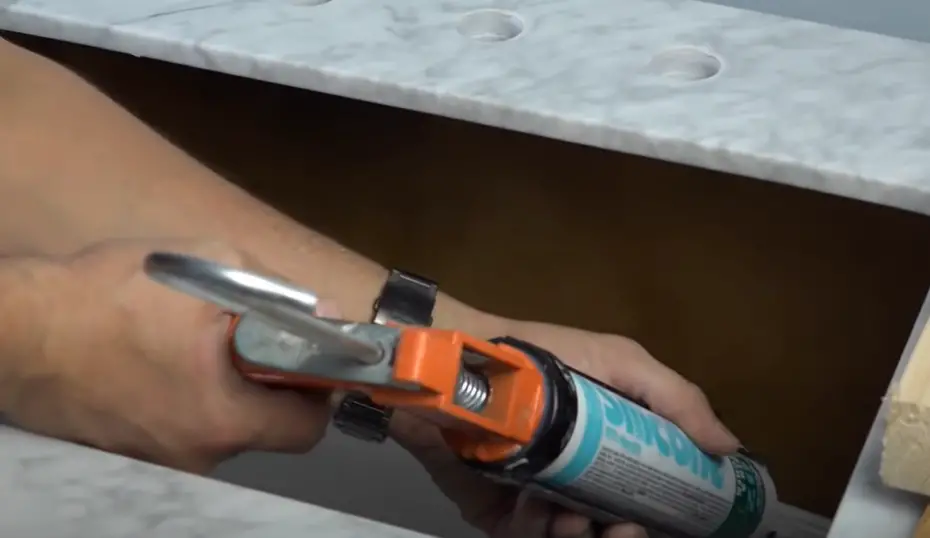
To attach the sink to your countertop, use a drill or screwdriver and install the clips in each corner of the sink. - Apply a generous amount of silicone sealant around the edges of the sink and countertop to ensure that there are no gaps or crevices in which water can seep through.
- Place kitchen towels on the countertop and place your sink into position. Gently press down on the sink until it fits snugly and securely into the countertop.
- Securely tighten the mounting clips in place and use a screwdriver to make sure that the clips are completely tightened.
- Finally, run a bead of silicone sealant over any visible screws or seams for further water protection and your sink is now successfully installed! [2]
How To Install Undermount Sink To Quartz Countertop?
- First, make sure that the sink opening is at the same level as the countertop surface. It should also be centered on the countertop for a more aesthetically pleasing appearance.
- Once the sink is in place, use a sharpie to mark the outline of the sink on the countertop. This will help you when cutting out the opening for the sink later on.
- Cut out a hole that fits your sink using either a jigsaw or router. It’s important to take your time and make sure the cut is precise, as this will affect how well the sink fits.
- Place a bead of silicone adhesive onto the underside of the sink and then place it into position on top of the countertop. The adhesive should be in contact with both surfaces, so use a cloth or other tool to push it into place.
- Secure the sink in place with a few underneath clamps, and then use caulk around the outside of the sink to provide a watertight seal. Be sure that you follow the manufacturer’s directions for using the appropriate type of caulk for quartz countertops.
- Finally, use screws to secure the sink in place. Once you’ve tightened all of the screws and secured the sink, you can now enjoy your new undermount kitchen sink!

How To Install Undermount Sink To Laminate Countertop?
- Place the sink in its intended position and mark the mounting holes onto the laminate countertop with a pencil or marker.
- Use an electric drill with a hole saw bit to create the holes in the countertop; make sure that it is set to a low speed, as high speeds can damage the laminate.
- Place a piece of painter’s tape over the countertop in front of the sink to protect it from damage; this should be done after drilling all of the holes.
- Align the sink with its mounting holes and secure it using a screwdriver or drill, depending on what type of mounting hardware came with the sink.
- Install the caulk around the edges of the sink, ensuring that no gaps exist between it and the countertop; this will help to prevent water from seeping into any cracks or crevices.
- Apply silicone sealant in a continuous bead along all four sides of the sink, and allow it to dry completely before use. [3]
- Measure twice, cut once! Always double check the measurements of your sink before cutting the hole in your countertop.
- Make sure the sink is securely supported! Undermount kitchen sinks require a lip to be created around the perimeter of the sink opening and then secured with screws or adhesive so it’s held firmly in place when weight is applied.
- Use silicone sealant between the sink and countertop! Silicone sealant helps ensure that the connection between your sink and countertop is watertight.
- Be careful when putting weight on the sink during installation! Since undermount kitchen sinks are secured with only a lip, it’s important to take extra care not to overburden it with too much weight while installing. [4]
- https://concretecountertopinstitute.com/free-training/how-to-install-undermount-kitchen-sinks/
- https://solvekitchenissue.com/install-undermount-kitchen-sink/
- https://www.wikihow.com/Install-an-Undermount-Sink
- https://www.naturalhandyman.com/iip/infplumb/infundermountsink.html
How To Replace Undermount Sink Without Removing Countertop?
In some cases, you may be able to replace an undermount sink without having to remove the countertop. This can save time and money, but it is important to properly prepare the area for a successful installation.
The first step is to disconnect all plumbing connections that are connected to the existing sink. It may also be necessary to remove any clamps or brackets that are holding the sink in place. Once these have been removed, you will need to carefully pry the sink away from the countertop using a flathead screwdriver or similar tool.
Next, use sandpaper or an abrasive cloth to create a rough surface on the underside of the countertop. This will help the adhesive bond more effectively. You may also need to use a drill or router to create any necessary cutouts for the sink or faucet.
Tips For Installing A Built-In Kitchen Sink
When it comes to installing an undermount kitchen sink there are a few tips that can help make the process go more smoothly. With these handy tips, you’ll be able to quickly and easily install your new sink with minimal effort:

Installing Undermount Kitchen Sinks
When installing an undermount kitchen sink, it’s important to follow the right steps and precautions for a secure and clean setup. Here’s a comparison of common installation steps, precautions, and tools required for the job.
| Common Installation Steps | Precautions | Tools Required |
|---|---|---|
| Measure and mark the sink’s position | Ensure precise measurements and alignment with the countertop cutout. | Measuring tape, pencil, and straightedge. |
| Create support for the sink | Use adequate support structures like support brackets or wooden supports. | Support brackets, wooden supports, and screws. |
| Apply sealant or adhesive | Use a high-quality sealant that’s compatible with your countertop material. | Sealant or adhesive recommended for undermount sinks. |
| Place and secure the sink | Handle the sink carefully to avoid damage during installation. | Sink clips, screws, screwdriver, and adhesive applicator. |
Explanation of the table:
This table provides a comparison of common installation steps, precautions, and tools required for installing undermount kitchen sinks. It covers key steps such as measuring and marking the sink’s position, creating adequate support, applying the right sealant or adhesive, and securely placing the sink. By following these steps and precautions, you can achieve a successful undermount sink installation.
FAQ
Can I install an undermount sink myself?
Yes, you can install an undermount kitchen sink yourself. However, for best results it is still recommended that a professional plumber do the job.
Undermount sinks require precise measurements and cutting, which can be difficult for those not familiar with these types of projects. Additionally, ensure that you have the proper tools and supplies on hand before attempting to install the undermount sink.
How do you secure an undermount sink to a countertop?
Undermount sinks are usually affixed to the countertop through a combination of mechanical fasteners and adhesive. After cutting an appropriately-sized hole in the countertop, the sink is placed in position and held tightly in place with clamps. Once it is secure, screws or nails are driven through the countertop and into the sink rim to keep it firmly in place. A bead of silicone adhesive is then applied around the edges of the sink, and the clamps are then removed. The adhesive helps to provide additional support for the sink, as well as sealing it against moisture. Once the adhesive has had time to cure, the installation is complete.
How do you attach an undermount sink to a granite countertop?
To begin the installation process, measure and mark where you intend to place the sink on the countertop. Depending on the sink’s design, you may need multiple measurements to ensure everything lines up correctly.
Use a drill and a hole saw to cut out the sink-sized area in your countertop. Make sure you are cutting slightly inside of your measurements to account for any imperfections in the sink’s fit.
Place the sink upside-down on your countertop, and use a putty knife to apply a generous amount of caulk or silicone sealant around the bottom edge.
Carefully flip the sink over and press it into place. Once the sink is in position, apply clamps or adhesive to secure it to the countertop.
Check for any areas where the sealant may have been disturbed during installation. Apply more caulk or silicone as needed and let the sink cure for 24 hours before using it.
Finally, install the faucet and drain assembly according to the manufacturer’s instructions. With everything in place, your undermount sink installation is complete!
You can now enjoy the modern look and convenience of your undermount kitchen sink.
How does an undermount sink stay up?
Undermount kitchen sinks are installed in three primary steps: cutting the hole, sealing the edges, and mounting the sink to the countertop. The sink is held up by a bearing system, which consists of clips and rails. The clips are screwed into place to secure the sink in position, while the rails, which are usually made of stainless steel or other corrosion-resistant material, provide the main support structure. In some cases, adhesives may also be used to ensure the sink is securely attached. Once the clips and rails are installed, the sink will stay in place for many years.
Do you install an undermount sink before the countertop?
An important step in the installation of an undermount sink is deciding whether to install it before or after the countertop. Installing the sink before the countertop allows you to seal it onto the cabinet and makes sure that it is secured, reducing the risk of any water damage or seepage. Installing the sink after the countertop has been installed allows you to have a more flush installation and creates a cleaner, sleeker look.
How do you stick an undermount sink?
The best way to do this is to use a two-part epoxy adhesive. To attach the sink, first clean off any dust or residue from the counter surface where you will be mounting the sink. Then, apply the two-part epoxy adhesive to both the sink and the countertop. Make sure that you spread it out evenly. Next, place the sink upside down on the countertop and press it firmly into the adhesive. Let it sit for about 24 hours before continuing with installation. Finally, attach the drain pipes to the sink and secure them with silicone caulk.
Is silicone enough to hold an undermount sink?
Silicone is a popular choice for installing an undermount kitchen sink due to its flexibility and waterproofing capabilities. Although silicone is an effective adhesive for most sinks, it is not always the strongest choice for an undermount installation. Heavy-duty epoxy adhesives and mounting hardware may be needed for sinks that are particularly heavy or large. Additionally, it is important to ensure that the countertop material can tolerate the type of adhesive used in the installation process.
What holds an undermount sink in place?
Undermount kitchen sinks are held in place with a combination of adhesives and metal brackets. The brackets should be secured, if possible, to a support beam or wooden brace beneath the countertop to provide extra strength. Silicone adhesives are typically used around the perimeter of the sink, and the entire sink is secured with screws. The installation process may vary slightly depending on the size and shape of your sink, so always follow the manufacturer’s advice and instructions.
Do undermount sinks ever fall out?
Undermount sinks are held in place by a combination of adhesive, sealer and caulk. Properly installed, they should not fall out unless the adhesive or sealer fails over time. When installing an undermount sink, it is important to use the recommended materials for adhesion and follow all instructions provided by the manufacturer.
Are there problems with undermount sinks?
Undermount sinks come with their own set of potential issues. It is important to use the right techniques when installing undermount kitchen sinks, as improper installation can cause serious issues. Problems that could arise include water damage, mold and mildew growth, and even an insecure sink. Failing to properly secure an undermount sink can cause it to separate from the counter, leading to water damage and structural issues.
What tools and materials do I need for the installation of an undermount kitchen sink?
For the installation of an undermount kitchen sink, you will typically need tools such as a screwdriver, adjustable wrench, silicone adhesive, clamps, and materials like mounting brackets, clips, and a sink template. The specific tools and materials can vary based on the sink and countertop material.
What are the primary steps for installing an undermount kitchen sink, and in what order should they be followed?
The primary steps for installing an undermount kitchen sink typically include creating a sink cutout in the countertop, applying silicone adhesive to the sink’s rim, positioning the sink in the cutout, securing it with mounting brackets or clips, and cleaning up any excess silicone. The order of these steps may vary depending on the sink and countertop material.
How do I ensure a watertight seal and proper support when installing an undermount sink in a countertop?
To ensure a watertight seal and proper support, apply a bead of high-quality silicone adhesive around the sink’s rim before positioning it in the cutout. Use mounting brackets or clips to secure the sink from below, applying even pressure to create a secure and watertight seal.
Are there any additional considerations when installing an undermount sink in a granite countertop compared to other countertop materials?
When installing an undermount sink in a granite countertop, it’s important to use the appropriate mounting brackets or clips designed for use with stone countertops. Additionally, ensure that the sink is correctly positioned in the cutout before securing it, as adjustments can be challenging with harder materials like granite.
What are some common mistakes to avoid when installing an undermount kitchen sink to ensure a successful and durable installation?
Common mistakes to avoid when installing an undermount kitchen sink include not using enough silicone adhesive, failing to properly secure the sink with mounting brackets or clips, not cleaning up excess adhesive, and not checking for leaks after installation. It’s essential to follow the manufacturer’s instructions and ensure a secure, watertight installation.
Useful Video: How To Replace and Install an Undermount Sink
Conclusion
Installing an undermount kitchen sink is a great way to add a modern look to any kitchen. It can also help increase the overall value of a home, as well as improve its overall aesthetic. Before beginning the process, make sure to gather all the necessary materials and measure twice before cutting. When the sink is ready, carefully place it into position and secure it with brackets. Then use a caulk gun to seal in any gaps between the sink and the countertop. Finally, connect the plumbing fixtures to ensure your undermount kitchen sink is ready for use.
References