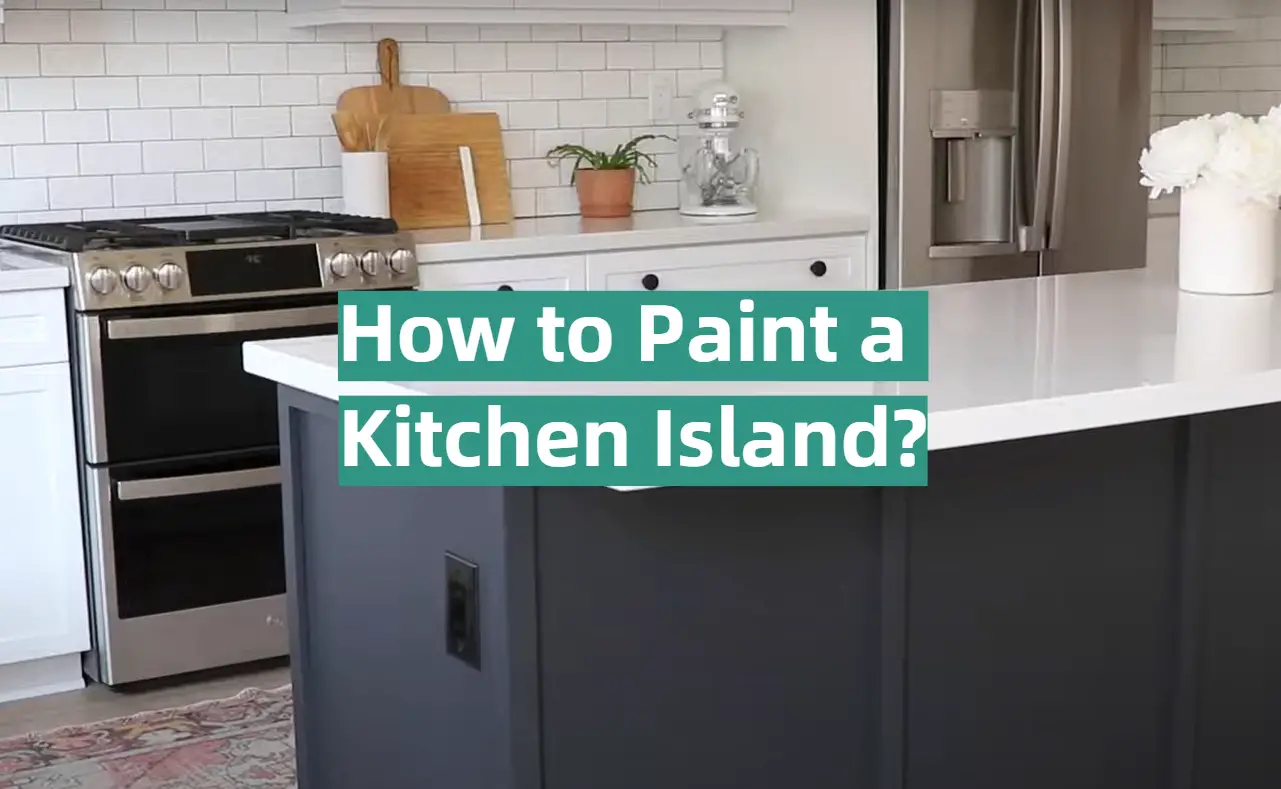
Kitchen islands are a great way to add extra counters and storage space to your kitchen. They can also be a great way to add some personality and style to your kitchen décor. If you have been thinking about painting your kitchen island, but aren’t sure where to start, you have come to the right place! This comprehensive guide will walk you through the entire process of painting your kitchen island. It will talk about the supplies you will need, the steps you need to take, and some tips and tricks that will help make the process go as smoothly as possible.
Why Should You Paint Your Kitchen Island?
Painting your kitchen island is a great way to upgrade the look of your kitchen without spending too much money. It can instantly add color, texture, and personality to an otherwise plain room. Furthermore, it’s easy to do it yourself if you don’t want to hire a professional painter. With just a few supplies and some time, you can transform your kitchen island into something beautiful! Painting your kitchen island is also a great way to protect it from wear and tear.
Painting your kitchen island is also a great way to express your creativity. You can choose any color or pattern that suits your tastes, allowing you to create a truly unique look. Whether you prefer bold colors, muted tones, monochromatic finishes, or something else entirely, there are plenty of options available for customizing your kitchen island. So, don’t be afraid to experiment with different ideas until you find the perfect combination! Finally, painting your kitchen island is one of the easiest ways to give it an update without breaking the bank [1].
Preparing Cabinets for Painting and Painting Process
Clean and Sand Surfaces
Before painting cabinets, you must clean and sand the surfaces. Use a mild detergent and water to remove dirt, grease, and other contaminants from the wood surfaces. If your cabinets are already painted or varnished, you should use a power sander to remove the old finish. This will create a smooth surface for the new paint to adhere to. Make sure to wear safety goggles, gloves, and a face mask when using power tools.
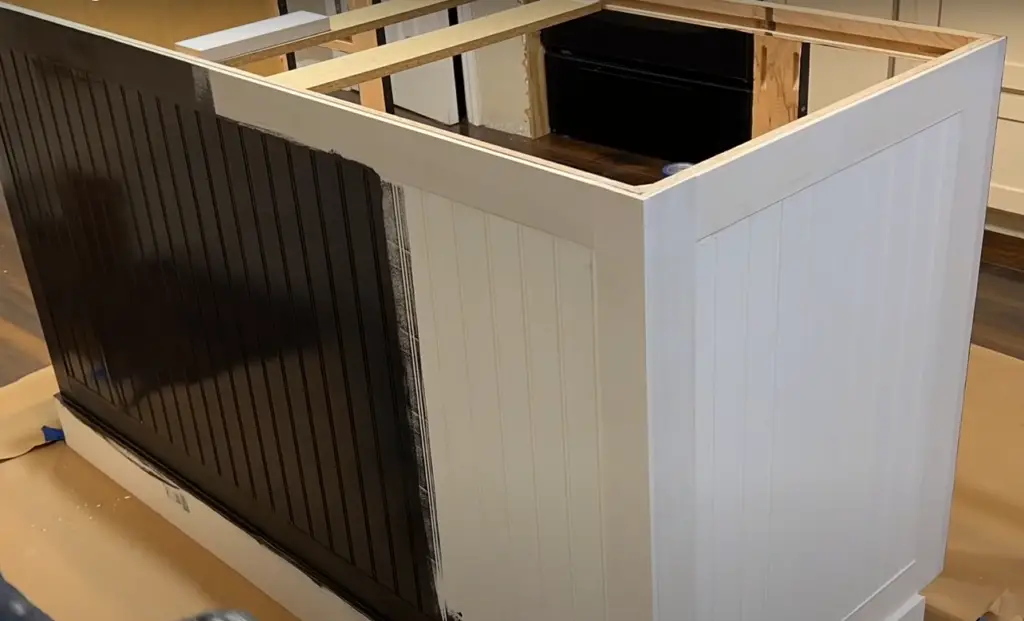
Expose the Island’s Frame
If you have an island in your kitchen, it may be necessary to expose the frame before painting. To do this, remove all drawers and doors from the cabinet. Then carefully unscrew the hinges and other hardware from the frame. Once everything is removed, you can use a putty knife to scrape off any remaining paint or varnish on the frame.
Protecting the Cabinet Interior Before Painting
Once the cabinet frames and doors have been sanded and cleaned, it’s time to protect the interior of your cabinets before painting. Cover any surfaces that will not be painted with painter’s tape, plastic drop cloths or newspaper. This will ensure that paint or primer does not get on items stored within the cabinets.
Caulking Cabinet Seams
Once the interior of your cabinets is protected, you can begin applying caulking to any seams or cracks between the frames and doors. Use a caulking gun to apply an even layer of caulk along all edges. This will create a waterproof seal that will help prevent moisture from damaging the wood. Let the caulking dry completely before painting.
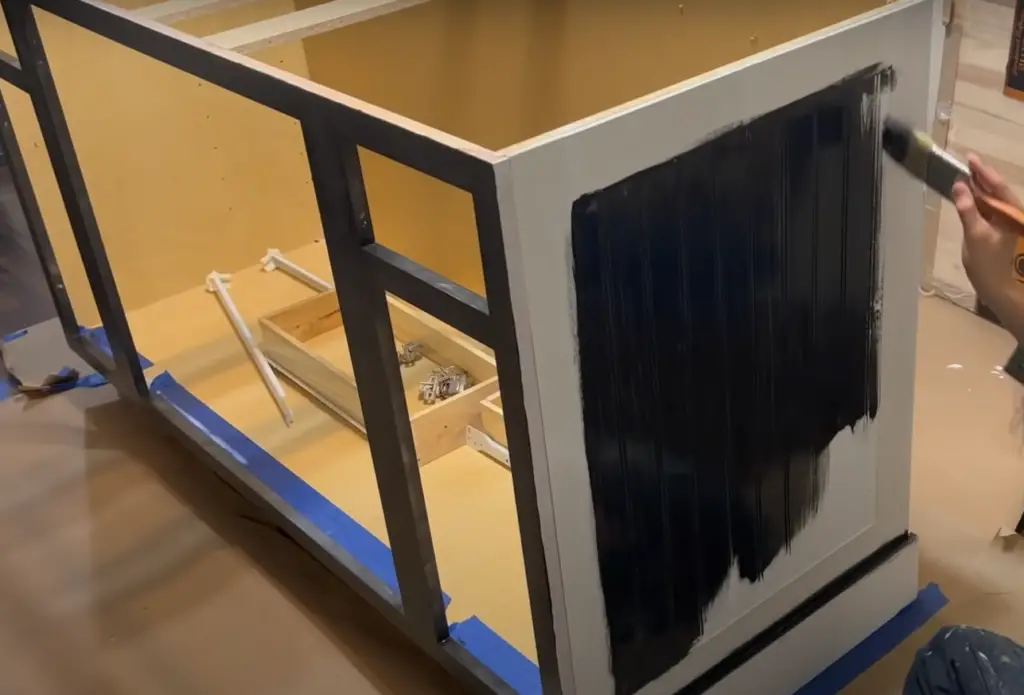
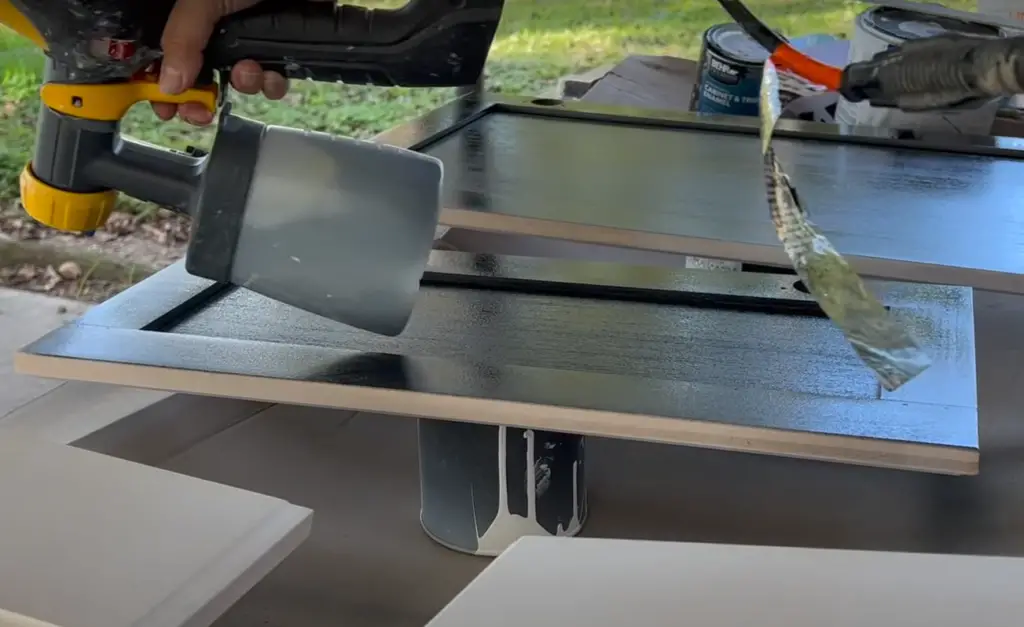
Applying a Primer to the Cabinets
Once the caulk is dry, you can begin priming your cabinet frames and doors. Primer helps to create an even surface that paint will adhere to more easily. For best results, use a high-quality oil-based primer. Apply two thin coats of primer, allowing them to dry completely between each layer.
Sand the Primed Surfaces
Once the primer is dry, use fine-grit sandpaper to lightly sand the primed surfaces. This will ensure that you have an even and smooth surface to paint on. Wipe away any dust using a clean cloth or rag.
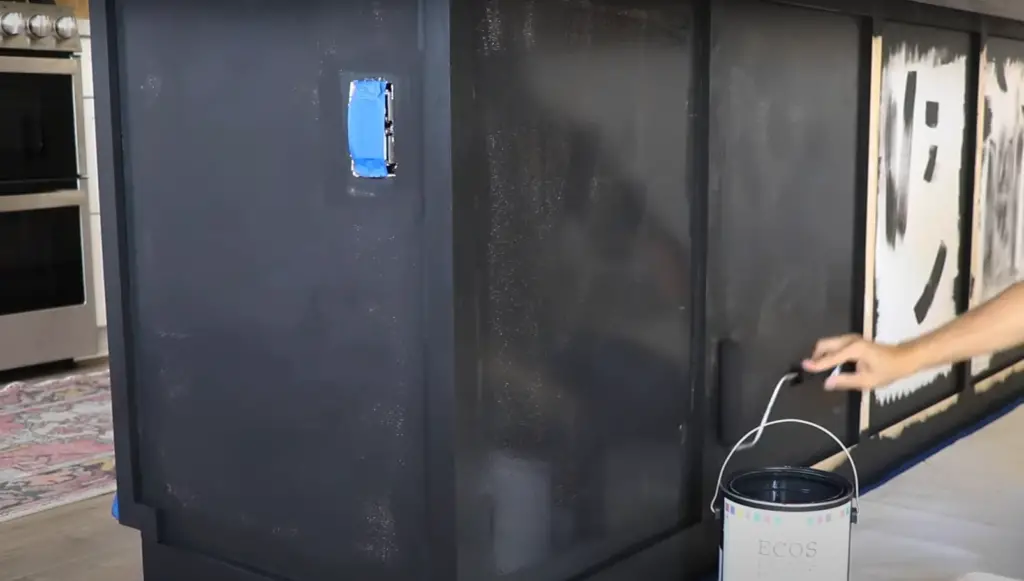
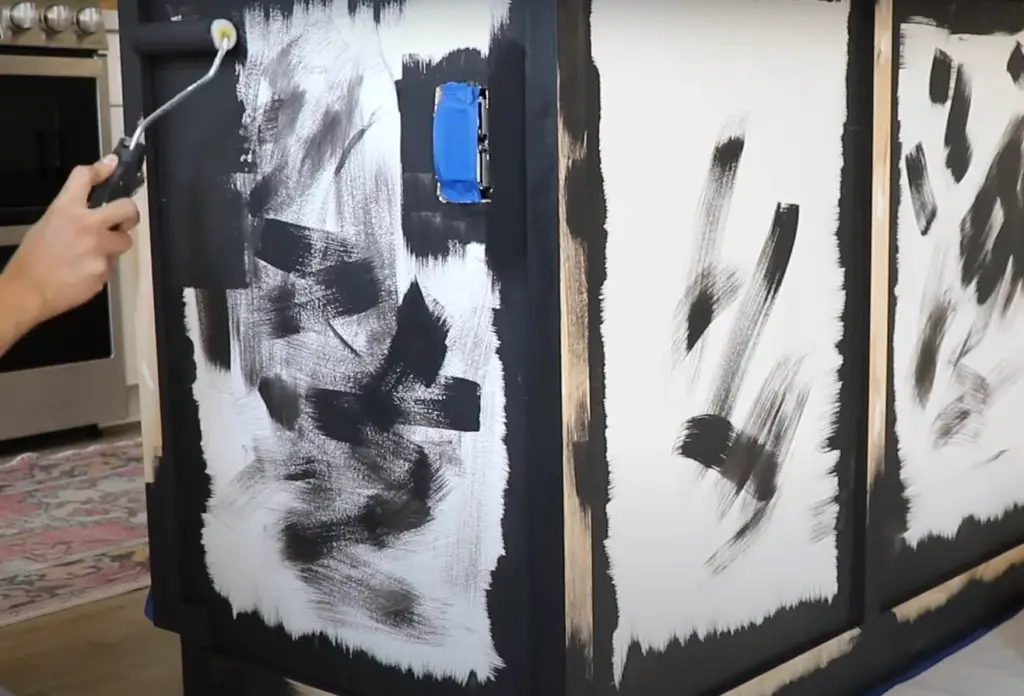
Applying Paint to the Cabinets
Now it’s time to apply the paint. For best results, use high-quality oil-based paint in either a semigloss or gloss finish. Apply two thin coats of paint, allowing each layer to dry completely before applying the next one. Start by painting the edges of each door and frame first, then work your way outwards using long strokes with a brush or roller. Make sure to apply multiple thin coats rather than one thick coat, allowing them to dry completely between each layer. Once your cabinets are dry, you can apply a topcoat to create a beautiful finish and further protect your paint job. Once you are finished painting, let your cabinets dry for 24 hours before replacing any hardware or doors [2].
Adding Decorative Elements
If desired, you can also add decorative elements to your cabinets once the paint has dried. This could include stenciling, trim work, distressing, or other decorative details. Have fun with it and show off your creativity!
Caring for Painted Cabinets
Once you’ve finished painting and decorating your cabinets, you should take care of them properly to ensure that they last for years to come. Wipe up spills as soon as possible and avoid using harsh cleaners on painted surfaces. Dust regularly with a soft cloth or feather duster to keep dirt from building up. Following these simple tips will help you maintain your newly painted cabinets and keep them looking beautiful for years to come.
What Type of Paint Do You Need for Kitchen Islands?
Oil or latex?
As latex paints also dry faster and can be easily cleaned with warm soapy water, they may be more convenient to use if you only need a light color refreshment. When applying either oil or latex paint on wooden cabinets, it is recommended to apply two coats to achieve the best results. Additionally, you should use a good-quality primer to ensure the finish lasts.
For metal cabinets, either oil or latex paint can be used. However, it is best practice to use specialized paints designed for metal if you want optimal adhesion and corrosion resistance on your cabinets. In this case, it is also recommended to apply two coats of paint to protect the surface from long-term wear and tear.
Regardless of which type of paint you choose, always test the color in an inconspicuous area first before applying it to your cabinets to make sure that you are happy with the shade. Additionally, ventilate the room well during the painting process as both types of paint produce fumes when applied. Finally, make sure that all surfaces are clean and dry before you start painting for the best results.
Brush or Spray Paint?
When painting cabinets, brush or spray paint can both be used depending on the desired result. If you want a smooth and even finish with minimal effort, then spray painting is your best bet. However, if you want to achieve a more textured look or have intricate details that need to be covered, then using a brush might be more suitable.
Brushes come in various shapes and sizes so you can choose one that suits your needs. Additionally, with brushes, it is easier to get into smaller nooks and crannies which may not be as easy when using spray paint. When deciding between brushes and spray paint for cabinets, take into account what type of finish you are trying to achieve as well as how much time and effort you are willing to put into the project.
Maintaining a Kitchen Island: Simple Tips
Maintaining a kitchen island is easy with the right tips. Here are some simple steps you can take to keep your kitchen island looking and functioning at its best:
- Clean Regularly – It’s important to wipe down your kitchen island regularly, especially if it’s used for food preparation or dining. Wipe up spills and crumbs as soon as possible to prevent any stains or bacteria from building up. Use mild soap and warm water or other approved cleaners suitable for the type of material your countertop is made of;
- Protect Surfaces – To keep your kitchen island surfaces safe from scratches, chips, and heat damage, use cutting boards when chopping vegetables or slicing meat. Also, be sure to use coasters for any hot items to prevent heat damage;
- Avoid Abrasive Cleaners – While it might be tempting to use harsh cleansers on your kitchen island, it’s best to avoid them. They can potentially scratch or damage surfaces and leave behind chemical residue that could seep into food or cause health problems;
- Buff Out Scratches – If you do accidentally get a scratch on the surface of your kitchen island, use a buffing paste and cloth to gently buff out the area until it looks new again. Be sure to test the paste on a small spot first before applying it more widely;
- Wax & Seal – To help protect and preserve the finish of your kitchen island, apply a protective wax and sealant to the countertop regularly. This will create a barrier against liquids, oils, and other substances that may come in contact with the surface;
Following these simple tips can help you keep your kitchen island looking beautiful and functioning at its best for years to come [3].
How to Make a Kitchen Island by Yourself?
Building your kitchen island is a great way to add extra storage and workspace, as well as give your kitchen an attractive focal point. The good news is that making your kitchen island isn’t as difficult as it may seem. All you need is some basic carpentry skills, the right materials and tools, and a plan of what you want on your new island.
Here’s a step-by-step guide to building your kitchen island:
- Measure Your Space – Before you begin constructing your island, you need to make sure that it will fit in the space allotted for it. Measure carefully so that there will be enough room to move around the area comfortably once the island is complete;
- Choose a Design – Consider the shape, size, and style of your kitchen island. There are many different designs available to fit your needs, so take some time to decide what works best for you;
- Gather Materials and Tools – You will need various materials such as wood, screws, nails, and/or glue to construct your island’s frame; lumber, plywood, or particle board for the countertop; plus any hardware (e.g., hinges) and other fixtures you may require. Also, make sure that you have all of the necessary tools on hand before beginning construction;
- Assemble the Frame – Start by assembling the basic frame of your kitchen island using the materials and tools you have gathered. Use screws or nails to secure the pieces together, ensuring that they are strong and stable;
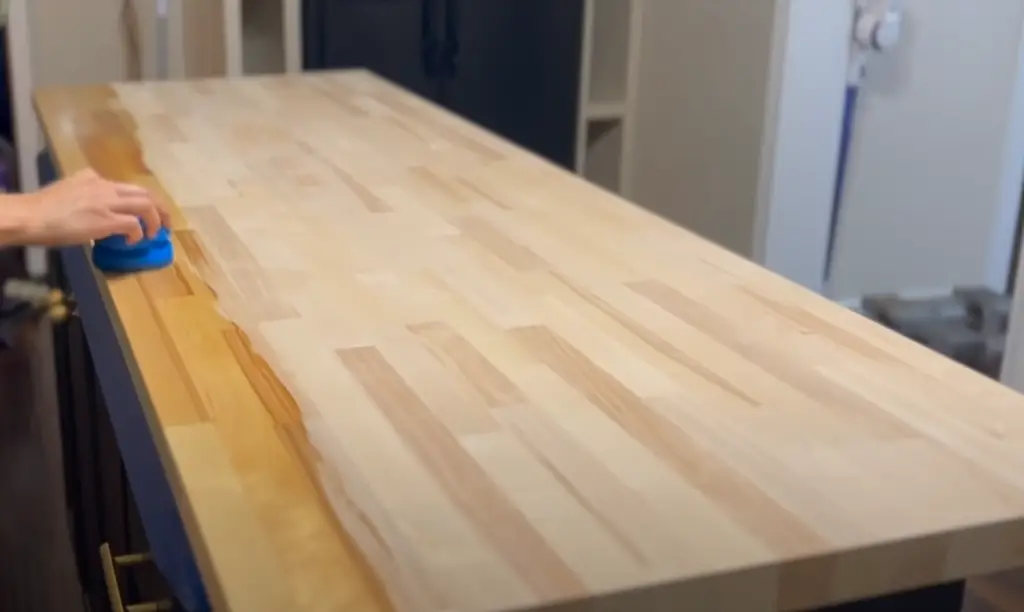
- Add Countertop – Once the frame is complete, you can add the countertop surface to your island. This can be made from wood, plywood, particle board, granite, etc., depending on what type of look you are going for. Make sure to use a waterproof sealant if necessary;
- Install Fixtures – Attach any fixtures such as hinges, handles, or pulls to your new kitchen island before adding any additional decorative touches;
- Add Finishing Touches – Once all of the construction is completed, it’s time to give your kitchen island its final touches with paint, stain, or varnish. You can also add decorative accents such as shelving, baskets, or lighting if desired;
- Enjoy Your New Kitchen Island – Congratulations! After following these steps, you now have a beautiful new island in your kitchen. Enjoy all the extra storage and workspace it provides for you and your family;
With a little bit of patience and creativity, making your kitchen island is a great way to give your kitchen an eye-catching focal point while adding additional storage and workspace. If you’re feeling up to the challenge, use this guide to build the perfect island for you and your family!
FAQ
What kind of paint should I use to paint my kitchen island?
The best type of paint to use on a kitchen island depends largely on the material of the island and your desired finished look. For a wooden or laminated surface, oil-based enamel paint is recommended for better durability and a glossy finish. If you’re looking for easier cleanup, opt for water-based latex paints that are low in VOCs (volatile organic compounds).
If your kitchen island is made of metal, a good quality epoxy or lacquer-based paint should be used to ensure that it lasts longer. Additionally, if you are planning to add any decorative accents such as stenciled designs or mosaic tiles, you may need to use specialty finishes like chalkboard paint or metallic spray paint.
Should kitchen islands be different colors than cabinets?
It is not necessary to have a kitchen island of a different color than the cabinets, but it can create an interesting visual contrast. For example, if you have white cabinets and dark countertops, painting your kitchen island in a darker shade could provide balance and bring out any intricate detailing on the island. If you prefer a monochromatic look, simply paint your island the same color as your cabinets for a subtle yet unified appearance. You may also want to consider using two-tone finishes that combine both light and dark hues to add depth and dimension to your space. No matter what color scheme you choose, make sure it complements the overall design of your kitchen.
How much does it cost to get a kitchen island painted?
What do I need to know before hiring someone to paint my kitchen island?
Before hiring a contractor or painter, make sure they have experience with similar projects and ask them what type of surface preparation they recommend. If you have a design in mind, be sure to communicate it clearly so that the painter can determine what types of materials and techniques will be needed for the job. Additionally, ask for references or check reviews online to make sure the contractor is reliable and trustworthy. Lastly, be sure to get a written estimate detailing all services provided before signing a contract.
Is there any paint that sticks without sanding?
Yes, there are specialty paints available that can be applied to most surfaces without sanding or primer. These paints tend to have a thicker consistency and provide better coverage for uneven surfaces. However, if you are dealing with an old surface, it is still recommended to do some light sanding before painting to ensure the best results. Make sure to use appropriate safety gear such as dust masks and goggles when sanding, and always read the manufacturer’s instructions carefully before beginning any project.
Does kitchen island paint need a top coat?
It depends on what type of paint you are using. Generally speaking, oil-based paints will require some sort of top coat either in the form of a sealer or clear coat while latex paints often do not. However, if you are looking for extra protection from wear and tear, a top coat is always a good idea. Just be sure to use the same type of paint (i.e., oil-based or latex) when applying the top coat so that there is no warping of the finish. Additionally, you may want to consider using an epoxy-based clear coat for metal kitchen islands as this will provide added durability and protection against scratching and scuffing.
What kind of sealer should I use on my kitchen island?
If your kitchen island is made from wood, it’s best to use a water-based sealer with a matte finish. This type of sealer is easy to apply and will protect from water damage, while still allowing the natural beauty of the wood grain to show through. For metal islands, an oil-based sealer or clear coat is recommended as this will provide extra protection against scratches and scuffing. Additionally, you may want to consider using a polyurethane sealer for more durability.
What happens if I don’t sand cabinets before painting?
If you don’t sand cabinets before painting, the paint won’t adhere properly and it may start to chip or peel off over time. Sanding will also help the primer and paint to stick better and create a smoother finish. Additionally, light sanding will remove any dirt or grime that has built up on your cabinets, allowing for better coverage. Always make sure to use appropriate safety gear such as dust masks and goggles when sanding so that you can keep yourself protected while working. Finally, remember to always follow the manufacturer’s instructions carefully when preparing surfaces for painting, and be sure to take your time to get the best results!
What is the most durable paint for the kitchen?
For a kitchen, you want to choose a paint that can stand up to high temperatures and frequent cleanings. Oil-based paint is generally the most durable choice as it provides an extra layer of protection against scratches and scuffing. Additionally, an oil-based paint will also create a hard shell that prevents moisture from seeping in, which makes it the best choice for kitchens prone to humidity and condensation. However, if you are looking for an easier cleanup option or prefer a more matte finish, then latex paint may be the better option for your kitchen. Just be sure to use a quality primer before painting so that the color lasts longer.
Should I use satin or eggshell paint in the kitchen?
Satin or eggshell paint are both good options for the kitchen. Satin paint is a bit shinier than an eggshell, but it will still look great in a kitchen and hold up well to everyday wear and tear. However, if you are looking for a less shiny finish that won’t show dirt as easily, then an eggshell would be the best choice. Eggshell paints also provide more depth of color than satin which can help create a more inviting atmosphere in any kitchen. Additionally, many manufacturers produce specialty paints specifically designed for kitchens that have antimicrobial properties which can help make cleaning easier.
Useful Video: DIY Kitchen Island Upgrade – How to Update a Builder-Grade Kitchen Island With Trim and Paint
Conclusion
Painting a kitchen island is a great way to update and refresh any kitchen, giving it an updated look. It’s important to research the best type of paint for your island and take the proper steps before you begin painting. Taking the time to properly prepare, prime, and sand the surface ensures that your project will turn out beautiful. With patience and careful planning, you can create a stunning painted kitchen island that looks like it was professionally done. By taking advantage of these tips and tricks, you can bring new life into your home without breaking the bank or making major renovations.
References:
- https://stylebestie.com/pros-cons-of-painting-your-kitchen-island-or-cabinets/
- https://www.thisoldhouse.com/kitchens/21097083/how-to-paint-your-kitchen-cabinets
- https://servingupsouthern.com/how-to-have-a-clean-kitchen-in-9-easy-steps/