Do you know how to caulk a kitchen sink? If not, don’t worry! This article is going to teach you everything you need to know about caulking a kitchen sink. Caulking is an important part of home improvement projects, and it’s something that every homeowner should know how to do. This post will discuss the supplies you need, the steps you need to take, and some tips for making the process as easy as possible.
Why do you need to caulk a Kitchen Sink?
Caulking a kitchen sink helps to keep it watertight while also preventing moisture damage. It forms a barrier between the sink and the countertop, keeping water from seeping underneath. Caulking also makes your kitchen look cleaner and neater by providing an attractive finish and hiding any gaps.
If you don’t caulk a kitchen sink, some problems can occur with sinks:
- Water can seep underneath, causing discoloration and staining of the countertop
- Unwanted moisture can accumulate and cause mold growth
- Cracks, gaps, or tears in the caulking material can allow water to penetrate the seal
- To caulk a sink you need to get the right materials, prepare and clean the area, apply the caulk in a neat line and then smooth it out. This process can be done on your own or with the help of a professional. It usually takes about an hour to complete.
You will need a caulk, a caulking gun, masking tape or painter’s tape, and acetone or rubbing alcohol. Make sure that you get the right kind of caulk suitable for bathrooms and kitchens. You can also purchase a kit that comes with all the necessary materials including the gun and caulk.
Best Caulk For Kitchen Sinks
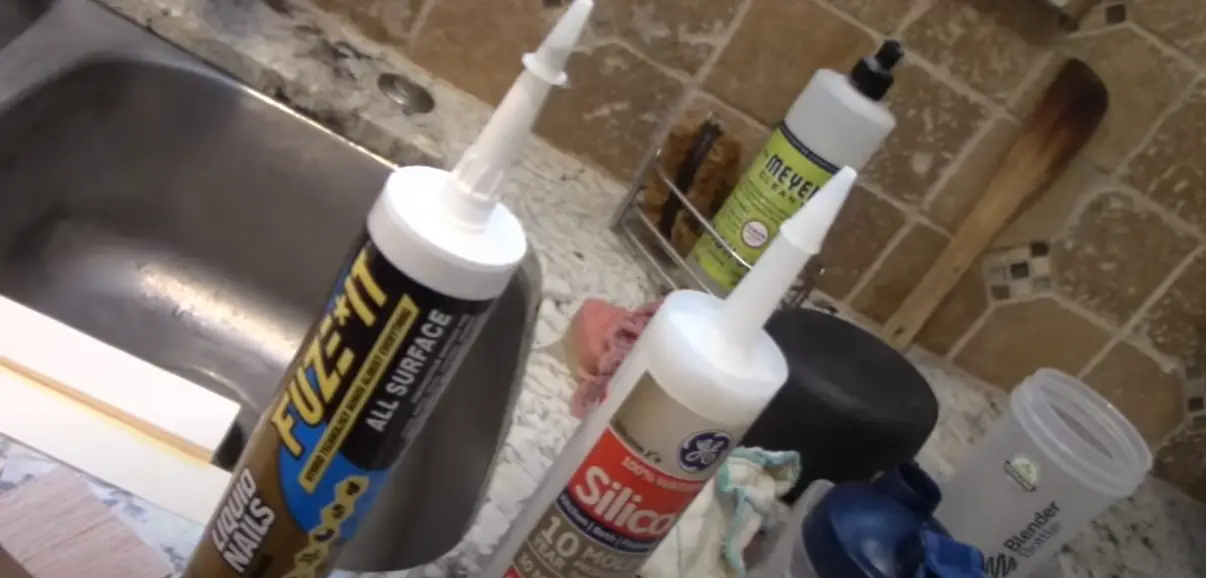
When it comes to caulking a kitchen sink, there is nothing more important than finding the right product. There are several types of caulk used on kitchen sinks:
- Silicone caulk: This type of caulk is very flexible, making it ideal for areas where a lot of movement occurs. It also has excellent waterproofing properties and can last up to 10 years before needing to be replaced.
- Acrylic Latex Caulk: This type of caulk provides superior adhesion and flexibility compared to silicone caulks. It’s easier to apply but tends not to last as long as silicone caulks so you will need to reapply it more often.
- Polyurethane Caulk: This type of caulk has good adhesive qualities and is very easy to clean off if mistakes are made during the application process. However, it doesn’t offer the same level of waterproofing as silicone caulks [1].
Steps to follow by caulking a kitchen sink
Step 1: Choose a Sealant
The first step in caulking a kitchen sink is to choose the right sealant. You should use a waterproof silicone caulk that is specifically designed for your type of sink, such as stainless steel or porcelain. Make sure the sealant has an expiration date and you should not exceed it.
Step 2: Clear the Surface
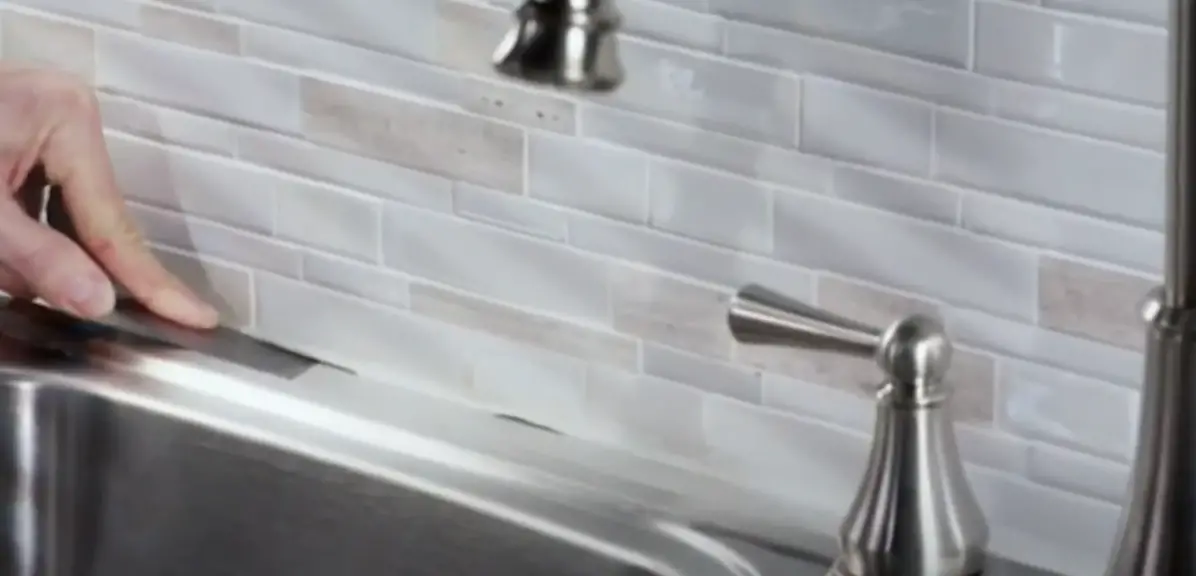
Once you have chosen the sealant, make sure to clear away any debris from the surface of your sink so that there is nothing between your caulking and the sink itself. This includes grease, dust, and other particles that can prevent proper adhesion of the sealant.
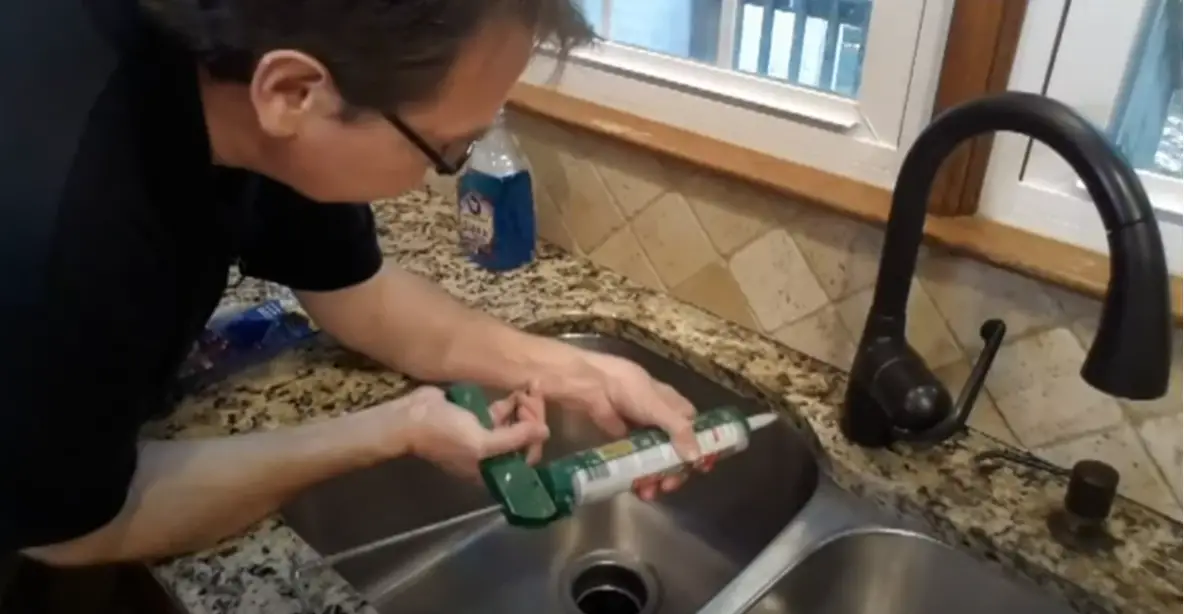
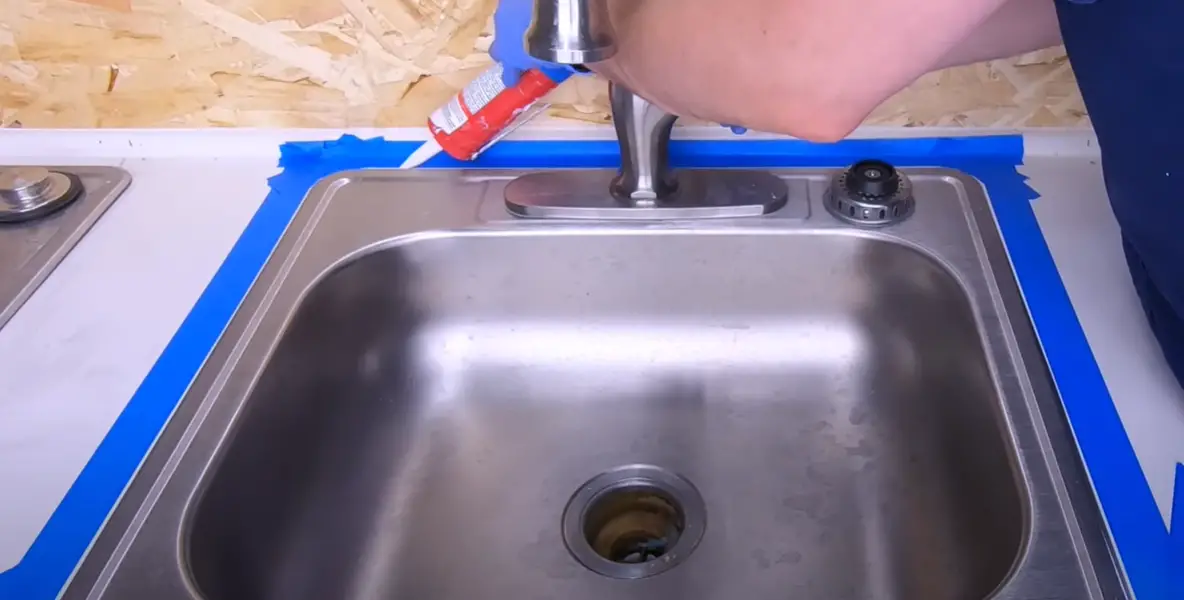
Step 3: Apply Caulk
Using a caulking gun, apply a thin bead of caulk around the edges of your sink, making sure to work it into any crevices or grooves that may be present in the surface. Don’t worry if some of the caulk gets on the countertop – it can easily be wiped away with a damp cloth when you’re done.
Step 4: Smooth Out Caulk
Once you have applied a bead of caulking around your sink, take a damp rag and use it to gently run over the caulk and smooth out any bumps or ridges that may appear on its surface. This will ensure a neat and professional finish when you are done caulking your kitchen sink.
Step 5: Allow Sealant to Dry
The final step is to allow the sealant to dry. This usually takes 24-48 hours, depending on the type of sealant and environmental conditions present in your home. Once it is dry, you can use water or mild detergent to clean off any excess caulk that remains on the surface of your sink.
What Is The Difference Between Caulk and Sealant?
Caulk is a type of sealant used for gaps in your kitchen sink. It’s designed to be waterproof and flexible enough to stay put when the sink expands or contracts from temperature changes, but it isn’t as strong as other types of caulk like silicone sealant. Sealants are more permanent, and they provide better protection against moisture and air leakage. There are some types of sealants that have greater adhesion and longer-lasting properties than caulk:
- Polyurethane sealant is the most durable and can be used in wet or dry areas. It’s best for areas that are exposed to a lot of movement, like joints between two different surfaces.
- Acrylic latex caulk is waterproof and flexible enough for kitchen sinks but it doesn’t last as long as polyurethane sealants.
Silicone sealant has high adhesion, making it ideal for use in sinks with frequent water exposure. It’s also very easy to clean off without leaving any residue behind.
Sealing around a kitchen sink: Tricks and tips
Caulking a kitchen sink is an easy and effective way to prevent water seepage from the perimeter of the sink. Following a few simple tips to achieve the best results:
- Clean the sink thoroughly and remove all debris, dirt, grease, and soap film before you start caulking.
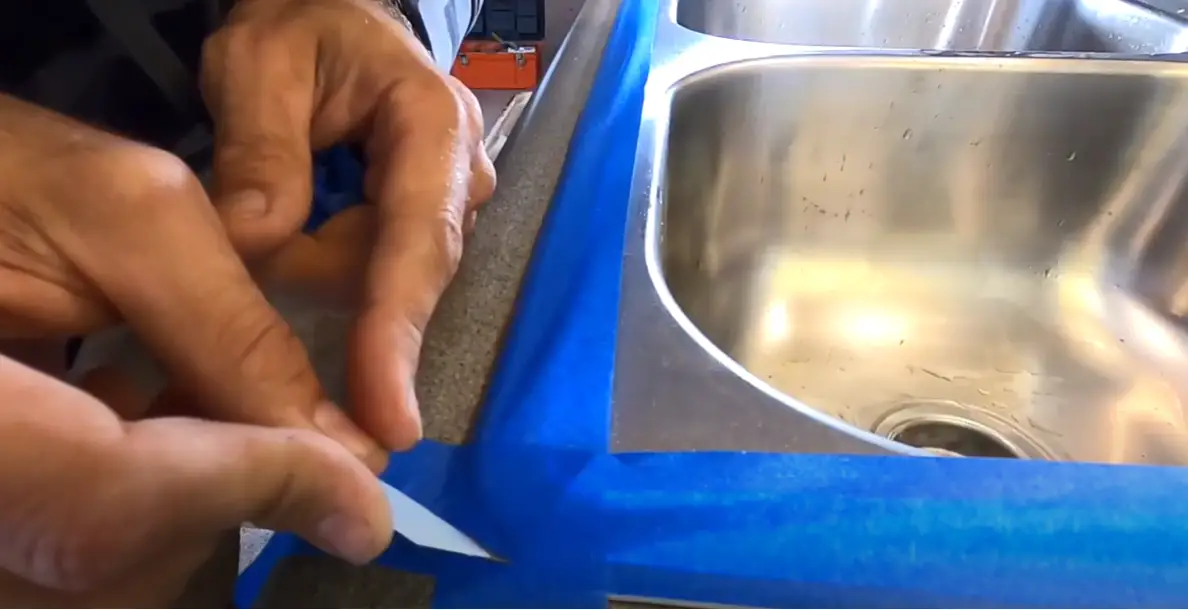
- Apply masking tape along both sides of the gap between the countertop and the sink bowl. This will help ensure a neat line of caulk is applied without any smudging or errors.
- Cut off the tip of the caulk tube at an angle with a craft knife to create a narrow opening on top. Squeeze out even beads of caulk along the perimeter in one continuous movement.
- Evenly spread out the bead using your finger dipped in water or a damp cloth if needed.
- Remove any excess caulk from around your sink using either a wet rag or an old toothbrush for precision.
- Allow the caulk to dry for a few hours before touching it. After that, remove the masking tape slowly and your sink should be sealed perfectly!
Follow these simple steps for caulking your kitchen sink and you’ll have a watertight seal in no time [3].
How to maintain the kitchen sink to avoid all the problems?
Caulking your kitchen sink can be an easy way to keep it functioning properly and looking great. It’s also a necessary step when replacing or installing a new sink. Caulk helps seal the seams between the sink and countertop and prevents water from seeping underneath either surface, which can cause serious damage if left unaddressed. To help you to get more of your kitchen sink here are some tips to use and maintain it:
- Cleaning the sink: You should clean the sink every day. Use soap and hot water, then dry with a soft cloth. Clean the sink regularly to remove debris and dirt that could affect the sink surface and damage it over time.
- Cleaning the faucet: You should regularly clean the sink faucet with warm soapy water and a soft cloth. This will help keep it looking good and functioning properly.
- Using a sealant: To ensure your kitchen sink is properly sealed, use a kitchen sink caulk to fill any gaps between the countertop and the basin of the sink. Apply a thin bead of caulk around the edges of the basin where it meets the countertop, then spread evenly with your finger or a damp sponge.
- Regular inspection: Inspect your kitchen sink regularly for signs of wear or damage that may require repair or replacement. This includes checking for cracks, chips, leaks, or other damage that can affect the performance and durability of the sink.
By following these tips, you can help ensure that your kitchen sink is properly sealed and functioning well for years to come. Proper maintenance of the kitchen sink is essential to prevent more serious damage and costly repairs down the line. So, take a few minutes each day to inspect, clean, and maintain your sink to keep it in tip-top shape [4]!
How to Caulk a Kitchen Sink: Step-by-Step Guide
Caulking around your kitchen sink is essential to prevent water damage and maintain a clean appearance. To assist you in this task, we’ve created a step-by-step guide with multiple columns to outline the key instructions and considerations for caulking a kitchen sink.
| Step | Procedure | Tools Required | Time Required | Difficulty Level |
|---|---|---|---|---|
| 1 | Clear the area around the sink to ensure it’s clean and dry. | Cleaning supplies | 5 minutes | Easy |
| 2 | Inspect the existing caulk for any signs of damage or mold. Remove old caulk if necessary using a caulk remover tool. | Caulk remover tool, scraper | 15 minutes | Moderate |
| 3 | Cut the tip of the caulk tube at a 45-degree angle, creating an opening that matches the width of the gap you plan to fill. | Caulk gun, utility knife | 2 minutes | Easy |
| 4 | Apply a continuous and even bead of caulk along the seam between the sink and countertop. | Caulk gun | 10 minutes | Easy |
| 5 | Moisten your finger and smooth the caulk bead, ensuring it’s properly adhered and has a clean finish. | N/A | 5 minutes | Easy |
| 6 | Allow the caulk to dry for the recommended time as indicated on the caulk tube. | N/A | 2 hours (drying time varies) | Easy |
| 7 | Check the caulked seam for any gaps or imperfections. Touch up if needed. | Caulk gun | 10 minutes | Easy |
Explanation of the Table:
- Step: Lists the sequential steps for caulking a kitchen sink.
- Procedure: Provides a brief description of what to do in each step.
- Tools Required: Lists the necessary tools for each step of the process.
- Time Required: Indicates the estimated time needed for each step.
- Difficulty Level: Rates the difficulty of each step, with “Easy” indicating simple tasks and “Moderate” for slightly more complex actions.
By following these detailed instructions and considering the tools required, time involved, and difficulty level, you can successfully caulk your kitchen sink, ensuring a watertight seal and a neat, professional appearance.
FAQ
Should you caulk around the kitchen sink?
Yes, it is essential to caulk around the kitchen sink. Caulking prevents water from seeping under the sink and damaging your cabinets or countertops. It also provides a finished look for your kitchen and ensures that there are no gaps between the sink and countertop.
What materials do you need to caulk a kitchen sink?
You will need a tube of silicone caulk, masking tape, a wet rag, safety goggles, a utility knife, and a razor blade scraper.
How do you prepare for caulking?
Before you begin caulking your kitchen sink, make sure to clean the edges of the area where you plan to apply the caulk.
How do you apply caulk around a kitchen sink?
First, cut the nozzle of the caulking tube at an angle to ensure a smooth flow of caulk. Then, apply masking tape along both sides of the gap between the sink and countertop. This will help to create nice straight lines in your finished caulk job. Next, press down on the trigger of the caulk tube and begin applying an even bead of caulk along the gap. Keep applying until you have filled all gaps. Once done, use your finger or a damp rag to smooth out any bumps or uneven surfaces in your newly applied caulk. Lastly, remove the masking tape and clean off any excess caulk with a damp rag.
What is the best way to caulk a kitchen sink?
The best way to caulk your kitchen sink is to ensure that you have a clean, dry surface before beginning. Make sure all residue and dirt are removed from the gap between the countertop and sink before applying any caulk. You should also apply masking tape along both sides of the gap for cleaner lines when finished. Lastly, use a damp rag or your finger to smooth out any inconsistencies once all gaps are filled with caulking material. With patience and proper technique, you can easily get the perfect finished look for your kitchen sink.
What kind of caulking do you use on a kitchen sink?
Silicone caulk is the most commonly used type of caulking for kitchen sinks. It provides a waterproof seal that is also resistant to heat, moisture, and bacteria. Silicone caulk can also be easily wiped down with a damp rag. Make sure to read the product instructions carefully before applying it around your sink. Additionally, you can use acrylic latex or butyl rubber-based caulks as alternatives if silicone caulk is not available.
Should you caulk between the sink and countertop?
Yes, it is important to caulk between the sink and countertop. Caulking prevents water from seeping underneath your sink and damaging your cabinets or countertops. It also provides a finished look for your kitchen and ensures that there are no gaps between the sink and countertop. Make sure to use the right kind of caulking material for the best results.
How often should you caulk your sink?
It is recommended to re-caulk your sink every few years to maintain a watertight seal. To check if your caulk needs replacing, inspect the edges of the gap between the sink and countertop for any gaps or cracks. Additionally, you can also check if there is any discoloration or damage on the caulk itself. If so, it’s time to apply new caulking material around your kitchen sink.
When should you not use caulking?
Caulking should not be used on any surfaces that are exposed to extreme temperatures or direct sunlight, as the caulk may not hold up against those conditions. Additionally, it is also important to make sure that all surfaces are dry before applying the caulking material. By following these steps and taking your time during the process, you can easily get a perfect finished look for your kitchen sink.
Can you caulk over old caulk?
Yes, it is possible to caulk over old caulk. However, you must make sure that the surface underneath is clean and dry before beginning. Additionally, if the old caulking material has any mildew or mold present, it should be removed with a damp rag before applying the new caulk. Once the area is clean and free from debris, you are ready to begin caulking your kitchen sink! Caulking can help keep water away from your countertops and cabinets while also creating an aesthetically pleasing finished look for your kitchen sink.
How long does it take for the kitchen sink caulk to dry?
It usually takes anywhere from 24-48 hours for the caulk to fully cure and become watertight. Be sure to keep areas away from children and pets until the caulk has dried completely. After that, you can enjoy your newly caulked kitchen sink!
Do you push or pull when caulking?
When caulking, you should always push the caulk material into the gap for a more secure seal. Make sure to use even pressure when pushing in the caulk and be gentle so that you don’t create any air bubbles or inconsistencies in the finished product. Once all of your gaps are filled, use a damp rag or your finger to smooth out any unevenness in the caulking material. With patience and proper technique, you will achieve perfect results every time!
What is the trick to caulking?
When caulking, the trick is to take your time and do it right! Make sure that all surfaces are clean, dry, and free of any debris before beginning. Additionally, you should also make sure that you use even pressure when pushing in the caulk and gently smooth out any unevenness with a damp rag or your finger. Finally, once your kitchen sink is finished caulking, give it at least 24-48 hours to dry completely before using it again. By following these steps and taking your time during the process, you can get perfect results every time!
Can you smoothly caulk with your finger?
Yes, you can easily caulk with your finger. However, it is important to ensure that your hands are clean and free of any debris before beginning. Additionally, use even pressure when pushing in the caulking material and gently smooth out any unevenness with your finger. If done properly, you should get a perfectly smooth finish on the finished product!
What do you spray on the caulk before wiping?
Typically, you do not need to spray anything on the caulk before wiping. However, if your sink has any mildew or mold present, it is recommended to spray a mixture of water and white vinegar onto the area before wiping it with a damp rag. This will help kill any bacteria and prevent them from forming again in the future. Additionally, it is also important to make sure that all surfaces are dry before applying the caulking material.
Do you poke a hole in the bottom of the caulk?
No, you do not need to poke a hole in the bottom of the caulk. However, it is important to ensure that all surfaces are clean and free of debris before applying the caulking material. Additionally, if there is any mildew or mold present on your sink, make sure to spray a mixture of water and white vinegar onto the area before wiping it with a damp rag. Once the area is clean and prepped correctly, you can begin caulking your kitchen sink!
How big of a gap is too big to caulk?
Any gap bigger than 0,6 cm is usually too large for caulking. If the gap between your countertop or cabinet and sink is larger than this, it’s best to use a foam filler instead of a caulk. Foam fillers are designed specifically for wider gaps and will provide a stronger seal. Additionally, foam fillers can easily be cut to fit any size gap, making them perfect for larger spaces in your kitchen!
Where should you not use silicone caulk?
Silicone caulk should never be used on walls, ceilings, or other surfaces that may come into contact with food or water. Additionally, silicone caulk should also not be used outdoors in areas where it will be exposed to direct sunlight as it can degrade over time. Finally, it is important to remember that silicone caulk should always be applied carefully and evenly for the best results. Overall, caulking your kitchen sink can seem intimidating at first but with patience and proper technique you can get perfect results every time!
How do you get straight lines when caulking?
Getting perfectly straight lines when caulking is all about technique. Make sure to apply even pressure with your fingers when pushing the caulk into place and then use a damp rag or your finger to smooth out any unevenness in the caulking material. Additionally, it is also important to make sure that you are using the right type of caulk for your kitchen sink as different materials have different properties and can result in different finishes.
Can you paint over a silicone caulk?
No, you should not paint over a silicone caulk. Silicone is designed to be waterproof and mold-resistant, so painting over it will void its protective qualities. If necessary, you can use a silicone-based paintable caulk, but be sure to read the directions carefully before applying as some types may require specific techniques for best results.
How much does an effective caulk cost?
The cost of an effective caulk can vary depending on the type and quality of the product. Generally, high-quality silicone or latex-based caulks are more expensive than cheaper alternatives. However, these products tend to last longer and provide a better seal overall, so it is often worth investing in a higher-quality product for long-term durability. In general, an effective caulk should be able to cost anywhere from 5-30 dollars depending on the size and quality.
How to clean the existing caulk?
To clean the existing caulk, you can use a mixture of warm water and mild soap. Additionally, it is also important to remove all traces of mold or mildew with a solution of equal parts water and white vinegar before cleaning the area. Once this is complete, scrub the caulk line gently with an abrasive sponge or brush for the best results. Finally, rinse off any soap residue with clean water before allowing the surface to dry completely. Properly maintaining your caulking will ensure that your kitchen sink looks great for years to come!
What is the proper technique for smoothing caulk around a kitchen sink?
To smooth caulk around a kitchen sink, follow these steps:
1. Apply a bead of caulk along the seam between the sink and countertop.
2. Wet your finger with soapy water or use a caulk smoothing tool.
3. Gently run your wet finger or smoothing tool over the caulk to create a smooth and even finish.
4. Wipe off any excess caulk with a damp cloth or sponge for a neat appearance.
Can I use a caulk smoothing tool instead of my finger to achieve a professional finish?
Yes, you can use a caulk smoothing tool for a more precise and uniform finish when caulking around a kitchen sink. It can help achieve a professional look and is particularly useful for straight lines and corners.
How long should I wait for the caulk around my kitchen sink to dry and set?
The drying time for caulk can vary depending on the brand and type. Generally, it may take 24 to 48 hours for caulk to fully cure. Follow the manufacturer’s recommendations on the caulk tube for specific drying times.
Is it essential to clean the area thoroughly before caulking the kitchen sink?
Yes, cleaning the area is crucial before caulking. Remove any old caulk, debris, or grease from the sink and countertop to ensure the caulk adheres properly and provides a watertight seal.
When should I not use caulking around a kitchen sink?
Avoid using caulk if there are significant gaps or cracks that need repair, as caulk is not a substitute for proper structural fixes. Additionally, do not use caulk in areas where it may come into direct contact with food or in situations where a flexible seal isn’t suitable.
Useful Video:
Conclusion
Caulking the kitchen sink isn’t difficult, but it pays to be precise. With the right tools and materials, you can easily seal any plumbing fixtures or seams around your kitchen sink. Make sure to take extra care when selecting a caulking material and prep the area properly before starting your project to ensure a successful outcome. With these simple steps in mind, you’ll be able to caulk your kitchen sink like an expert! Once again, make sure to follow all of the necessary safety precautions and wear protective gear when handling any solvents or adhesives. Follow these instructions closely and you should have no trouble creating a lasting seal that will keep your kitchen sink looking great for years to come.
References
- https://theswifthome.com/what-kind-of-caulk-for-kitchen-sink/
- https://www.wikihow.com/Caulk-the-Kitchen-Sink
- https://www.lepage.ca/en/know-how/caulking-kitchen-sinks-stop-water-from-damaging-your-cabinets.html
- https://simplygreenplumbing.com/7-easy-ways-to-keep-your-kitchen-drain-clean-and-unclogged/