When it comes to painting your kitchen cabinets, there are a lot of factors to consider. How long will it take? What kind of paint should you use? How much work is involved? This article will answer all of those questions and more! It will discuss the different steps involved in painting your kitchen cabinets, as well as the best paint for the job. So, whether you’re thinking about repainting your cabinets or are just curious about how it’s done, read on for some helpful tips!
Why Do You Need to Paint Kitchen Cabinets?
Painting kitchen cabinets is a great way to update or refresh your kitchen. There are many different styles and colors of paint that you can choose from, allowing you to customize the look and feel of your kitchen space. Painting cabinets also allows you to protect them from further wear and tear, which will help extend the life of your cabinetry.
Additionally, painting cabinets can be relatively inexpensive compared to purchasing new ones, making it a cost-effective solution for updating your kitchen’s look. Whether you’re looking for an entirely new style or just a refreshing coat of paint, painting kitchen cabinets is an easy and affordable way to give your space a makeover [1]!
Tools and Materials You May Need for Painting Cabinets
When painting cabinets, you will need some basic tools and materials to do the job properly. Here are some of the essential supplies:
- Paint: Choose a high-quality latex or oil-based paint for the best results. Be sure to select a finish that is appropriate for the surface you’ll be working on;
- Primer: If you are painting over an existing coat of paint, use a good-quality primer before applying your new color;
- Brushes and rollers: Select brushes and rollers that are made of natural fibers such as hog bristle or synthetic fibers like nylon, polyester, or microfiber. Make sure they are suitable for the type of paint you have chosen;
- Drop cloths: Cover the area where you’ll be working with several layers of drop cloths to protect the floors and furniture;
- Sandpaper: Use medium grit sandpaper to lightly scuff the surface before painting;
- Painter’s tape: Choose a painter’s tape that is designed for use on cabinets for neat edges;
- Paint tray: Get a paint tray lined with plastic that is deep enough to hold your roller and brush;
- Putty knife: Use this tool to fill in any imperfections on the surfaces you are painting;
- Rags and sponges: Have some rags or sponges handy for wiping up spills and cleaning up any mistakes;
- Safety equipment: Make sure you wear protective eyewear and a respirator when working with paint and primer. Also, use gloves to protect your hands;
- Ladder: Get a sturdy ladder if you need to reach high cabinets or shelves;
These tools and materials will help you achieve professional results when painting cabinets. With the right supplies and proper preparation, your cabinet project will look great [2]!
What Type of Paint Do You Need for Cabinets?
Oil vs. latex paint for kitchen cabinets
When painting kitchen cabinets, the question isn’t just what color to choose but also which type of paint. The two most common types of paints used for kitchen cabinets are oil-based and latex. Here’s a quick guide on the differences between them:
- Oil-based paint: Oil-based paints provide an attractive glossy finish and are very durable, making them one of the best options for high-traffic areas like kitchen cabinets. They can also be applied easily in multiple coats without much difficulty. However, they have strong fumes that require proper ventilation and take longer to dry than latex paints. Cleanup is more difficult as well since you need special solvents for cleaning up after using oil-based paint;
- Latex paint: Latex paints provide a somewhat less glossy finish but are still attractive. They’re also very easy to use and clean up after, making them great for DIYers. In addition, latex paints dry faster than oil-based paints and don’t have such strong fumes. The downside is that they aren’t as durable or long-lasting as oil-based paints, so you may end up needing to touch up your cabinets more often;
Overall, the decision between oil-based and latex paints will depend on the look you want to achieve and how much maintenance you’re willing to do over time. Both types of paint offer their advantages, so it ultimately comes down to personal preference. However, if you’re looking for a long-lasting solution that will stand up to wear and tear, oil-based paint is the best option. If you’re going for an easy cleanup and short drying time, then latex paint is your best bet [3].
The Best Paint Finish for Kitchen Cabinets
In addition to deciding between oil-based and latex paints, you also need to consider the type of finish you want for your kitchen cabinets. The two most popular finishes are glossy and semi-glossy.
- Glossy: Glossy finishes are shiny and reflective but can also show fingerprints easily. They’re best suited for high-traffic areas since they’re easy to clean and provide a classic look that won’t go out of style;
- Semi-glossy: Semi-gloss finishes tend to be less shiny than glossy ones and do not show fingerprints as easily. They provide an attractive, modern look that isn’t too flashy or overwhelming, making them great for kitchens with a more subtle design;
Overall, the type of finish you choose for your kitchen cabinets will depend on the look you’re going for and how much maintenance you’re willing to do. Glossy finishes are best suited for high-traffic areas since they’re easy to clean and provide a classic look that won’t go out of style. If you’re looking for an attractive, modern look without too much shine, then semi-glossy finishes are the way to go.
Should I Use a Paint Sprayer or A Brush and Roller?
When painting kitchen cabinets, you have two main options for application: a paint sprayer or a brush and roller. Each method has its pros and cons, so it’s important to consider the following factors before making your decision:
- Time: Paint sprayers are much faster than brushes and rollers since they can cover large areas quickly with minimal effort. If you want to finish your project as quickly as possible, then a paint sprayer is the way to go;
- Cost: Paint sprayers tend to be more expensive than brushes and rollers due to their complexity and cost of maintenance. However, if you plan on using a paint sprayer frequently, then they can end up being more cost-effective in the long run;
- Quality: Paint sprayers provide a more even, professional-looking finish than brushes and rollers. However, they require more skill to use properly, so it’s important to practice before attempting to paint your cabinets with a sprayer;
Overall, the decision between using a paint sprayer or brush and roller will depend on your budget, time constraints, and skill level. If you have the money and want to finish quickly with minimal effort then a paint sprayer is the way to go. Otherwise, if cost is an issue or you prefer having full control over the painting process then a brush and roller are your best bet.
Steps to Paint Your Cabinets
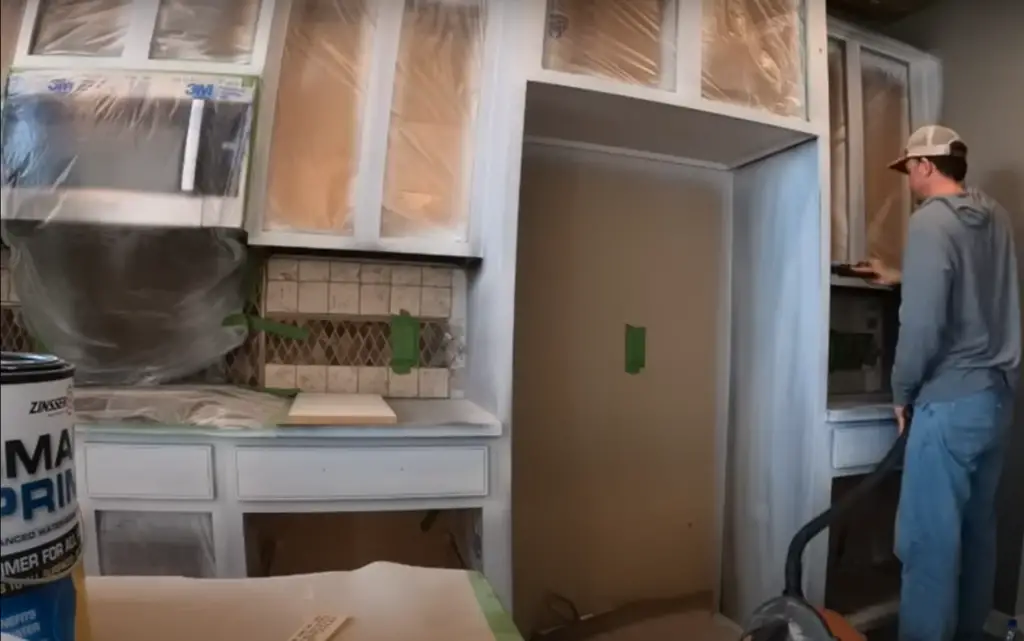
1. Prep the space
Before you start painting your cabinets, it is important to prepare the space. Make sure you remove all hardware from the cabinets and clean off any dirt or grease. You may also want to tape off areas that you don’t want to be painted with painter’s tape.
2. Create a paint station
Set up a paint station somewhere with enough space to spread out. This can include a drop cloth, dust mask, and all of the necessary supplies such as an orbital sander, sandpaper, putty knife, primer, paint brush/roller, stir stick for paint stirring, and a small bucket for water-based paints.
3. Remove doors and hardware
It is best to remove the doors, drawers, and any hardware from the cabinets before beginning. To do this, you can use a flat-head screwdriver and pliers. This will make it easier to paint the cabinets as well as protect the hardware from any paint or dust.
4. Clean all surfaces
Use a damp cloth to wipe down all surfaces of the cabinets. This will help remove any dirt, dust, or residue that has built up over time. To do this, use a mild detergent and warm water. You may also want to use a degreaser if the cabinets are particularly greasy or grimy.
5. Strip the current paint off of the cabinets
If your cabinets have a previous coat of paint on them, you will need to strip it off before adding a new coat. Use an orbital sander and sandpaper to carefully remove the old paint from the cabinet surfaces. You should use sandpaper that is appropriate for the type of paint you are using (oil or water-based). For example, if you are using oil-based paint, use 120-grit sandpaper. If you are using water-based paint, use 220-grit sandpaper. You may also want to use a putty knife to help with scraping off any stubborn patches. Such a knife can also help remove any stubborn residue after sanding.
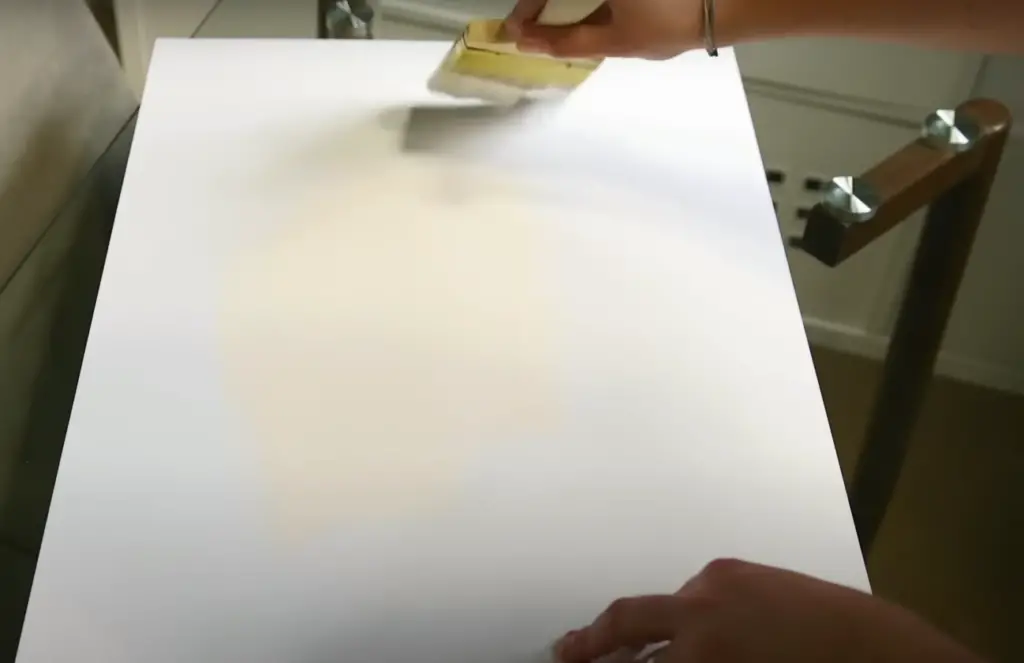
6. Prime the cabinets
Once all of the surfaces are stripped and clean, you need to apply a layer of primer. Primer is important as it helps the paint adhere to the surface more easily and increases durability. Make sure to use a high-quality primer that is appropriate for your type of paint (water or oil-based). Use a paintbrush or roller to carefully apply an even coat of primer. Allow sufficient time for drying before continuing with painting.
7. Caulk and seal the cabinets
Once you have applied the primer, use a caulking gun to apply the caulk in any gaps or cracks that may be present on the cabinets. This will help fill any small holes and seal any seams, creating a smoother surface for painting. The caulk should be flexible enough to allow for the expansion and contraction of the cabinetry.
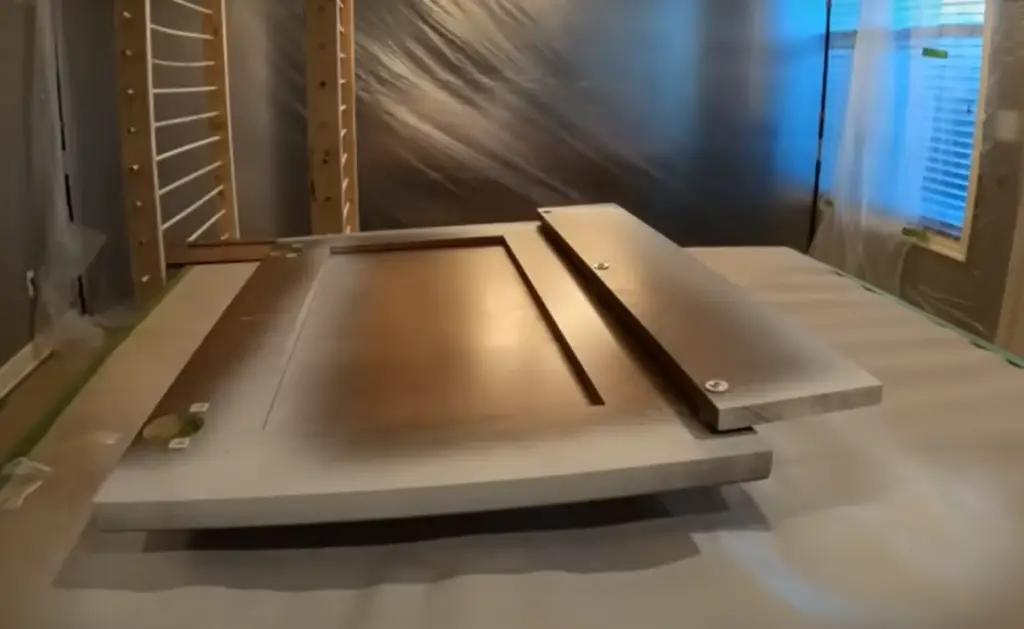
8. Paint the cabinets
Now it’s time to paint! Use a high-quality paint specifically designed for kitchen cabinets – either water or oil-based, depending on your choice of primer. Make sure you stir the paint thoroughly before applying it so that there are no lumps or chunks in the mixture. You can use a roller or brush to apply an even coat of paint onto all surfaces of the cabinet doors, drawers, and hardware (if applicable). Allow sufficient time for drying between coats and make sure each area is completely dry before continuing with another coat.
9. Put back all the pieces
Once the paint has dried and you are satisfied with the finish, it is time to reattach all of the pieces. Start by replacing all hardware such as hinges, handles, and knobs. Then reinstall the cabinet doors and drawers in their original positions [4].
How long does it take to paint kitchen cabinets?
The Cost of Painting Kitchen Cabinets: What Does It Depend On?
Painting kitchen cabinets is a cost-effective way to refresh the look of your kitchen. However, the cost can vary greatly depending on several factors such as the number and type of cabinets to be painted, how much prep work needs to be done beforehand, and which materials will be used.
Firstly, the number of cabinets affects the total cost significantly. The more cabinets you have, the more time it takes to paint them all. In addition, certain types of cabinets may require extra preparation or additional coats for proper coverage. This leads us to the second factor—the amount of prep work needed before painting begins. Preparing surfaces for painting usually involves cleaning and sanding them down to ensure that the new coat adheres correctly. The extent and detail of the necessary prep work can significantly increase the cost due to additional labor involved and materials needed.
Finally, the type of paint you choose will also affect the total cost of painting your kitchen cabinets. Most professionals recommend using high-quality, time-tested products for the best results. Although these paints may be more expensive than cheaper alternatives, they are likely to last longer and require fewer coats for a flawless finish.
Overall, there is no definitive answer as to how much it will cost to paint your kitchen cabinets—it all depends on several factors such as the number and types of cabinets, amount of prep work required, and type of paint used. You should consult with a professional painter or interior designer who can give you an accurate estimate. With proper preparation and the right materials, painting your cabinets can be a great way to revamp your kitchen on a budget [5].
How to Maintain Kitchen Cabinets After Painting?
Once you have painted your kitchen cabinets, it is important to take steps to ensure that the paint job lasts as long as possible. Here are some tips for maintaining kitchen cabinets after painting:
- Clean them regularly – Regular cleaning of your painted kitchen cabinets with a mild soap and water solution will help keep them looking fresh and new. Make sure to use a soft cloth or sponge when cleaning so that you do not scratch off the paint;
- Polish them occasionally – Applying a coat of furniture polish every few months can help keep your painted kitchen cabinets looking their best by helping seal in moisture and protect against dirt, dust, and fingerprints;
- Seal the paint – Once your kitchen cabinets are completely dry, you should apply a coat of sealer to protect the paint from wear and tear;
- Protect from heat – To ensure that your painted kitchen cabinets last as long as possible, it’s important to keep them away from hot appliances like ovens and stoves. Keep cookware stored in a separate location or use a pot holder when cooking on the stovetop;
- Avoid harsh chemicals – Using harsh chemical cleaners can damage your painted kitchen cabinets, so stick to mild soap and water for regular cleaning needs;
- Repair nicks and scratches immediately – Small nicks and scratches can be easily fixed with touch-up paint or wood stain, but it’s important to take care of these right away so that they don’t spread or become more noticeable;
- Check for signs of mold and mildew – If your kitchen cabinets are exposed to moisture for prolonged periods, it can cause mold and mildew to grow on the painted surface. Inspect the cabinets regularly for any signs of moisture damage, and take steps to repair any issues if necessary;

Following these tips will help ensure that you get the maximum life out of your painted kitchen cabinets!
FAQ
How long does it take for paint to dry on kitchen cabinets?
The amount of time it takes for paint to dry on kitchen cabinets typically depends on the type and brand of paint used, as well as environmental conditions such as humidity and temperature. Generally, oil-based paints take between 6-8 hours to dry, while latex or acrylic paints may need 2-4 hours. Some brands claim their products can dry in an even shorter time than this. To be safe, allow the paint to fully cure before applying a second coat or performing any tasks that might disturb it, such as closing cabinet doors. Additionally, some specialty finishes require multiple coats and may take much longer than standard paints. Consult product labels for specific drying times.
Is painting kitchen cabinets difficult?
Painting kitchen cabinets can require a lot of time and effort. However, if you plan ahead and use the right materials, it is possible to achieve professional-looking results with relative ease. Be sure to thoroughly clean and sand the surfaces before painting, as well as prime them beforehand if necessary. Take care to use adequate ventilation while applying paint and be sure to give each coat sufficient drying time between applications. With patience, attention to detail, and high-quality supplies, painting kitchen cabinets can be a straightforward project that yields beautiful results.
What kind of paint should I use on my kitchen cabinets?
The type of paint you choose for your kitchen cabinets depends largely on personal preference as well as the desired finish. Generally speaking, oil-based paints provide a more durable finish but require significantly more time for drying and curing. Latex or acrylic paints are typically easier to work with, dry faster, and are less likely to emit harmful fumes. If you’re looking for a glossy finish, consider using enamel paint; if a matte look is preferable, opt for satin or eggshell instead. No matter the type of paint chosen, proper surface preparation before the application is essential to achieve the best results.
How long should I wait between coats of paint on kitchen cabinets?
The exact time you should wait between coats of paint on kitchen cabinets depends on the type and brand of paint used. Generally, oil-based paints require 6-8 hours between coats, while latex or acrylic paints may only need 2-4 hours. Consider consulting product labels for specific drying times recommended by the manufacturer before applying a second coat. Additionally, some specialty finishes require multiple coats and may take substantially longer to dry completely in between applications.
Useful Video: DIY PAINT KITCHEN CABINETS TOTAL KITCHEN MAKE OVER | DIY CLEAN WITH ME
Conclusion
Painting kitchen cabinets is an easy, cost-effective way to instantly update the look and feel of your kitchen. It’s a job that anyone can manage with the right materials and some patience. The trick is in taking the time to prepare properly so that you end up with good-looking, durable results. On average, it can take from a day to several days to complete this project. But the effort is well worth it in the end when you can step back and admire your new kitchen cabinets!
With careful mapping out of the project, quality supplies, detailed instructions, and lots of preparation, you should have no problem painting your kitchen cabinets successfully. This simple DIY project will give your kitchen an entirely new look without breaking the bank or taking up too much of your time!
References:
- https://theflooringgirl.com/blog/reasons-paint-kitchen-cabinets/
- https://mydesignrules.com/kitchen-cabinet-paint-supply-checklist/
- https://www.thespruce.com/types-of-paint-for-kitchen-cabinets-4686963
- https://www.architecturaldigest.com/story/how-to-paint-kitchen-cabinets
- https://www.forbes.com/home-improvement/painting/painting-kitchen-cabinet-cost/