
Installing a kitchen island can be a daunting task. But with the right tips and tricks, it can be a breeze! In this article, we will discuss the best way to attach your kitchen island to the floor. We’ll answer some common questions, and provide helpful tips for a sturdy installation. So whether you’re a DIYer or you’re hiring a professional, read on for all the information you need to know about attaching your kitchen island to the floor!
Benefits of a Kitchen Island
A kitchen island is a piece of furniture that can be used for both food preparation and dining. Kitchen islands are usually placed in the middle of the kitchen, making them the focal point of the room. They can be made from a variety of materials, including wood, metal, and glass. Islands can also come in different shapes and sizes, so it’s important to choose one that will fit your needs.

A kitchen island can provide many benefits in terms of both form and function. They are a great way to add extra storage and counter space to your kitchen, and can also be used as a makeshift dining table or breakfast bar. And if you choose a kitchen island that matches your kitchen style, it can complement it as well!
They can also act as a divider between the cooking area and the rest of the room, which can be helpful if you have an open-plan layout. [1],[5]
Types of Kitchen Islands
There are two main types of kitchen islands: fixed or rolled. Each type has its own pros and cons.
Fixed kitchen islands
Fixed kitchen islands are, as the name suggests, are attached to the floor and cannot be moved. You can use these as extra prep space, storage, or dining tables.
The main advantage of a fixed island is that it’s very sturdy and won’t move around when you’re using it. However, the downside is that they can’t be moved as easily if you need to change the layout of your kitchen. This can be a problem if you have a small kitchen or plan on moving in the future.
Fixed kitchen islands are a great option if you’re looking for extra storage or counter space that is permanent. But this also means that you’ll need to make sure that your island is correctly attached to the floor so that it doesn’t move or wobble when in use.[1]
Rolling kitchen islands
Rolling kitchen islands are not attached to the floor and can be easily moved around. These are great if you want extra flexibility in your layout or if you need to be able to move the island out of the way when not in use. This makes them a great option if you want an island that can be used for different purposes or placed in different positions depending on your needs. The main disadvantage of rolling kitchen islands is that they are not as sturdy as fixed islands and can tip over if not used properly. Make sure to choose one with robust wheels. It’s also advised not to overweight them so they don’t fall over.
Why Kitchen Island Needs to be Anchored to the Floor?
Now that we know the types of kitchen islands, you might wonder why exactly kitchen islands need to be anchored? The reasons for that are quite straightforward.
To accommodate heavier equipment
First and foremost, kitchen islands need to be anchored because they need to be able to accommodate heavier equipment. Kitchen islands need to be able to support the weight of countertops, appliances, and any other items that you might want to put on top of them.
You don’t want your kitchen island to tip over if you try to store too much weight on it.This is also important if you eat behind your kitchen island. If you have pets, they might want to sit on the countertop while you’re cooking. Anchoring your kitchen island to the floor will make it much more sturdy and less likely to tip over if someone leans or sits on it. [1],[2]
For stability and safety
If your kitchen island is not anchored to the floor, it can easily tip over if someone leans or sits on it. This could cause serious injury, so it’s important to make sure that your island is properly anchored.
Another reason why you might want to anchor your kitchen island is for stability. If you have a large island, it can be quite difficult to keep it from moving around when you’re cooking or working on it. By anchoring the island to the floor, you can ensure that it stays in one place and doesn’t wobble around. This is particularly important if you have young children or pets who might accidentally bump into it. It also means that you’ll be able to use your island more confidently.
Finally, anchoring your kitchen island can also help to prevent damage to the flooring underneath. If your island is not anchored and it tips over, it can scratch or dent the floor. If you have a particularly heavy island, it can even crack the floor if it falls over. [1],[3]
What to Consider Before Attaching Your Kitchen Island
As you can see, there are several reasons why you might want to anchor your kitchen island to the floor. However, before you do so, there are a few things that you need to keep in mind.
The intended use of the kitchen island
The first thing you need to think about is how you plan to use your kitchen island. If you’re going to be using it for heavy-duty tasks like chopping meat or kneading dough, then you’ll need to make sure that it’s firmly attached to the floor. On the other hand, if you’re only going to use it for light tasks like serving food, then you might be able to get away with not attaching it at all.
Another thing to consider is how much traffic your kitchen island is going to see. If it’s going to be in a high-traffic area, then you’ll need to make sure that it’s properly anchored so that it doesn’t get knocked over by accident.
Depending on what you need the kitchen island for, you should place it in the appropriate location. For example, if you’re going to be using it for prep work, then you’ll want to place it near the stove or sink. If you’re going to be using it for serving food, then you’ll want to place it near the dining table. [2]
The clearance of the island
Next, you need to consider the clearance of the island. If the island is too close to the wall or another piece of furniture, it might be difficult to attach it properly. You also need to make sure that there is enough space around the island so that you can easily move around it and access all sides of it.
Another thing to consider is the weight of the island. If the island is too heavy, it might be difficult to attach it to the floor correctly. You also need to make sure that the floor can support the weight of the island without being damaged.
Finally, you need to think about what type of attachment you want to use. There are several different options available, so you need to choose one that will work best for your island and your floor. [4]
When You Don’t Need to Anchor Your Kitchen Island
It’s important to note that not all kitchen islands need to be anchored to the floor. If you’re using a lightweight island or one that is going to be moved around often, it might not need to be secured. However, if you’re planning on using your island for heavy-duty tasks, it’s always better to be safe than sorry.
Such an exception to the rule is if you have a small kitchen. In this case, anchoring your island might not be necessary since you will most likely need a portable rolling island instead of a fixed one that takes a lot of space.
Portable islands are a great option for people who have small kitchens or who want the flexibility to move their island around as needed. If you choose a portable island, make sure that it has casters that hold into place so that it doesn’t accidentally roll away.[1] ,[2]
Ways to Anchor Kitchen Island to the Floor
There are a few different ways that you can anchor your kitchen island to the floor, and the best option for you will depend on the type of island you have and the materials of your floors.
By using wood cleats
The best option is to use wood cleats.
This is a good option if you have a heavy island or one with caster wheels, as it will keep the island from moving around.
By directly screwing it into the floor
Another option is to directly screw your island into the floor. If you want to go with this option, it’s recommended to go with screws that are long enough to reach the floor joists.
The main drawback of this method is that overtime the screws can loosen and the island will become wobbly. [1]
If you don’t feel confident about your skills, you can always seek help and have a professional help you anchor your kitchen counter.
Attaching Kitchen Island to the Floor Using Wood Cleats
Measure the distance between the room edges and the island
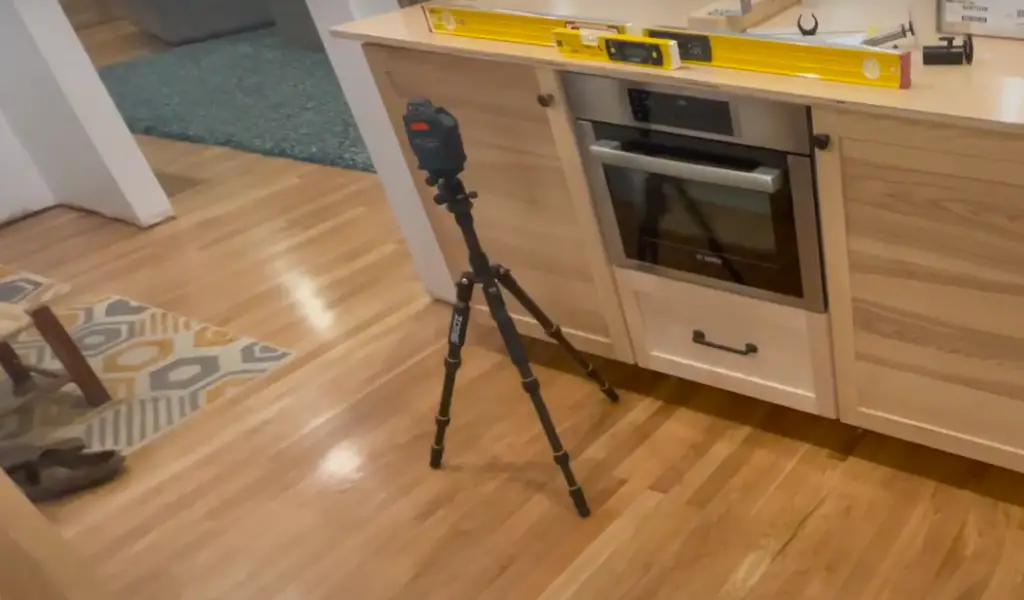
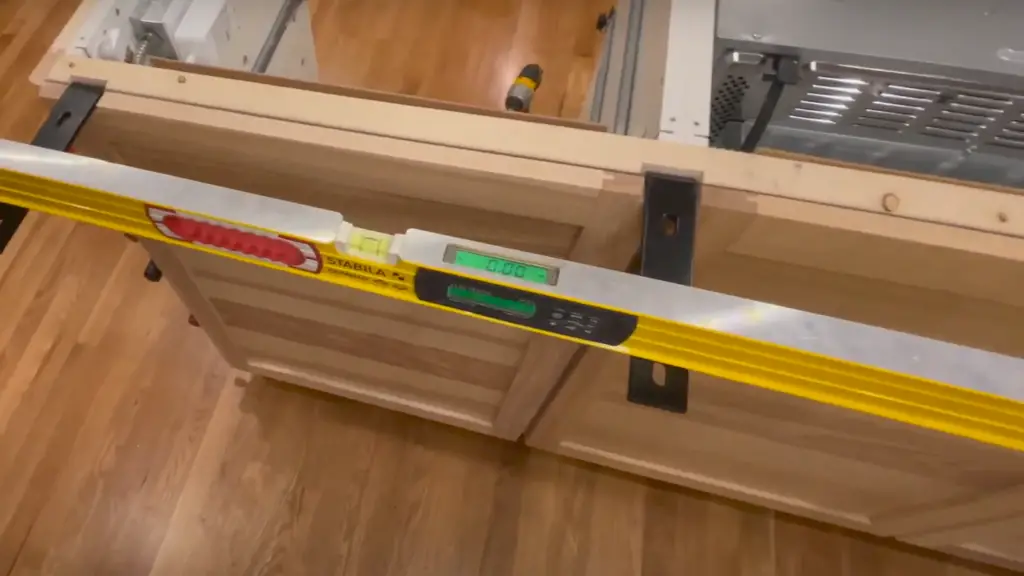
Before you start attaching anything to the floor, it’s important to measure the distance between the room edges and the island. This will ensure that your island is centered in the room and that there is enough space for people to move around it. Still, it’s best to position the island not too far from the counters and stove so that you can easily reach everything when cooking. Double check if it is level. Use a leveler to adjust the island feet if necessary. [1],[2],[3]
Move the island in the desired position
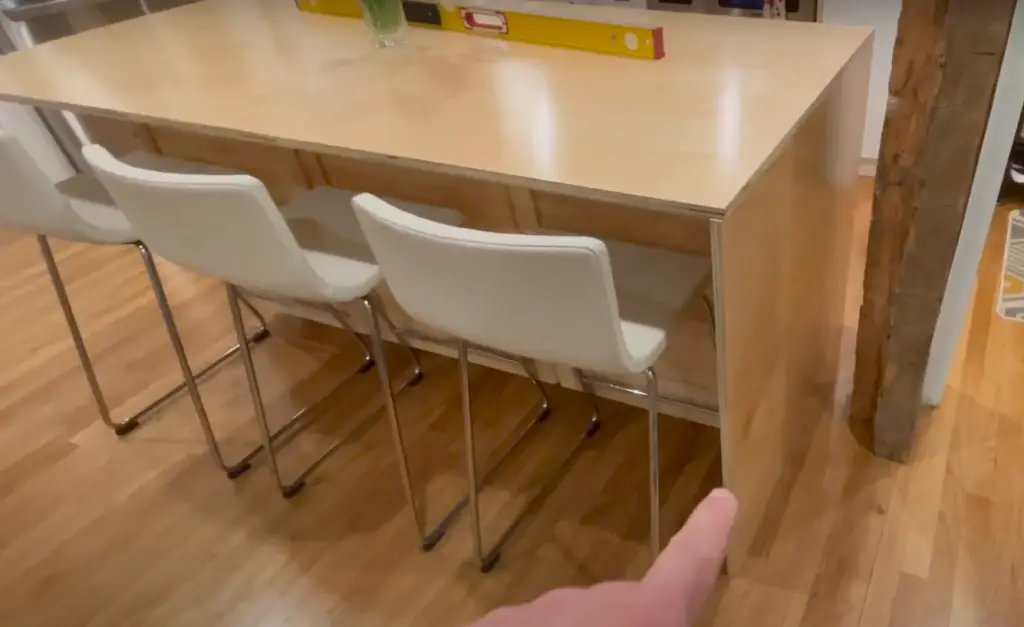
After you have measured the distance, you can move the island into the desired position. Once you have it in place, inspect the kitchen counter from all angles to make sure that you like the look and that it is symmetrical.
If you are happy with the position, use a tape or pencil to mark the location of the island’s outline on the floor. This will be your guide for attaching the wood cleats.
Measure the cleats
It’s also important to measure the cleats before you start attaching them to the floor. This will ensure that they are the right size and that they will be evenly spaced. To measure the cleats, start by measuring the width of the island’s feet. Choose an appropriate size that allows the island’s feet to pass through without being too loose or too tight.
Again, mark the location of the cleats on the floor with a pencil or tape.
Install cleats
Now you are ready to start attaching the cleats to the floor. Use a drill to make pilot holes in the floor at each mark. Arrange the cleats so that they are evenly spaced and parallel to each other.
Once the pilot holes are drilled, screw the cleats into the floor with screws that are long enough to go through the thickness of the cleats and into the subfloor. Be sure to use screws that are appropriate for your type of flooring. Screw in the screws tight so that they don’t come loose over time.
Attach the kitchen island
Now, it’s finally time to attach the island to the floor. Lift up the island base and align the island’s feet with the cleats.
If your kitchen island comes with electrical outlets, make sure to plug them in before you screw the island into place.
Attach a trim to the base of your kitchen island
After the island is placed on the cleats, you will want to attach a trim to the base of your kitchen island to finish the anchoring. This won’t only give it a finished look and help protect your floors from scuffs and scratches. You can find trim at most hardware stores. Attach the trim to the cleats with screws or nails, depending on what type of material it is made out of.
Securing Your Kitchen Island: Floor Attachment Methods
A kitchen island is a versatile and functional addition to your kitchen space, but it must be properly secured to the floor to ensure stability and safety. Below, we explore the methods and considerations for attaching a kitchen island to the floor, including materials, tools, installation steps, and tips to help you complete this essential home improvement project.
| Aspect | Information |
|---|---|
| Materials and Tools | Lists the materials and tools required for securing a kitchen island to the floor. |
| Installation Methods | Explains different methods such as using brackets, screws, adhesive, or bolts to attach the island. |
| Floor Surface Considerations | Discusses how the type of flooring, whether it’s wood, tile, or concrete, affects the attachment process. |
| Island Design | Considers how the island’s design, size, and weight impact attachment choices. |
| Preparation Steps | Provides steps for preparing the island and floor for attachment, including measurements and marking. |
| Attachment Process | Details the steps for securely attaching the island to the floor, including drilling, screwing, or gluing. |
| Alignment and Leveling | Explains how to ensure the island is level and properly aligned during installation. |
| Finishing Touches | Suggests finishing touches such as concealing attachment points or adding trim for a polished look. |
| Professional Installation | Notes when it may be advisable to hire a professional for complex installations. |
| Maintenance | Provides tips for maintaining the attachment and addressing any issues that may arise over time. |
Explanation of the Table:
- Materials and Tools: Lists the necessary materials and tools for the project.
- Installation Methods: Explains various methods for attaching the island.
- Floor Surface Considerations: Discusses how the type of flooring affects attachment.
- Island Design: Considers the design’s impact on attachment choices.
- Preparation Steps: Provides preparation steps, including measurements and marking.
- Attachment Process: Details the steps for attaching the island.
- Alignment and Leveling: Explains how to ensure proper alignment and levelness.
- Finishing Touches: Suggests ways to enhance the island’s appearance.
- Professional Installation: Advises when professional help may be needed.
- Maintenance: Offers tips for maintaining the attachment.
By following the guidelines and methods for attaching a kitchen island to the floor, you can enjoy a sturdy and stylish addition to your kitchen that enhances both functionality and aesthetics.
FAQ
Why does my kitchen island shake?
If your kitchen island is shaking, it could be due to a few different reasons. The first thing you should check is that all of the screws and bolts are tightened properly. If they are, then it’s likely that your floor is uneven or that the island itself is unbalanced. You can try shimming under one side of the island or adding weight to the other side to see if that helps stabilize it.
Another possibility is that your kitchen island was not properly attached to the floor in the first place. This can happen if you try to do it yourself without proper knowledge or tools. In either case, it’s important to fix the problem as soon as possible.
Can a kitchen island be freestanding?
A kitchen island can be either freestanding or built-in. If you’re planning to have a freestanding island, make sure it is properly secured to the floor so that it doesn’t tip over when in use.
For smaller kitchens, a freestanding island may be the best option. They are easier to move around and can be put away when not in use. If you have a larger kitchen, you might want to consider a built-in island.
Built-in islands are more permanent and usually require professional installation. But they can be customized to your specific kitchen layout and come in a variety of materials and styles.
Does an island need to be attached to the floor?
No, an island does not *need* to be attached to the floor, but there are several benefits to doing so. For one thing, it will help keep your island from wobbling or shifting when you’re using it. Additionally, attaching your island to the floor will help prevent damage to your floors if the island is knocked over. Finally, attaching an island to the floor is simply safer.
Can you install a kitchen island on laminate flooring?
Laminate flooring can present a few challenges when installing a kitchen island. The first thing to consider is the weight of the island. If it is too heavy, it could cause the laminate to buckle or break. It is also important to make sure that the island is properly supported. The best way to do this is to use shims under the legs of the island to level it out and provide stability. You will also want to use secure screws to secure the island in place so that it does not move over time.
What are the benefits of attaching a kitchen island to the floor?
Attaching a kitchen island to the floor offers several advantages:
1. Stability: Securing the island to the floor ensures stability and prevents it from moving or shifting during use.
2. Safety: A securely anchored island is less likely to tip over or pose safety hazards, especially in busy kitchens.
3. Durability: It helps prolong the life of your kitchen island by preventing wear and tear caused by movement.
4. Countertop Support: A securely attached island can better support heavy countertops and appliances.
5. Plumbing and Electrical Connections: If your island includes plumbing or electrical connections, attaching it to the floor ensures these connections remain secure and functional.
6. Design Integration: A properly anchored island becomes an integrated part of your kitchen’s design and layout.
Can I attach a kitchen island to a concrete floor?
Yes, you can attach a kitchen island to a concrete floor. Concrete anchors or bolts are typically used for this purpose. Drilling pilot holes into the concrete and using appropriate anchors can securely fasten the island to the floor.
Is it possible to attach a kitchen island to a tile or stone floor?
Yes, you can attach a kitchen island to a tile or stone floor. Special care is needed when drilling into these materials to avoid cracking or damaging the flooring. Tile or stone anchors, as well as brackets, are commonly used for this type of flooring.
Are there alternatives to permanently attaching a kitchen island to the floor?
Yes, there are alternatives to permanently attaching a kitchen island. Some islands are designed to be freestanding and do not require attachment to the floor. These islands rely on their weight and stability to stay in place. However, freestanding islands may not offer the same level of stability and security as those anchored to the floor.
What should I consider when deciding whether to attach my kitchen island to the floor?
When deciding whether to attach your kitchen island to the floor, consider factors such as the island’s weight, size, intended use, and the flooring material. Islands with heavy countertops, appliances, or plumbing connections benefit from floor attachment for stability and safety. Additionally, the design and layout of your kitchen can influence the decision. Consulting with a professional or following manufacturer guidelines is advisable to ensure a secure and suitable attachment method.
Useful Video: Kitchen Island Installation – QUICK AND EASY – DIY
Conclusion
All in all, it’s recommended for a kitchen island to be securely fixed. You will be doing a lot of cooking on it, after all, and you don’t want it to move around while you’re working. Failing to properly anchor your kitchen island can lead to damage to your floors, the island itself, or even injuries. In this article we have covered how to attach a kitchen island to the floor using wooden cleats and screws.
Now that you know how to attach a kitchen island to the floor, you can be confident that your island will be sturdy and stable. Just follow these simple tips and tricks and you’ll be able to enjoy your new kitchen island for years to come! Thanks for reading!
References:
- https://kitchenseer.com/is-kitchen-island-fixed-to-floor/
- https://www.kitchenexpressnc.com/kitchen-island-attached-to-the-floor/
- https://homezesty.com/how-are-kitchen-islands-attached-to-the-floor/
- https://trendswoodfinishing.com/blog/installing-kitchen-island/
- https://reinspiredkitchen.com/how-to-instal-a-kitchen-island-to-the-floor/