If you need to remove a Moen kitchen faucet, it can be a bit daunting. They are one of the most popular brands of kitchen faucets on the market, and they are known for their durability. However, this doesn’t mean that they are immune to problems. If your faucet starts acting up, or you simply want to upgrade to a newer model, follow these simple steps given in this article to remove it!
What Is a Moen Cartridge faucet?
Moen is a well-known producer of kitchen and bathroom fixtures, and one of their most popular products is the Moen cartridge faucet. This type of faucet uses a single handle to control all temperatures and flow rates, making it easy to use in any kitchen or bathroom. The Moen cartridge faucet also features a durable construction made from brass and other quality materials, so it can stand up to regular use without breaking down.
Moen products are also known for their reliability and easy installation, so it’s no surprise that many homeowners rely on them to get their kitchen and bathroom fixtures up and running. If you have a Moen cartridge faucet in your home, chances are you’ll need to know how to remove it to perform maintenance or replace it with another model.
How to choose the right Moen faucet?
Moen faucets can be different depending on the type of faucet you choose. Selecting the right style and features for your needs can depend on a variety of factors. There are three main types of Moen faucets to choose from: single-handle, two-handle, and pull-down or pull-out faucets. When selecting a two-handle faucet, decide if you would like lever handles or knob handles; both styles offer different benefits depending on the look you’re going for. For example, lever handles typically provide more clearance around the sink, making them easier to maneuver in tighter spaces.
Another factor to consider is the number of faucet holes in your sink. Most Moen faucets come with a set number of hole requirements, so make sure you select a model that is compatible with your current setup.
Moen faucets are made of a variety of materials and finishes, so you can choose one that complements the look and feel of your kitchen. From polished chrome to oil-rubbed bronze, there is sure to be a Moen faucet for every style. Don’t forget to check for any additional features that your Moen faucet might have, such as a pause button or adjustable flow rate [1].
Tools you may need to remove the Moen cartridge faucet
There are several reasons why you may need to remove a Moen kitchen faucet. You could be replacing it with a new one or just want to replace the cartridge inside the current faucet. Removing a Moen kitchen faucet is easy, but you should have some tools on hand to make the job easier and faster.
You will need a pair of adjustable or locking pliers, an Allen wrench, a bucket to collect any water that may drain out during the process, and some towels for cleaning up. Optional tools include a flathead screwdriver and channel locks if you have them handy. For example, an Allen wrench is used to remove the handle and the pliers can be used to loosen the compression nuts that secure the supply lines.
Moen’s Faucets: How to Remove Like a Pro
Step 1: Make Sure The Waterline Is Off
The most important step in removing a Moen kitchen faucet is to shut off the water supply. Do this by finding the valves under the sink and turning them clockwise until they won’t turn any further. This will stop new water from flowing into the faucet system, allowing you to work safely.
Step 2: Drain The Pipes
Once the water supply is off, you can proceed to drain all of the water from the pipes. Begin by taking off the plug at the bottom of the sink and emptying any remaining water. This will prevent spills and messes while removing your faucet.
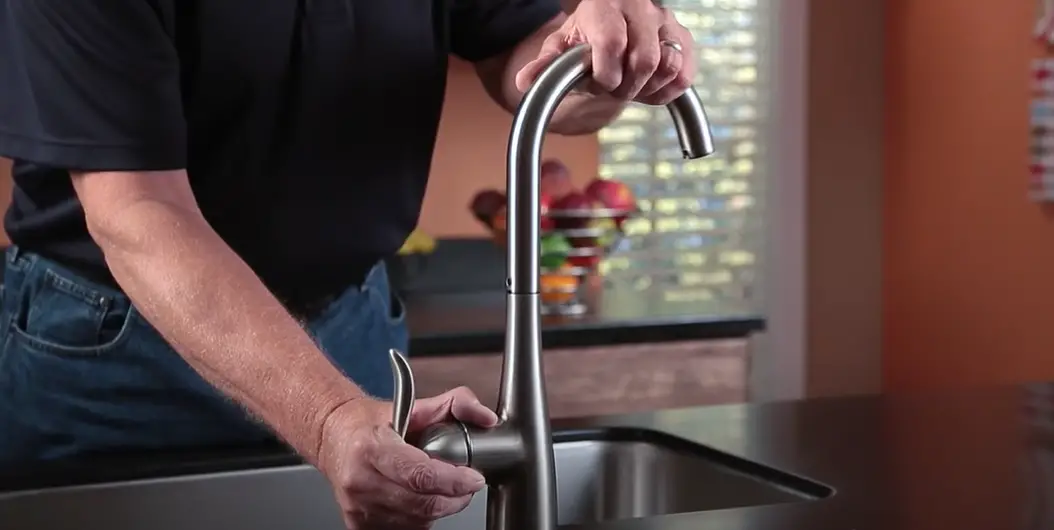
Step 3: Remove The Faucet Handle
Using an adjustable wrench, loosen and remove the screw located at the top of your Moen kitchen faucet handle. Lift it away from its mounting bracket, then carefully pull out both O-rings that are attached underneath it. You may need to use a flathead screwdriver to help pry them out, but be sure not to damage them in any way.
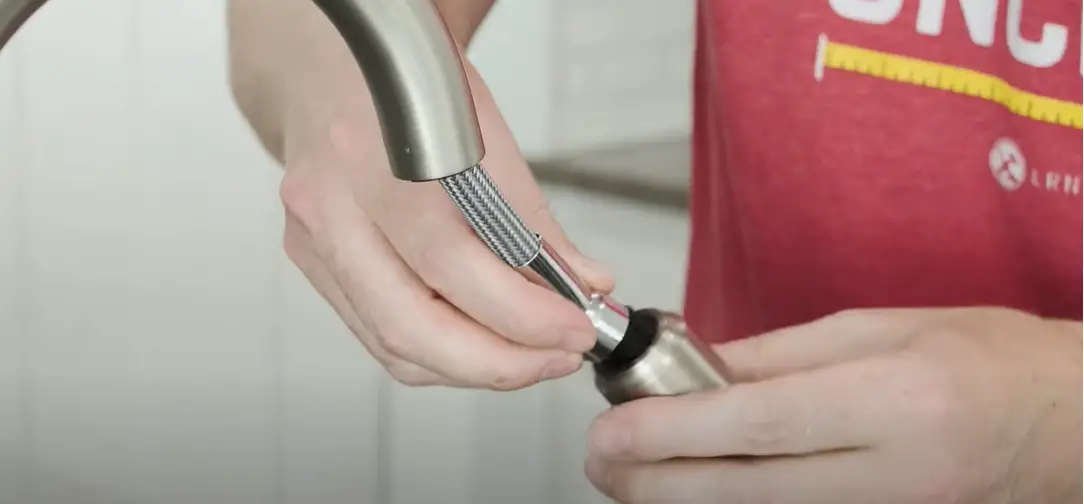
Step 4: Get Rid Of A Dome And A Jacket
Once the handle is free, you can remove a dome and a jacket. These parts are easily accessible in most Moen faucets, so simply unscrew them with an adjustable wrench until they become loose enough to lift away.
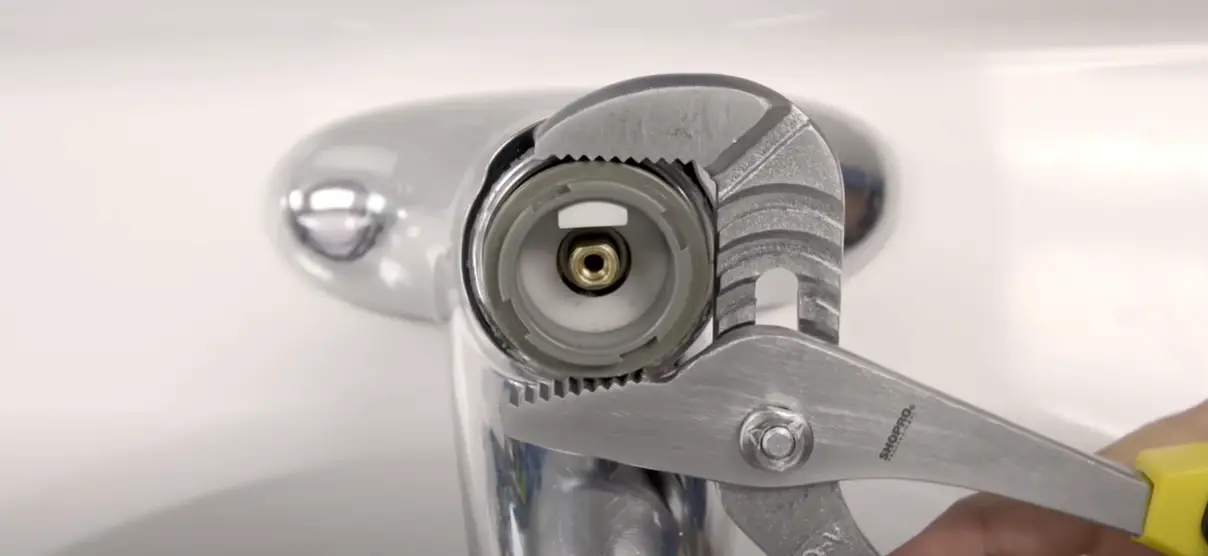
Step 5: Disassemble The Control Of the Waterline Flow
At the base of the faucet, you will find a control for waterline flow. Unscrew it with an adjustable wrench and pull it out of the mounting bracket. This part is connected to a cartridge that’s responsible for controlling water flow, so be sure not to damage it in any way.
Step 6: Take The Ring Out
Finally, use an adjustable wrench to remove a large retaining ring that’s located around the base of the faucet. This will allow you to pull out the Moen kitchen faucet and complete your removal process.
Step 7: Finish The Process
Once all of the above steps have been completed, you can finish the process by reinstalling the new faucet. Make sure to properly attach all connections and turn on the water supply before testing your new Moen kitchen faucet. With a few simple steps, you can remove your old Moen kitchen faucet like a pro [2]!
Reinstalling of Your Moen Kitchen Faucet
Once you have removed your Moen kitchen faucet, it’s time to reinstall it. Before installing the new faucet, make sure that all components are complete and in good condition.
The next step is to attach any quick-connect hoses that may be required for your specific model of Moen kitchen faucet. Once these are connected firmly, screw on the mounting assembly using a wrench.
Finally, make sure to attach the handle and turn on the water supply. Test your faucet for any leaks or other issues before using it again. With these steps, you should have successfully reinstalled your Moen kitchen faucet!
Now that you know how to remove and reinstall a Moen kitchen faucet, you can enjoy its unique features in no time. From touchless activation to sleek designs and style, Moen kitchen faucets will add a modern look to any kitchen. Plus, with their easy-to-install design and reliable performance, you won’t need to worry about replacing them anytime soon. Keep these tips in mind next time you’re ready to install a new Moen kitchen faucet [3]!
Tips for Using Your Moen Kitchen Faucet
Moen kitchen faucets are one of the most popular and reliable types on the market, offering a long-lasting and attractive look. They are perfect if used correctly and maintained properly. Here are some tips on how to get the most out of your Moen kitchen faucet:
- When turning on and off the water, be sure to turn it slowly, as rapid changes in pressure can cause damage over time.
- Regularly inspect your faucet for any signs of corrosion or wear and tear, such as rust spots or discoloration. If you see anything that concerns you, contact a professional for repair.
- Clean your Moen kitchen faucet regularly with a soft cloth to remove dirt and grime build-up. A gentle soap solution can also help keep it looking shiny and new.
- Always use the appropriate tools when disassembling or replacing any parts of your faucet, as incorrect tools can cause damage.
Tips For Repairing A Faucet
Even using a faucet correctly can go wrong in some cases. It’s important to know what to do when this happens. Here are a few tips for repairing your Moen kitchen faucet:
- Check the handle first. If it’s loose, tighten it with an adjustable wrench or pliers.
- If the handle is stuck, you can try gently tapping on it with a hammer to free it up.
- Make sure that the water supply lines aren’t blocked or kinked and that there isn’t any debris blocking them.
- If the O-ring is worn out or damaged, you can replace this yourself using a new one from your local hardware store.
- If the faucet still isn’t working, you may need to replace the entire assembly.
How to Remove a Moen Kitchen Faucet: Step-by-Step Guide
Removing a Moen kitchen faucet may be necessary for maintenance or replacement. To assist you in this task, we’ve prepared a step-by-step guide with multiple columns outlining the key instructions and considerations for removing a Moen kitchen faucet.
| Step | Procedure | Tools Required | Time Required | Difficulty Level |
|---|---|---|---|---|
| 1 | Turn off the water supply to the faucet by closing the shutoff valves under the sink. | Adjustable wrench or pliers | 5 minutes | Easy |
| 2 | Disconnect the water supply lines from the faucet’s hot and cold water pipes. Use a wrench or pliers to loosen the nuts and disconnect the lines. | Adjustable wrench or pliers | 10 minutes | Easy |
| 3 | Remove the faucet handle. This typically involves locating a set screw or cap on the handle, which you’ll need to remove to access the handle’s mounting screw. | Allen wrench, screwdriver | 5 minutes | Easy |
| 4 | Unscrew and remove the handle’s mounting screw, then carefully lift off the handle. | Phillips or flathead screwdriver | 5 minutes | Easy |
| 5 | Locate and remove the faucet’s retaining nuts or clips securing it to the sink or countertop. | Adjustable wrench, pliers | 10 minutes | Moderate |
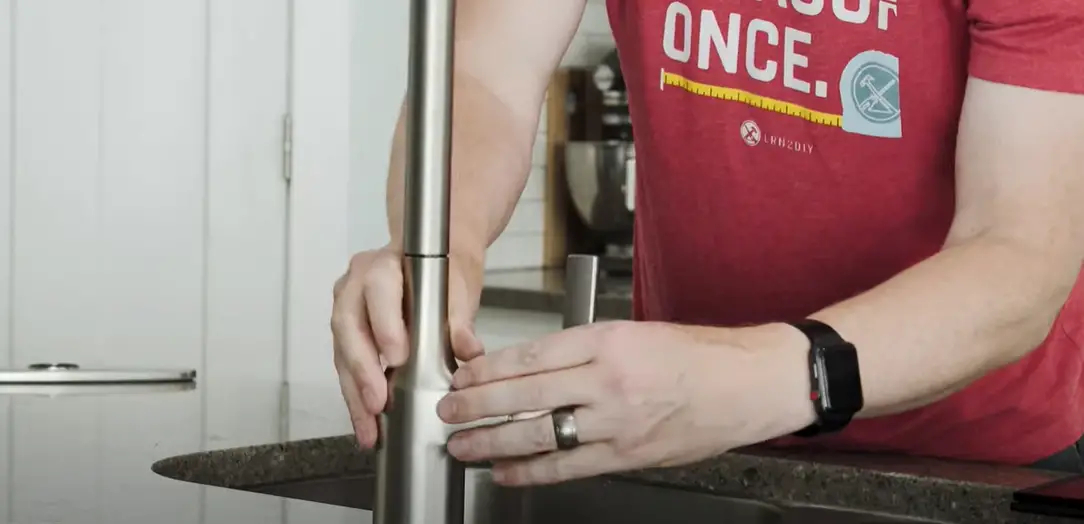
| 6 | Carefully lift the faucet out of the mounting hole, ensuring you don’t damage any pipes or connections. | N/A | 5 minutes | Easy |
| 7 | Inspect the area for any remaining components or debris and clean it as needed. | N/A | 5 minutes | Easy |
Explanation of the Table:
- Step: Lists the sequential steps for removing a Moen kitchen faucet.
- Procedure: Provides a brief description of what to do in each step.
- Tools Required: Lists the necessary tools for each step of the process.
- Time Required: Indicates the estimated time needed for each step.
- Difficulty Level: Rates the difficulty of each step, with “Easy” indicating simple tasks and “Moderate” for slightly more complex actions.
By following these step-by-step instructions and considering the tools required, time involved, and difficulty level, you can confidently remove your Moen kitchen faucet for maintenance or replacement.
FAQ
How long does the Moen kitchen faucet last?
Moen kitchen faucets are built to last and typically have a lifetime warranty. With proper maintenance, your Moen kitchen faucet should last for years without needing any major repairs or replacements.
How do you remove an old Moen kitchen faucet?
Removing an old Moen kitchen faucet is relatively simple and can be done in a few easy steps. First, make sure the water supply has been shut off to the faucet. Next, remove any decorative hardware or handles from the faucet body. Finally, loosen the mounting nuts on either side of the faucet and pull it away from the sink or counter surface.
What do I need to buy before installing a new Moen kitchen faucet?
Before you install your new Moen kitchen faucet, certain parts will require purchase before installation. Make sure to have a basin wrench and/or adjustable wrench available for the removal of the existing faucet as well as the necessary parts to install the new faucet. Additionally, the correct size and type of washers, gaskets, mounting nuts, and other hardware should be purchased before beginning installation.
What is the best way to maintain a Moen kitchen faucet?
Moen kitchen faucets are designed for easy maintenance and will last longer when given proper care. Regularly wiping down the surface of your faucet with a soft cloth will help keep it looking like new for years to come. Make sure to check all connections periodically for signs of leaks or wear and tear and repair them when needed. Following these simple steps will ensure that your Moen kitchen faucet lasts for many years.
How do you take apart a Moen single-handle kitchen faucet?
Taking apart a Moen single-handle kitchen faucet can be done in a few simple steps. First, shut off the water supply to the faucet. Then, remove the handle and any decorative hardware from the body of the faucet. After that, loosen and unscrew the mounting nuts on either side of the faucet until it is free from its mountings. Finally, take out any O-rings or gaskets located within the fixture before taking it apart completely.
How do you remove a Moen kitchen faucet handle without visible screws?
If your Moen kitchen faucet does not have visible screws on the handle, it is likely held together with a snap ring. To remove this type of handle, you will need to use needle nose pliers and carefully twist and pull out the ring from the hole in the back of the handle. Once the ring has been removed, the handle should come off easily. Removing a Moen kitchen faucet is an easy task that can be done quickly with minimal effort. Be sure to have all necessary parts and tools ready before beginning installation so that your new faucet can be installed without any issues or delays.
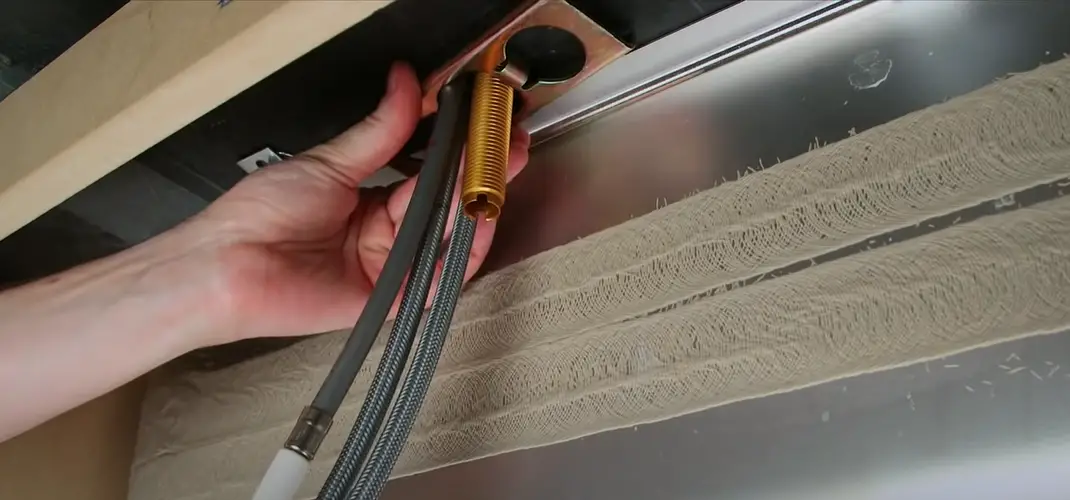
How do you remove a Moen kitchen faucet water line?
Removing the water line from a Moen kitchen faucet is easy and can be done with simple tools. Start by turning off the water supply to the faucet. Then, use an adjustable wrench or pliers to loosen and remove the nut that holds the water line in place. Pull out the line from its socket, being careful not to bend or break it. Once removed, you’ll be ready to install your new Moen kitchen faucet!
How do you remove a supply line from a kitchen faucet?
Removing a supply line from a kitchen faucet is easy and can be done with minimal effort. First, shut off the water supply to the faucet. Next, use an adjustable wrench or pliers to loosen and remove the nut that holds the water line in place. Once removed, you’ll be ready to install your new Moen kitchen faucet!
What size is the connector on a Moen kitchen faucet?
The size of the connector on a Moen kitchen faucet varies, depending on the model. Generally speaking, you’ll need to use a 0,37-inches or 0,5-inches connector when attaching your water lines to the faucet. Be sure to check your specific model for the exact connector size before beginning installation.
How do I know what model Moen faucet I need?
When purchasing a Moen kitchen faucet, you’ll need to know the exact model number. This number can be found on the existing faucet or in your home’s documentation. If you cannot find the model number, you may need to contact Moen directly for assistance. Additionally, online databases can help you find compatible parts and models for your specific faucet.
Do all Moen faucets use the same valve?
No, not all Moen faucets use the same valve. Depending on your specific model, you may need to purchase a different type of valve for installation. Be sure to double-check with Moen before beginning installation so that your new faucet works properly. Making sure to follow these steps when removing and installing a Moen kitchen faucet will help ensure a successful replacement or upgrade project.
Where is the cartridge on a Moen kitchen faucet?
The cartridge is typically located at the base of the faucet handle. It is usually made of plastic and can be easily removed using a small, flathead screwdriver or an Allen wrench. Replacing the Moen kitchen faucet cartridge should only take a few minutes and will ensure that your new faucet functions properly.
Is there a filter in a Moen kitchen faucet?
No, there is no filter in a Moen kitchen faucet. However, some models may be equipped with a water-saving device or an adjustable flow rate controller. Be sure to check the specifications of your specific model before purchasing and installing it.
Does Moen have a lifetime warranty on their faucets?
Yes, Moen does offer a lifetime warranty on their faucets. This warranty covers any manufacturer defects in materials and workmanship, as well as any damage caused by a normal residential use. Be sure to register your new Moen kitchen faucet within 90 days of purchase to take advantage of this great offer!
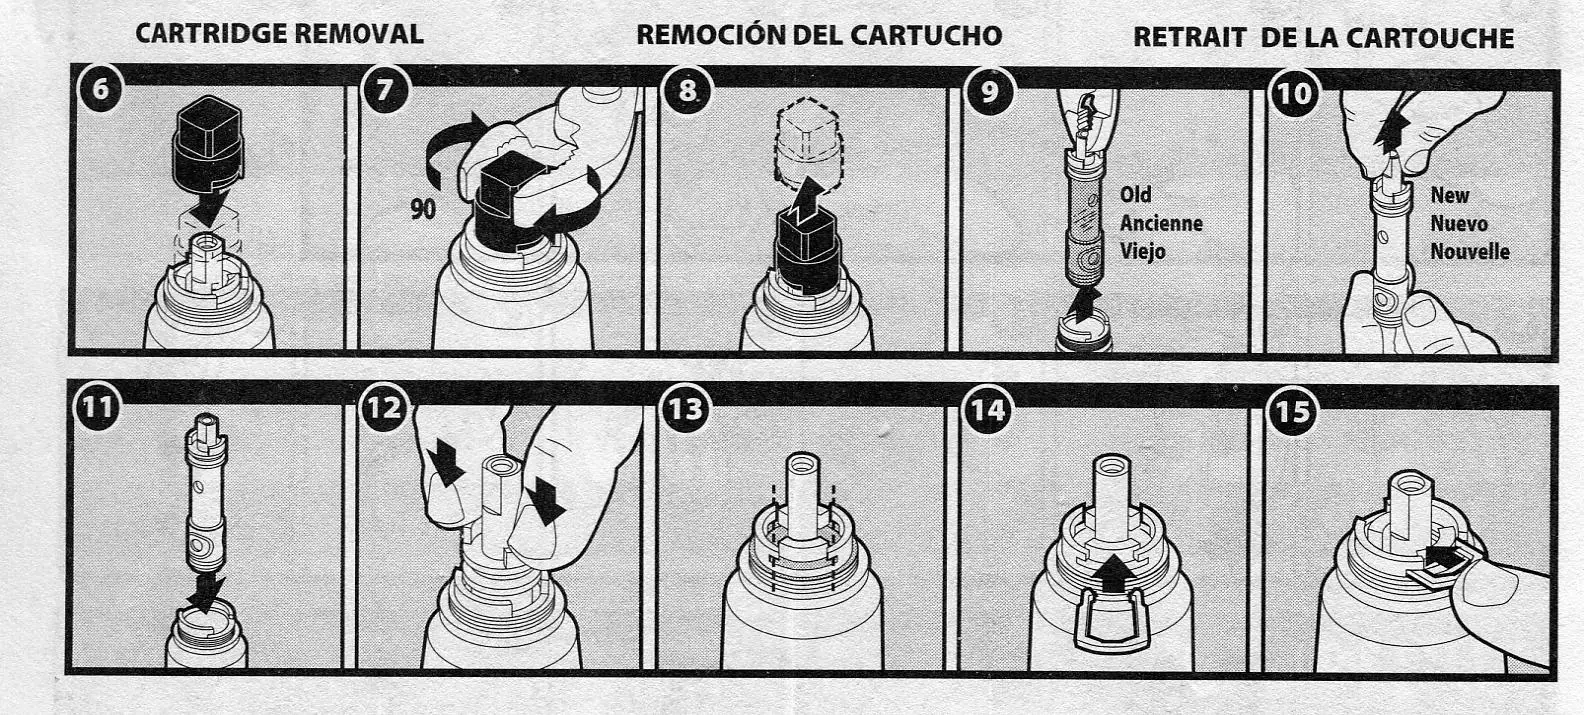
How do you replace a Moen kitchen faucet cartridge?
Replacing a Moen kitchen faucet cartridge is easy and can be done with minimal effort. Start by turning off the water supply to the faucet and using an Allen wrench or flathead screwdriver to remove the existing cartridge. Then, insert the new cartridge into its socket and use adjustable pliers or a wrench to tighten it in place. Finally, reattach the water line and turn on the water before testing your new Moen kitchen faucet!
Why does my kitchen faucet keep coming loose?
If your Moen kitchen faucet keeps coming loose, it could be due to a worn-out or broken cartridge. The best way to resolve this issue is to replace the existing cartridge with a new one of the same type and size. Once the old cartridge has been removed and the new one installed, your faucet should be more secure and stable. Additionally, make sure that all nuts and bolts are tightened properly before testing your new Moen kitchen faucet.
What is a 4-hole kitchen faucet?
A 4-hole kitchen faucet is a type of Moen kitchen faucet that requires four separate holes to be cut into the sink or countertop for installation. These types of faucets typically have an additional side sprayer in addition to the main spout and are best suited for sinks with ample space. Be sure to double-check the specifications of your model before beginning installation, as some may require fewer or more holes than others. Following these steps and tips when removing or installing a Moen kitchen faucet will ensure a successful upgrade project!
Why do you need a new faucet?
A Moen kitchen faucet can be a great way to add style and functionality to your kitchen. Whether you’re replacing an old or worn-out model, upgrading for better water pressure, or simply wanting a fresh look – there are plenty of reasons to choose a new Moen kitchen faucet! Additionally, installing a new faucet can help conserve water, save money on bills, and reduce the risk of future repairs and replacements.
How do I remove a Moen kitchen faucet handle?
To remove a Moen kitchen faucet handle, locate the set screw or handle screw beneath the handle, usually hidden by a decorative cap. Use an Allen wrench or screwdriver to loosen and remove the screw, allowing you to lift off the handle.
What steps should I follow to uninstall a Moen kitchen faucet?
Here’s a general process to uninstall a Moen kitchen faucet:
1. Turn off the water supply to the faucet.
2. Remove the faucet handle, exposing the cartridge or valve.
3. Disconnect the water supply lines from the faucet.
4. Use an adjustable wrench to remove the retaining nut securing the faucet to the sink.
5. Gently lift the faucet body from the sink, ensuring you don’t damage any plumbing connections.
How can I identify and order the correct replacement parts for my Moen faucet?
You can identify your Moen faucet model and find the right replacement parts by checking the faucet’s installation manual or searching for the model number on the faucet body. Once you have the model number, you can order the necessary parts from Moen’s official website or a Moen-authorized dealer.
Are there any precautions I should take when removing a Moen kitchen faucet?
When removing a Moen kitchen faucet, be cautious not to overtighten or force any parts, as this may cause damage. Additionally, always turn off the water supply before starting to prevent water leaks or accidents.
Do I need any specialized tools to remove a Moen kitchen faucet?
While basic hand tools like an adjustable wrench, Allen wrench, and screwdriver are typically sufficient, having a basin wrench can be helpful for hard-to-reach areas during removal.
Useful Video: How to Remove and Install a Kitchen Sink Faucet (Moen-Georgene 87912SRS)
Conclusion
Moen kitchen faucets are a great asset to any kitchen, but when it comes time to replace one or do some repairs, the process of removing it can seem daunting. This article has provided you with the knowledge and resources to make sure that removing a Moen kitchen faucet is no longer a challenge! Simply gather the necessary tools, turn off the water supply to the faucet, disconnect all available connections and finally remove the faucet itself. With these easy steps, you can have any Moen kitchen faucet removed in no time at all. So don’t hesitate – to get started on your project today!
References
- https://solutions.moen.com/Article_Library/How_to_Choose_a_Kitchen_Faucet
- https://www.mrkitchenfaucets.com/how-to-remove-a-moen-kitchen-faucet/
- https://simply2moms.com/how-to-remove-and-replace-your-kitchen-faucet/