
A kitchen faucet is one of the most important appliances in a home. It is used every day to cook, clean, and wash dishes. That’s why it’s important to choose the right one! If you’re in the market for a new kitchen faucet, Moen is a great brand to consider. They make high-quality products that are built to last. This article will show you how to install a Moen kitchen faucet step-by-step. It is important to follow the directions provided exactly because each faucet is different.
Why install a Moen kitchen faucet?
One of the most important features of any kitchen is the faucet. Not only does it provide a source of clean water, but it also creates a focal point in the kitchen design. Moen faucets are reliable, stylish, and easy to install, making them an ideal choice for any homeowner.Moen faucets offer:
- Durability and strength – Moen faucets are designed to last for years, even with heavy use.
- Easy maintenance – The sturdy design of Moen faucets makes them easy to clean and maintain.
- Stylish design – Moen kitchen faucets come in a variety of styles, so you can find the perfect one to match the look of your kitchen.
What You’ll Need to Install a Moen Kitchen Faucet?
Before starting the installation process of a Moen kitchen faucet, it’s important to make sure you have all the necessary tools and materials. Here’s what you’ll need:
- An adjustable wrench
- Plumber’s tape
- Screwdrivers (for removing the nuts)
- A bucket or container to catch the water that runs off during the installation process
- A rag/towel (for wiping up any spills)
- New faucet kit with instructions included
The adjustable wrench is the most essential tool, as it is primarily used to disconnect or connect the water supply lines. Screwdrivers are required to remove the mounting nuts that secure the faucet in place. Plumber’s tape is used to ensure a tight seal at connections and prevents leaks from occurring.
Instructions on Installing Moen Kitchen Faucet
Disconnect the Existing Faucet
Begin by turning off the water supply to the existing faucet and disconnecting it from the sink. Loosen and remove any mounting nuts or screws holding the old faucet in place. Pull out the old faucet to access the installation area behind it.
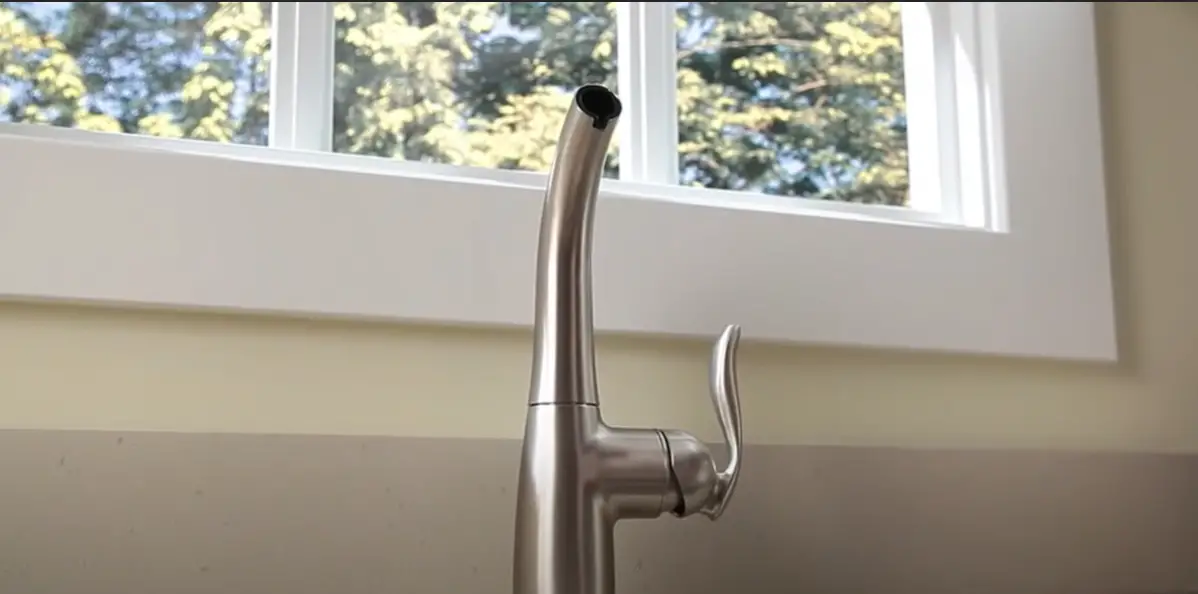
Install the Spout of Moen Sink Faucet
A spout of the kitchen faucet is a component, usually made of metal or plastic. It has two parts: an escutcheon plate and an adapter. Install the spout of the Moen kitchen faucet according to the manufacturer’s instructions. Usually, this requires you to attach the mounting nuts or screws that came with the new faucet and tighten them securely in place.
Install the Valve Stem of Moen Kitchen Faucet
The valve stem of the Moen kitchen faucet is a cylindrical component that allows you to control the water flow. It has two connections: hot and cold. It is usually made of brass, steel, or plastic. Install the valve stem by connecting it to the pipes in the wall and then connecting it to the spout with a gasket. Make sure all connections are secure before
continuing.
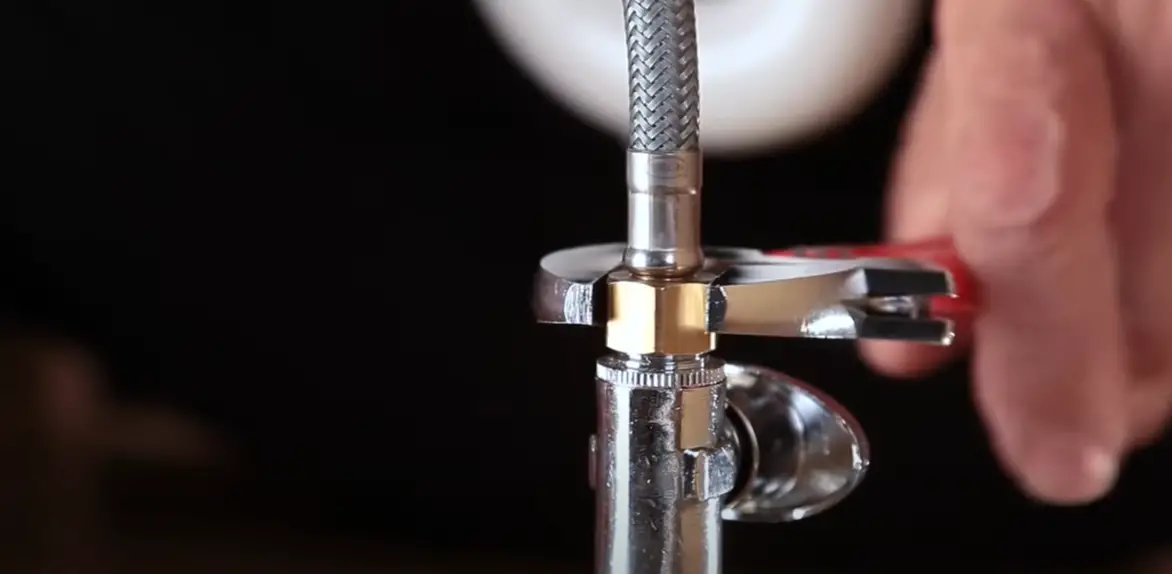
Connect Hoses of Moen Kitchen Faucet
Next, connect hoses for hot and cold water supply to appropriate ports on the spout of your new Moen kitchen faucet. Secure them with mounting nuts or screws provided by the manufacturer. Make sure all connections are tight and leakproof before moving on to the next step.
Install the Handle of Moen Kitchen Faucet
Most kitchen faucets have a handle that allows you to adjust the water flow. Install the handle according to the manufacturer’s instructions. Usually, this requires attaching it with a mounting nut or screw and then securing it with a cover plate. Make sure all connections are tight before continuing.
Turn on the Water Supply and Test Your Installation
Once all components are installed, turn on the water supply and test your installation by turning on both hot and cold water taps. Check for any leaks or problems in the operation of your new Moen kitchen faucet. If everything is working properly, you can now enjoy your new kitchen faucet [1]!
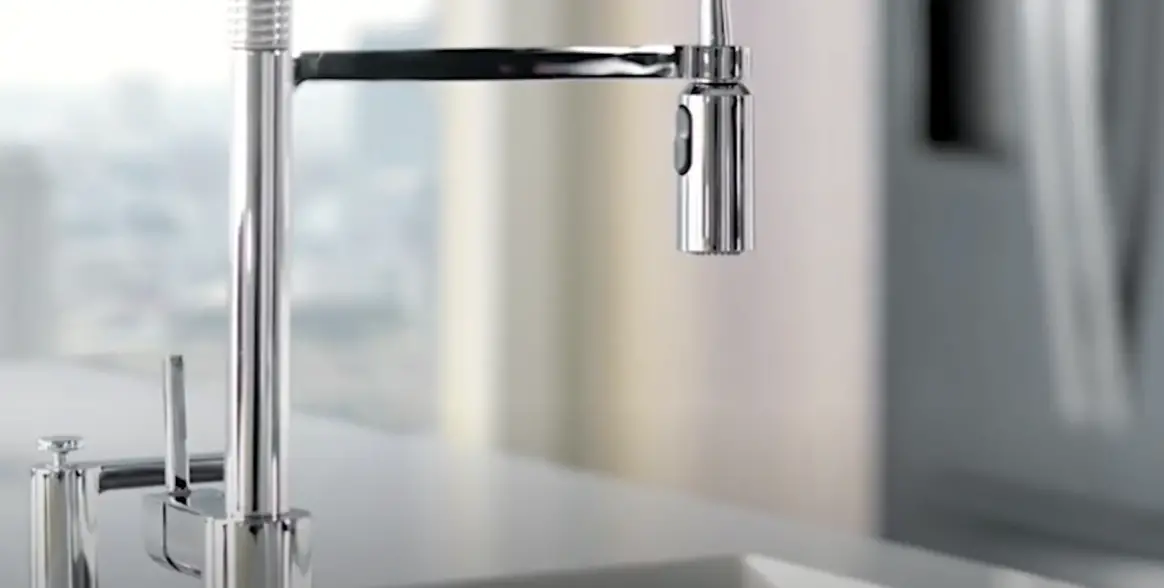
The Benefits Of A Moen Kitchen Faucet
Moen kitchen faucets provide both form and function, making them a great addition to any home. To choose the right one for your needs, first, consider the style of the faucet and its features. Moen offers a wide range of products, from single-handle faucets to pull-down sprayers. Many models include built-in technology such as motionsense, which allows you to start and stop the flow of water with just a wave of your hand.
How do you use Moen Kitchen Faucet?
Moen faucets are easy to use, with intuitive technology that makes everyday tasks simpler. Single-handle models offer one-handed flow control, while dual-handle designs offer two independent levers for hot and cold water.
MotionSense models add an extra level of convenience, allowing you to start and stop the flow of water with just a wave of your hand. You can also find touchless pull-down sprayers that allow you to adjust temperature and water pressure at the same time. Additionally, many Moen kitchen faucets feature flexible spray heads that can be easily maneuvered to make cleaning and food prep easier.
How to maintain a Moen Kitchen Faucet?
If you want your Moen Kitchen Faucet working effectively and efficiently, you’ll need to keep it clean and well-maintained. Here are some tips on how to do that:
- Check your faucet regularly for signs of damage or leakage. If there are any cracks or lose parts, replace them immediately.
- Clean the outside of the faucet with mild detergent and water. Wipe away excess water and dirt with a soft cloth or sponge.
- Lubricate moving parts such as valves and handles every six months using mineral oil or silicone-based lubricant specifically designed for use in plumbing fixtures like kitchen faucets.
- Protect the finish by avoiding harsh chemicals and cleaning products that may damage it over time.
- Flush the faucet with clean water every few months to prevent sediment buildup in the pipes and valves, which can cause clogs or leaks.
- Inspect the aerator regularly for signs of rust or corrosion and replace it if necessary.
- For added protection, you may also want to consider a faucet cover for outdoor kitchen faucets during very cold weather.
Following these maintenance tips will help keep your Moen Kitchen Faucet in top condition for years to come [2]!
FAQ
How do I replace a Moen kitchen faucet?
Replacing a Moen kitchen faucet is not a complicated process and requires only basic tools. Before you begin, make sure to turn off the water supply valves underneath the sink and disconnect the water hoses from the faucet.
Once you have disconnected the hoses, use an adjustable wrench to remove the mounting nuts on either side of the old faucet. After that, carefully lift out the old faucet and clean up any debris or sediment left in its place.
Next, line up your new Moen kitchen faucet with the existing holes in your sink top and secure it using the mounting hardware provided. Make sure to keep all components tight but do not over-tighten them as this could cause damage.
Finally, attach the water supply lines to the new faucet and turn on the valves beneath your sink. Be sure to check for any leaks before you call it a night! With these steps, you will have successfully replaced your Moen kitchen faucet with minimal hassle.
Can I install a Moen kitchen faucet myself?
Yes, installing a Moen kitchen faucet is not a difficult task and can be done in just a few simple steps if you are familiar with basic plumbing techniques. All that’s required is some basic tools such as an adjustable wrench, pliers, and screwdriver as well as the correct mounting hardware included in the package.
Do I need plumbers putty on the Moen faucet?
It is not necessary to use plumbers’ putty when installing a Moen kitchen faucet. The mounting hardware that comes with the faucet should be enough to keep it in place and prevent any water from leaking out. If you do choose to use plumbers putty, make sure to only apply it around the base of the faucet where it meets your sink top. Never apply too much of the product as this can cause damage to your faucet or sink over time. Once you have successfully installed your new Moen kitchen faucet, take a few minutes to enjoy your handiwork!
How do you install a Moen single handle?
Installing a Moen single-handle kitchen faucet is relatively straightforward and requires only basic tools. Before you begin, make sure to turn off the water supply valves beneath the sink. Then use an adjustable wrench to loosen and remove any mounting nuts or bolts around the existing faucet. With your new Moen single-handle kitchen faucet in hand, line it up with the holes already present in your sink top and secure it using the mounting hardware that came with it. Make sure all components are tight but do not over-tighten them as this could cause damage.

Why should you remove Moen kitchen faucets?
Moen kitchen faucets are built to last and require minimal maintenance. However, they may need to be removed due to regular wear and tear or if you wish to upgrade your current setup with a new model. Removing a Moen kitchen faucet is an easy task that requires basic tools such as an adjustable wrench, pliers, and screwdriver. Once you have the correct mounting hardware in place, use the wrench to loosen and remove any mounting nuts from either side of the old faucet and carefully lift it out of its place. From there, all that’s left is for you to clean up any debris or sediment left behind before replacing it with your new Moen kitchen faucet!
How do you choose Moen kitchen faucets?
When looking for a Moen kitchen faucet, it’s important to consider the type of sink you have as well as how much money you’re willing to spend. Different styles, finishes, and features can help to personalize your space while providing convenience and ease of use.
For example, pull-down and pull-out spray heads make everyday tasks such as rinsing dishes or filling pots easier than ever before. Consider also the mounting options available – deck mounted or wall mounted–to determine which will fit best in your space. Finally, check out the warranties offered by Moen with each product, ensuring that your purchase is protected should any issues arise over time.
Is plumber paste required when installing Moen kitchen faucets?
A plumber’s paste is not necessary when installing a Moen kitchen faucet. The mounting hardware included with the product should be enough to keep it in place and prevent any water from leaking out. Plumbers paste can be used if desired, but make sure to only apply it around the base of the faucet where it meets your sink top. Too much of the product can cause damage to your faucet or sink over time, so make sure not to use too much!
Which is better, plumber’s paste or silicone for sealing a Moen kitchen faucet?
Both plumber’s paste and silicone can be used to seal a Moen kitchen faucet. Silicone is more of an all-purpose product, while plumbers paste specializes in sealing sinks and faucets specifically. If you decide to use the former, make sure the area around the sink is clean and dry before applying it. The latter should also be applied only around the base of the faucet where it meets your sink top to avoid any damage over time. Either option will do for most installations; just make sure to follow directions carefully for the best results.
How do I tighten the nut under the kitchen sink faucet?
Tightening the nut beneath a kitchen sink faucet is a relatively simple task, but it does require special tools. You will need an adjustable wrench and pliers for this job. First, make sure that the nuts themselves are not loose; if they are, use your pliers to tighten them up before moving on to the next step. Then place your adjustable wrench over the nut and turn it clockwise until you feel resistance. Do not tighten too much or you may cause damage! Continue tightening until it’s snug and make sure everything else is firmly in place before turning on the water supply valves again. Finally, test out your newly tightened Moen single-handle kitchen faucet to ensure that there are no further leaks or problems.
How much should it cost to replace a kitchen faucet?
The cost of replacing a kitchen faucet varies depending on the type, style, and brand you choose. A basic Moen kitchen faucet replacement can range from $100 to $400 or more. It is important to note that this price includes installation as well as any required mounting hardware. For more elaborate styles or finishes, the cost may be higher; make sure to do your research before purchasing so that you know exactly what is included in the final cost.
How long should it take a plumber to replace a kitchen faucet?
It typically takes a plumber between one and two hours to replace a kitchen faucet. This includes the removal of the old faucet, installation of the new one, and testing for any leaks or issues. Make sure that you are comfortable with the plumber’s skill level before allowing them to do the job; ask for references or reviews from previous customers if necessary. The total time may also be affected by how much work is required to fit your new Moen kitchen faucet into place properly.
What are the three types of single faucets?
The three types of single faucets are the pull-down, pull-out, and two handles. The most popular type is the pull-down; this type features a high arc spout that can be pulled down to reach further into your sink or over larger pots and pans. A pull-out faucet has a lower profile and its head can be extended out on a hose for easier access to different areas of the sink. Finally, two-handle faucets feature separate handles for hot and cold water control as well as an easier installation process. Whichever type you choose, make sure that it fits with your existing kitchen decor and meets all safety requirements before making your purchase.
Useful Video: How to install a Moen Kitchen Faucet Step-by-Step
Conclusion
Installing a Moen kitchen faucet is a relatively easy do-it-yourself project that can make a big difference in the look and feel of your kitchen. With just a few simple tools, you can give your kitchen an updated new look by installing your own Moen kitchen faucet. By following the simple steps outlined in this guide, you’ll be able to complete the job quickly and easily, giving you extra time to enjoy all the benefits of having a beautiful new Moen kitchen faucet! So get started today and transform your space with this classic upgrade!
References
- https://www.thespruce.com/installing-a-moen-kitchen-faucet-2718847
- https://kitcheninfinity.com/how-to-clean-a-touchless-moen-kitchen-faucet/