
It’s the middle of summer and you’re cooking up a storm. The kitchen is hot and steamy, and the sink is full of dishes. You turn on the faucet to get some water to rinse off your plates, but instead of a refreshing stream, all you get is a trickle. What’s going on? Has your kitchen sink gone on strike? If you’ve been dealing with this issue, don’t worry – here is the solution! This article will teach you how to vent a kitchen sink under a window.
Best Kitchen Sink: How to choose?
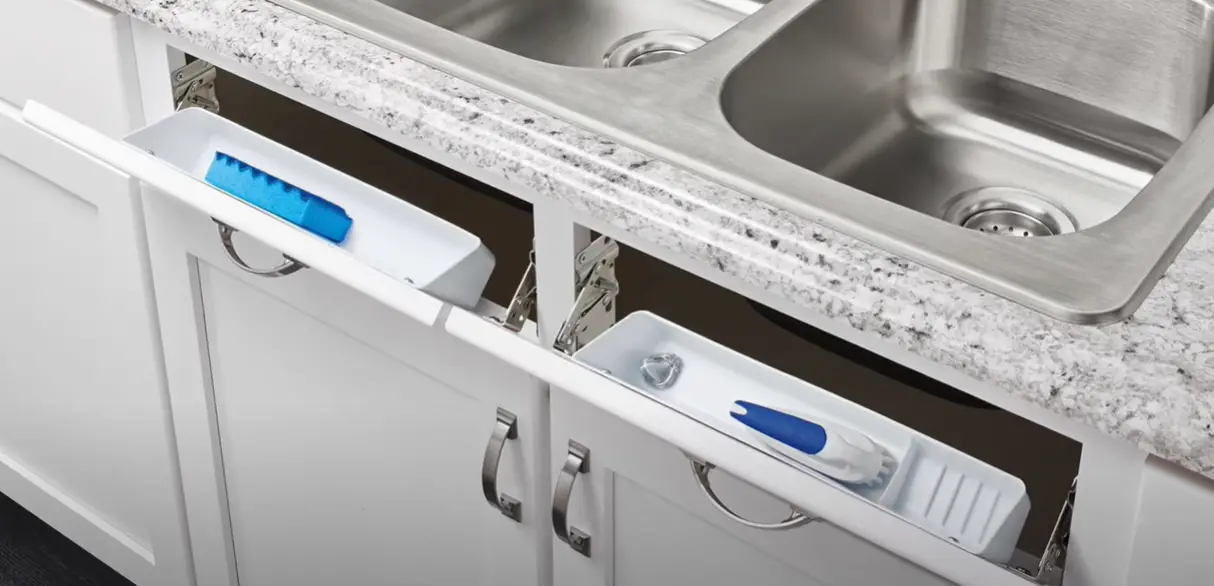
Are you looking for the best kitchen sink to install under your window? You should consider some factors: material, size, and installation type. Consider stainless steel sinks as they are easy to clean and last longer than other materials. An undermount sink is suitable for a kitchen with a window because it requires less counter space, allowing you to make the most of your natural light source.
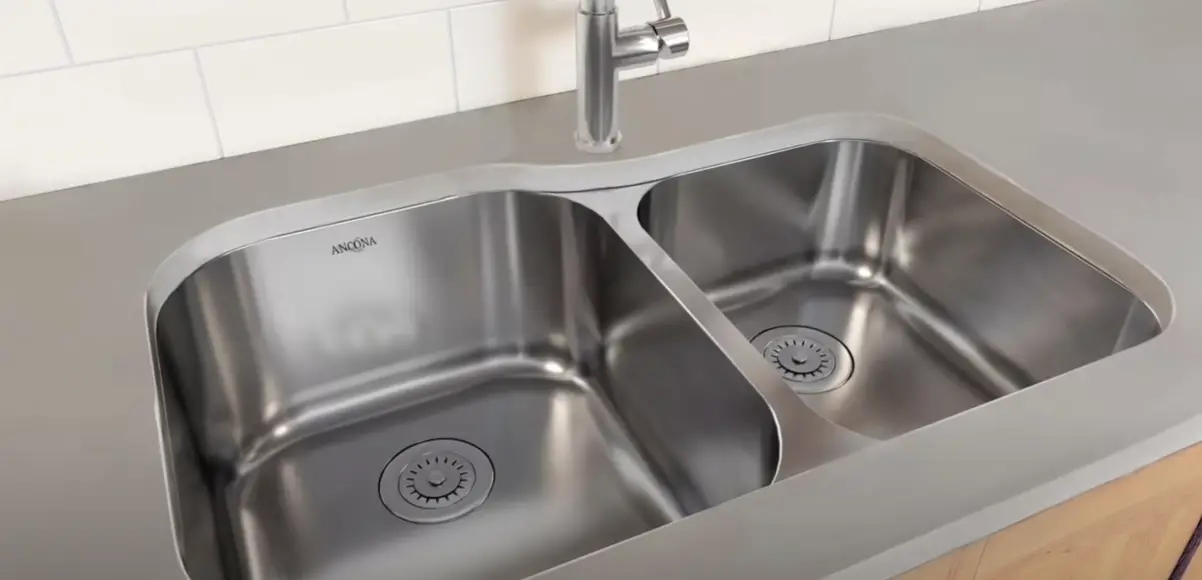
The choice of size will depend on the size of your window and counter space. For example, a single-bowl sink may be enough for a smaller window and counter, while you will likely need a double-bowl sink to accommodate a larger window and space. The average size range of kitchen sinks is 23,6-32,6 inches wide and 17,7-21,6 inches deep.
The design of the sink should also be taken into consideration. There are many different styles of kitchen sinks available, such as:
- Farmhouse sinks
- Top mount sinks
- Undermount sinks
- Apron front sinks
No matter what type you choose, all kitchen sink designs require proper ventilation. If they don’t get enough air circulation, the water will not run smoothly and can cause bad smells and even mold growth [1].
Why can the Kitchen Sink be Placed Under a Window?
Kitchen sinks are usually placed under a window for convenience and design. By placing the sink under the window, you can take advantage of natural lighting when working on the countertop or washing dishes. Plus, it gives your kitchen an attractive look that makes it stand out from the rest.
Moreover, having the kitchen sink located under a window also allows for easy access to fresh air, which can be beneficial when preparing meals.
Venting a kitchen sink under a window can be tricky because of its location. Having the sink against an opening in the wall means that it’s more difficult for plumbing fixtures and ventilation systems to do their job properly. Additionally, some materials used in construction such as drywall or wood framing may not allow adequate airflow, leading to potential problems such as mold growth and water damage.
How to Install a Vent Pipe for the Kitchen?
Step 1: Connect the Sink and Waste Drain Pipe
The first step is to install the sink and waste drain pipe to make a secure connection. This involves cutting a hole in the countertop for the sink, connecting the trap assembly to the bottom of the basin, and then connecting it all to the main drainage system.
Step 2: Select the Vent Pipe Configuration
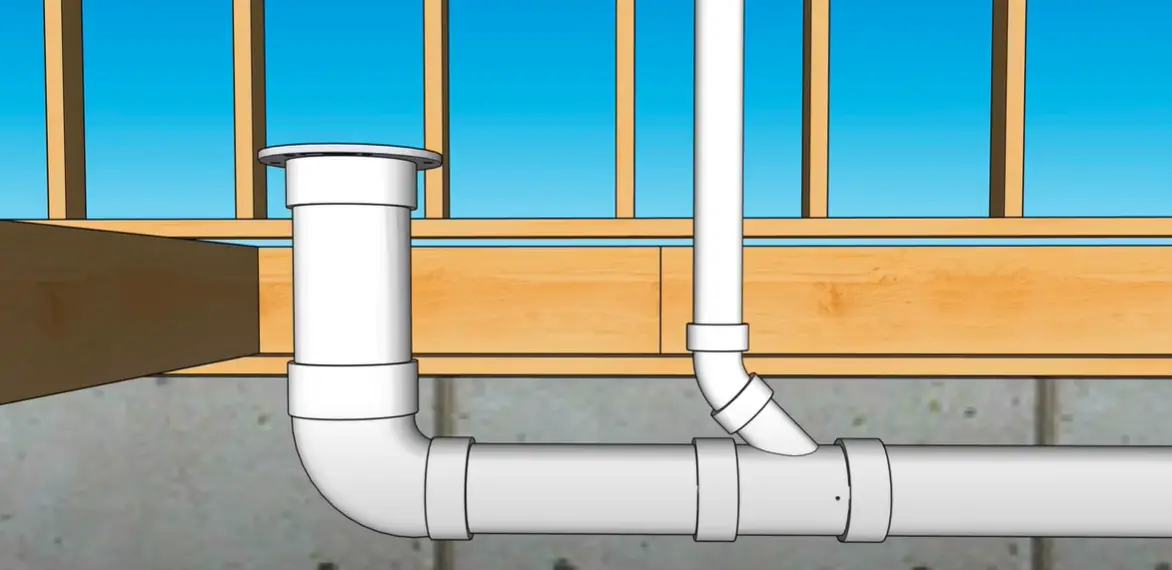
Now that the sink is connected to the main drainage system, it’s time to select an appropriate vent pipe configuration. Most kitchen sinks are vented through a loop vent, which connects the top of the trap assembly directly to the drain pipe and then rises up above the roofline. If your kitchen has a window near the sink, however, you may need to use a U-bend configuration instead.
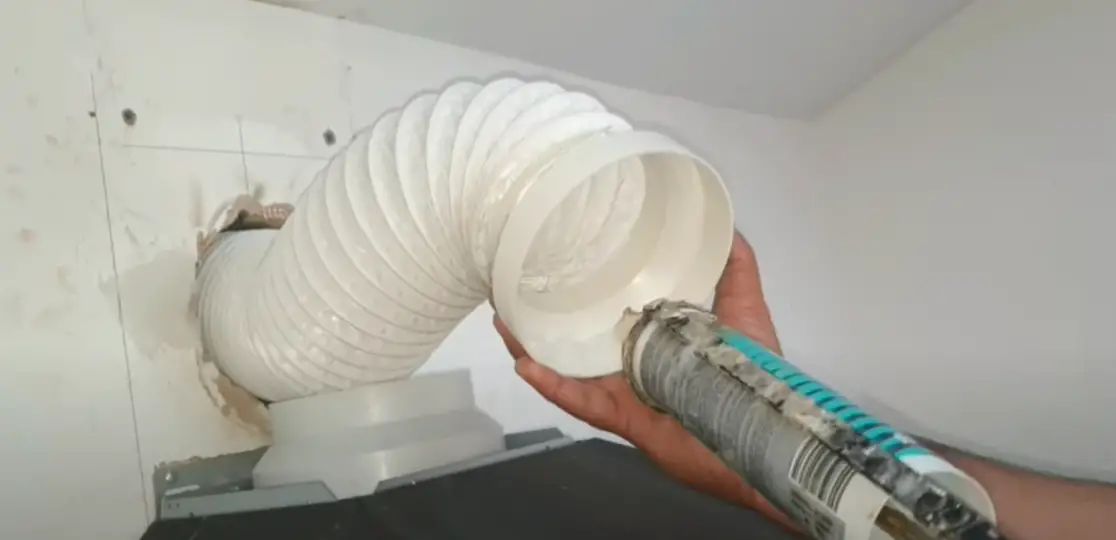
Step 3: Attach Pipe to the Opening Under the Window
Once you’ve selected the vent pipe configuration, you can begin attaching it to the opening under the window. Start by cutting a section of pipe that is long enough to loop around and up above the roofline. Secure this pipe into place with an appropriate fitting and sealant, before connecting it to both the trap assembly and the main drainage system.
Step 4: Draw a Chalk Line
Next, draw a chalk line on the wall from the window opening down to the floor. This will help indicate where you need to drill a hole for the vent pipe extension.
Step 5: Drill a 1,7-inch hole
Using the line as a guide, drill a 1,7-inch hole in the wall. This should be large enough to fit your vent pipe extension and provide adequate airflow for proper drainage.
Step 6: Add a second Elbow Fitting
Finally, add a second elbow fitting and connect it to the vent pipe extension. Secure this in place with an appropriate sealant and make sure that everything is properly attached before testing the drainage system.
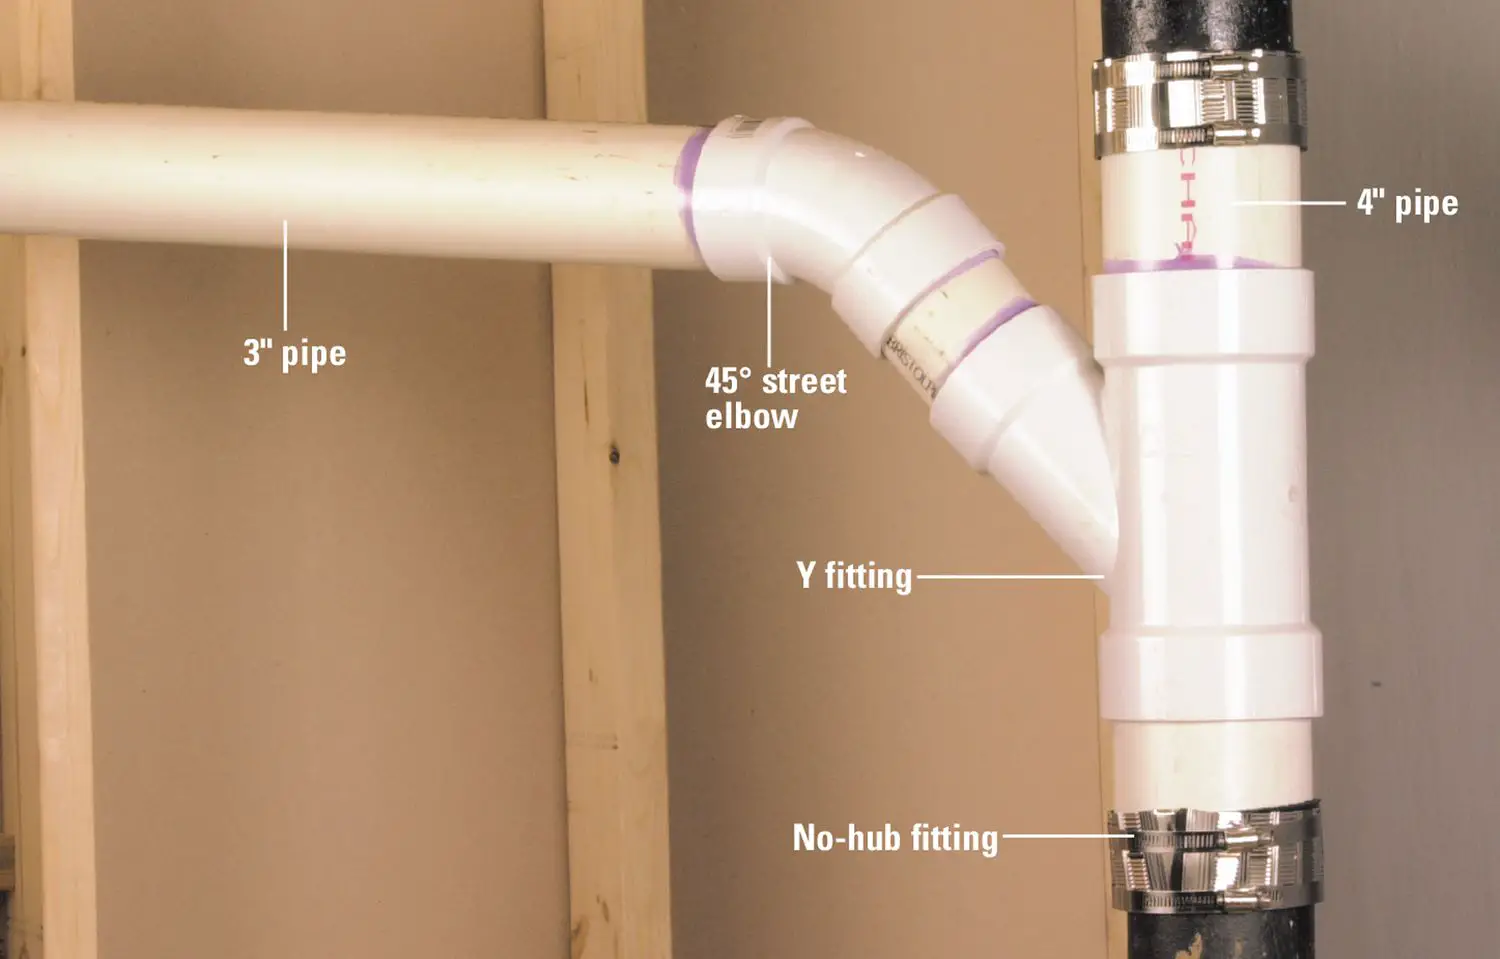
Step 7: Install a Straight-up Vertical PVC Vent Pipe
Another step is to install a straight-up vertical PVC vent pipe to support the loop vent above the roof line. This can be done by simply attaching it to the first elbow fitting and then running it up through the wall and out of your home.
Step 8: Attach Another PVC Elbow Fitting
Attach another PVC elbow fitting to the end of the straight-up vertical vent pipe. This will help ensure that the water drains correctly and prevents any potential backups. Once everything is in place, you’re ready to test your new kitchen sink vent system.
Step 9: Connect Vent Pipe to the Stack Vent
The last step is to connect the vent pipe to the stack vent, which is usually located in an attic or crawlspace. This will help ensure that air can circulate freely around the drainage system and prevent any potential clogs from forming [2].
Tips for venting a kitchen sink under a window
Venting a kitchen sink located under a window can be a tricky task. While the process may vary from home to home, certain tips can help ensure a successful installation.
- Check for Existing Ventilation: Before venting your sink, it is important to make sure that the window does not already provide adequate ventilation. If there is an existing exhaust fan near the sink or a gap between the top of the window and ceiling, you may be able to skip this step altogether.
- Measure Twice, Cut Once: It’s always best to take accurate measurements before beginning any project – especially one involving plumbing! Make sure that you measure twice and cut once to avoid costly mistakes down the road!
- Use U-Shaped Pipes: When installing a vent pipe under a window, it is often best to use U-shaped pipes instead of straight pipes. This will help avoid any potential blockage due to the sloping window frame.
- Install a Backflow Preventer: Installing a backflow preventer is an important step in venting your sink under a window. This device will help keep water from flowing back into the sink or other fixtures and causing backups or flooding.
- Install Flexible Piping: When installing the piping for your vent, it is best to use flexible pipes as they are less likely to break or crack over time due to fluctuating temperatures or movement in the house.
- Pay Attention to Slopes: Make sure that you pay attention to the slope of your pipes when installing them – having too much of a downward slope could cause blockages in the line.
- Seal Gaps Around Pipes: When you are finished installing your pipes, make sure to seal any gaps around them with silicone caulk or another suitable sealant. This will help to prevent any water from leaking into the walls or ceiling of your home.
How To Fix a Kitchen Sink Vent For Adequate Drainage?
Do you have a kitchen sink under a window and the water is backing up when it’s draining? Chances are, your kitchen sink vent isn’t working properly. A blocked or defective sink vent can cause problems with drainage and even result in permanent damage to the surrounding walls and windows. Fortunately, learning how to fix a kitchen sink vent for adequate drainage is not complicated; all you need is an understanding of plumbing basics.
The first step to fixing a kitchen sink vent involves understanding what a ‘vent’ actually is. In basic terms, it is simply an exhaust pipe that helps release air pressure in the pipes around the sink so water can flow freely. Without this ventilation system, standing water can occur, which can eventually lead to clogs and potential flooding. The next step is to identify where the vent should be located between the window and sink. Ideally, it should be placed about one foot away from the window so that it does not expose any water or drainage issues. It’s also important to make sure that the vent pipe is at least 3 inches above the top of the drainpipe so that air pressure can properly escape.
Once you have identified a location for your vent pipe, you will need to determine what type of material you need for installation. A PVC (polyvinyl chloride) pipe is usually recommended because it is both durable and inexpensive; however, there are other options available as well.
Once the material has been selected, it’s time to begin the installation. If you have basic plumbing knowledge and tools handy, this should be a relatively straightforward task. Now that your vent pipe is in place, you can rest assured that your kitchen sink will be draining properly without backing up or flooding. However, it’s important to keep an eye on the system over time and make sure everything is functioning as it should. With regular maintenance and occasional inspections, you’ll be able to enjoy your kitchen sink under the window for many years to come [3]!
What tools do you need to vent a kitchen sink under the window?
Venting a kitchen sink under a window can be an intimidating task, but with the right tools and a little know-how, it’s entirely doable. Before you begin the process, make sure you have all the necessary supplies:
- Drill
- Tape measure
- Vent kit (includes pipe, tee connectors, elbows, and clamps)
- PVC cement
- Pencil or marker
- Tubing cutter
- Wrench
The drill is used to cut the hole for the vent pipe in the wall, and a tubing cutter is used to trim the PVC pipe. The other tools will be used to assemble and secure the parts of your vent kit. PVC cement is used to glue the pipes together, and a wrench is used for tightening. Finally, use a pencil or marker to mark your desired measurements on the pipe. Once you have all of your tools in hand, it’s time to begin venting the kitchen sink under the window.
FAQ
Does a kitchen sink need to be vented?
Yes, all kitchen sinks should be vented. Proper venting is necessary to prevent an overflow of water, as well as to keep the sink and surrounding area free from mold and mildew caused by stagnant air around the drain.
Why can’t a kitchen sink be vented directly out a window?
Directly venting a kitchen sink out a window is not recommended due to potential backflow issues caused by the wind or other elements outside of your home. Instead, you should ensure that there is an adequate vent pipe in place to take the exhaust air away from your home and safely disperse it outside.
How do I properly vent a kitchen sink under a window?
Venting a kitchen sink under a window requires some special planning and consideration. First, you should ensure that the window is at least three feet away from the sink to ensure proper ventilation without creating a backflow issue. Next, determine a route for the vent pipe that will take it away from your home and out of sight if possible. Finally, attach this vent pipe securely to the sink’s overflow drain before connecting it to an appropriate outlet on the other side of your wall or roof. By following these steps, you can properly vent a kitchen sink under a window, keeping your home safe and free from excess moisture caused by inadequate ventilation.
Where should a kitchen sink vent be placed?
The ideal place for a kitchen sink vent is in an area that is both out of sight and away from the sink. This will ensure proper exhaust airflow and prevent any backflow issues caused by the wind or other elements outside your home.
What are the benefits of properly venting a kitchen sink?
Properly venting a kitchen sink helps to create a healthier indoor environment as it prevents stagnant air around the drain, as well as mold and mildew caused by excess moisture in the area. Additionally, vented sinks can also help reduce noise from draining water, making it easier to enjoy meals without hearing loud sounds coming from the drains. Finally, having a properly vented sink also reduces odors emanating from dishwashing and cooking activities.
Will a sink drain without a vent?
No, a sink drain cannot function properly without proper venting. Without a vent, air pressure within the sink will be unable to escape, resulting in an overflow of water or potential backflow issues. Therefore, it is important to ensure that your kitchen sink has proper venting in place before use.
How far can a kitchen sink be from a vent?
The general rule of thumb is to have the vent within 35 inches of the sink. This ensures that there is adequate ventilation without creating a backflow issue. If this distance cannot be achieved, it is important to follow the manufacturer’s recommendation or consult with a professional plumber before proceeding.
Does a vent pipe have to go straight up?
No, a vent pipe does not have to go straight up as long as there is an adequate slope. Generally, the pipe should be angled slightly downward so that any condensation or moisture can safely drain away from your home. Additionally, this also helps to reduce backflow issues caused by the wind outside of your home.
Do all kitchen sinks need an air gap?
No, not all kitchen sinks require an air gap. In most cases, a vent pipe is enough to ensure proper ventilation and prevent backflow issues. However, if your sink is installed near a body of water such as a lake or ocean, then it may be necessary to install an air gap to prevent contaminated water from entering the plumbing system.
At what height should a vent be installed about a sink?
The vent should be installed at least 35 inches above the sink to ensure proper airflow and prevent backflow issues. Additionally, it should be placed in an area that is both out of sight and away from the sink for optimal results.
What is the code for plumbing vents?
The plumbing code for vents is usually included in the local building codes. Generally, it requires that ventilation systems be installed correctly within a home to ensure proper exhaust airflow and also prevent backflow problems. Consult your local building codes or professional plumber before making any changes to your existing vent system.
What happens if you don’t vent a sink?
If you don’t vent a kitchen sink, there will be an inadequate amount of airflow in the drainage system. This can cause water to back up or overflow from the sink, as well as create mold and mildew due to stagnant air around the drain. Additionally, it can also lead to odors coming from dishwashing or cooking activities. Therefore, it is important to make sure that your kitchen sink is properly vented before use.
How do I know if my sink is properly vented?
To ensure that your sink is properly vented, check the vent pipe for any signs of clogs or blockages. Additionally, make sure that the vent pipe is within 35 inches of the sink and angled slightly downward to prevent backflow issues. If you are unsure if your kitchen sink has been properly vented, it is best to contact a professional plumber for assistance. Venting a kitchen sink under a window can seem like an intimidating task but with the right information and guidance, it doesn’t have to be!
Useful Video: How to Vent a Kitchen Sink under a Window
Conclusion
Installing a correctly vented kitchen sink under a window is an essential aspect of ensuring your kitchen has proper plumbing. It may seem tricky at first, but with the right tools and know-how, you can easily complete this job on your own. By following the steps in this article, you’ll be able to successfully vent a kitchen sink under a window properly and safely so that water will stay where it belongs – in the sink! Now all that’s left for you to do is enjoy the improved functionality of your new space! With proper installation, you won’t have any worries about pesky water splashes getting anywhere they shouldn’t.
References
- https://www.realsimple.com/home-organizing/decorating/how-to-choose-kitchen-sink
- https://homeguides.sfgate.com/properly-vent-sink-37348.html
- https://hometuff.com/sinks/kitchen-sink-drain-venting/