A kitchen sink is one of the most important appliances in a home. It’s where dishes are washed and food is prepared. That’s why it’s so important to make sure that your sink is properly sealed to prevent water from leaking out and causing damage to your floor or cabinets. This article will discuss how to caulk a stainless steel kitchen sink using silicone caulk. It will also provide some tips on how to make the caulking process as easy and stress-free as possible!
What is Caulking: An Overview
Caulking is the process of filling in gaps, cracks, and joints with a material that will seal them off from air, water, or other liquids. Caulk is typically made of silicone, latex rubber, or acrylic compounds and is applied either as a paste or in a liquid form. Once caulking has dried it forms an effective seal which helps to create a waterproof barrier and can also be used to stop drafts.
Caulking can be used in many different areas of the home, such as around windows and doors, bathroom fixtures, and pipes. It is an important part of maintaining your home since it helps keep out insects and other pests, reduces energy bills by preventing air leaks, and keeps water from entering the home. Properly caulked joints also make a home look more attractive by providing a neat finish.
Caulking can be done either inside or outside of the home. For exterior use, it is important to make sure that the caulking material used is designed for outdoor use and will not deteriorate over time. It is also important to use the correct type of caulk for the particular application, as some materials are better suited for certain tasks than others.
When applying caulking material, it is important to follow instructions carefully and take your time to ensure that the job is done properly and effectively. Careful preparation of the area to be sealed is essential, as is using the correct tools to ensure a neat and professional finish. After the job has been completed, it is also important to check for any gaps or drafts which may have been missed during the application process [1].
Steps To Caulk A Stainless-Steel Kitchen Sink
Clean Sink Countertop
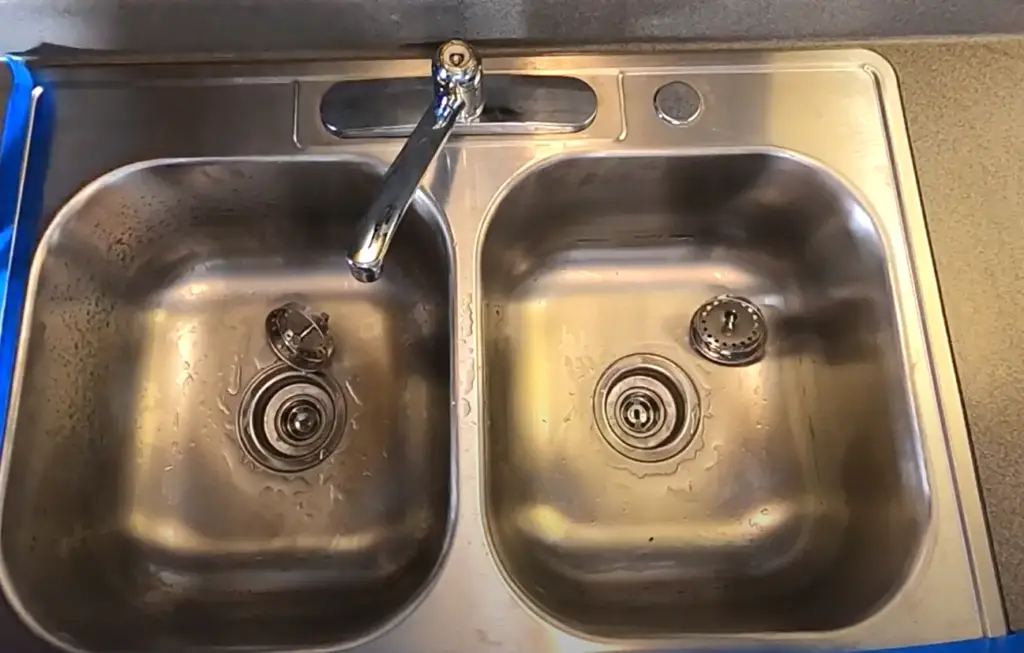
The first step in caulking a stainless-steel kitchen sink is to make sure that the countertop around it is clean. It’s important to remove any dirt, food particles, grease, and grime before you begin the process of caulking. Using a damp cloth or sponge, wipe down the surface and make sure everything is completely dry before you move on to the next step.
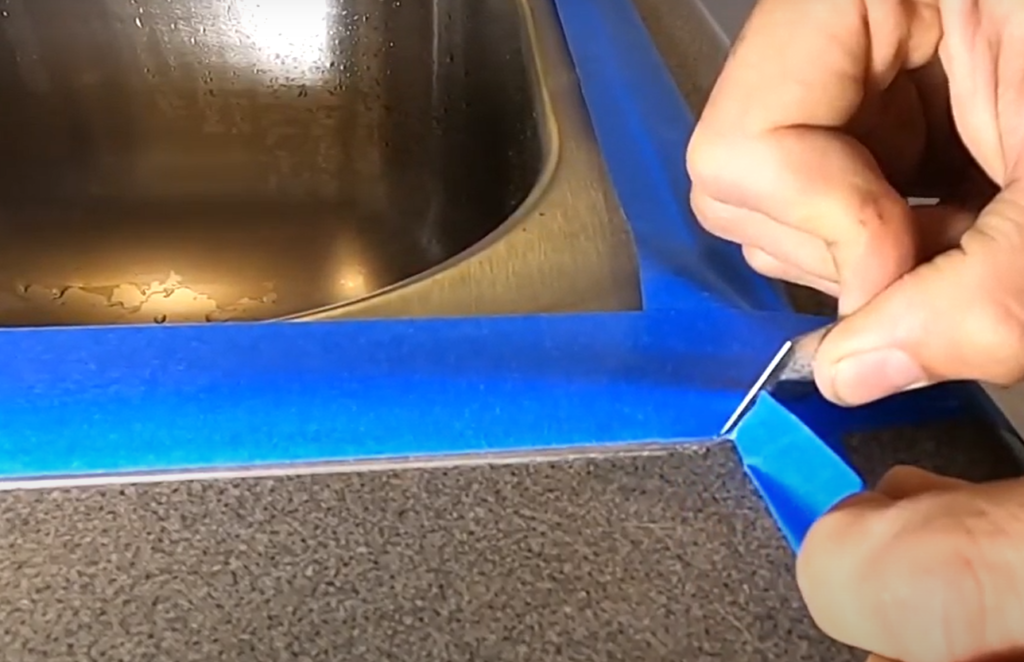
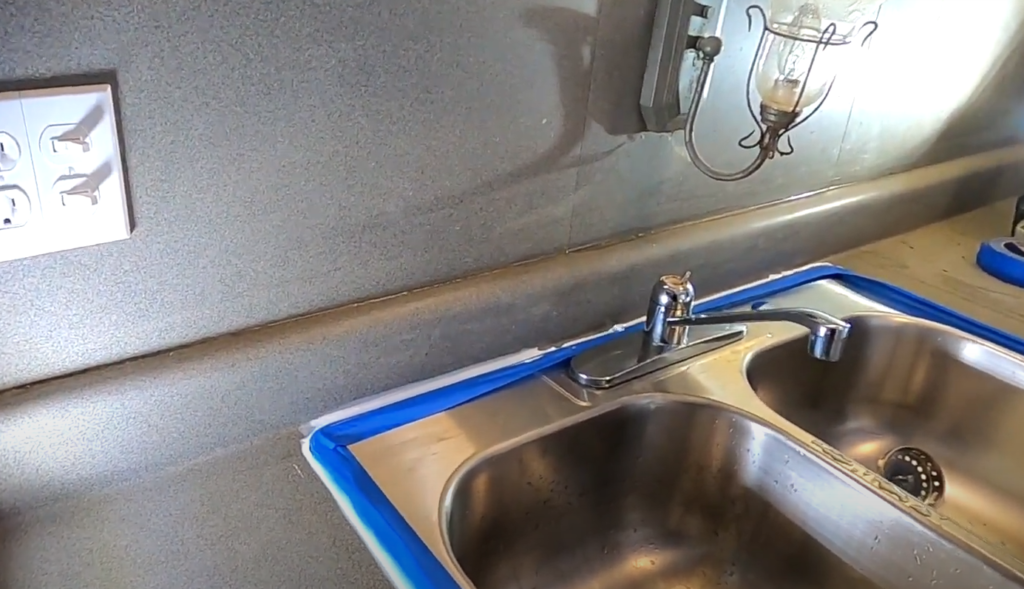
Apply Masking Tape
The next step is to apply a strip of masking tape around the sink’s edges. This will help keep the caulk in place as it dries and also ensures that your lines are straight and even. Make sure to press down firmly on the tape to make sure it stays in place.
Cut the Tip of Your Caulk Tube
Once you’ve applied the masking tape, take your tube of caulk and use a razor blade or utility knife to cut off the tip at a 45-degree angle. This will help create a smooth line when applying the caulk.
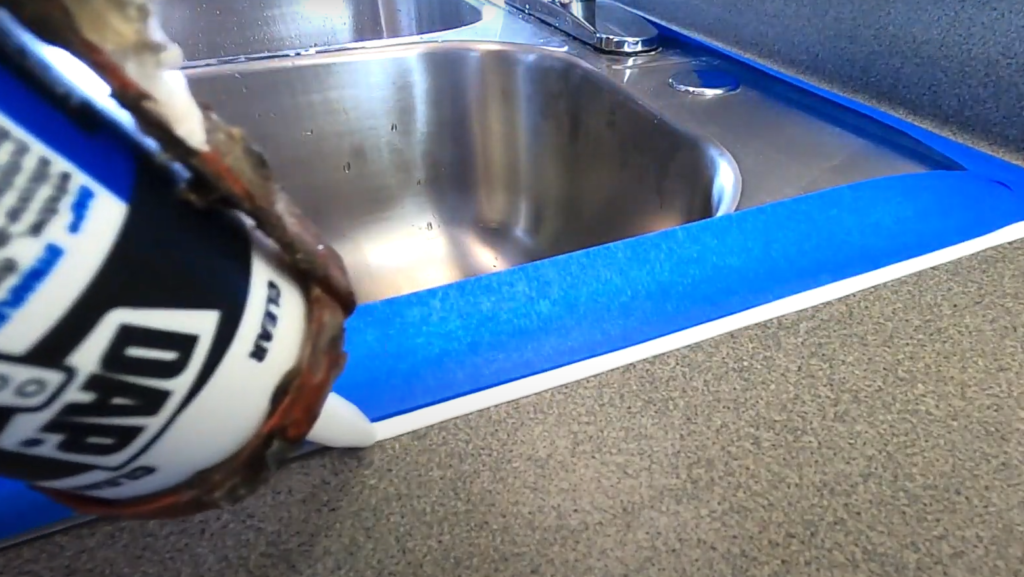
Apply Caulk
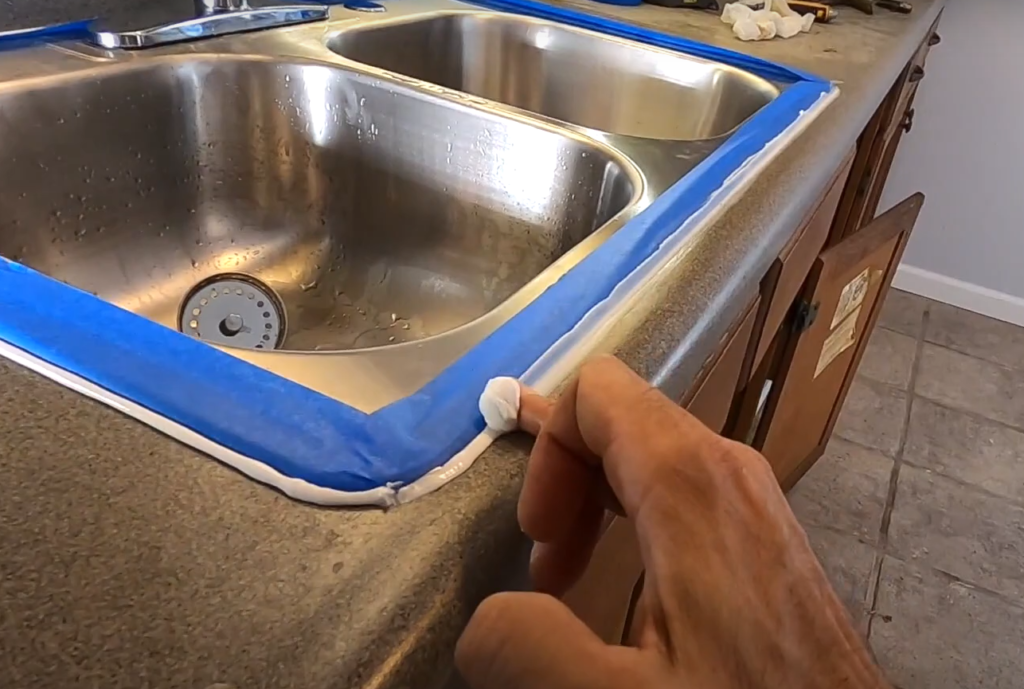
Now you’re ready to apply the caulk. Taking a steady hand, begin squeezing the tube and smoothly spread the caulk along the edges of the sink. Make sure to keep your lines even and consistent, taking care not to leave any gaps or extra caulking in areas where it isn’t needed.
Smooth Caulk Line
Once you’ve finished applying the caulk, use your finger or a damp cloth to smooth out any bumps or air bubbles that may have formed along the caulking line. This will help create a professional-looking seal.
Remove Masking Tape
Once you’re finished smoothing out the caulk, you can remove the masking tape. Again, make sure to press down firmly on the edges of the sink to ensure that the caulking is properly sealed.
Allow Caulking To Dry
Once everything is in place and your caulking job looks good, it’s time to let it dry. Depending on the type of caulk you used, this can take anywhere from a few hours to a few days. Make sure that you read the instructions on your caulk tube for an exact drying time so you know when the process is complete.
Reseal Gaps Or Holes
Once the caulking is dry, you can check to make sure there aren’t any gaps or holes that need to be resealed. If so, simply apply a small amount of caulk in that area and let it dry before repeating the steps above [2].
Types of Caulk to Use on A Stainless-Steel Kitchen Sink
When it comes to caulking for use on a stainless-steel kitchen sink, several types of caulk can be used effectively.
Acrylic latex caulk is another option that can be used to seal around a stainless steel sink. It comes in a variety of colors and is easier to apply than silicone, but it does not provide as strong an adhesion. Acrylic latex is also more prone to cracking over time and is not waterproof, making it better suited for areas that may come into contact with water from time to time.
In addition to these two types of caulk, there are also epoxy-based caulks available that offer a strong bond and excellent adhesion to surfaces such as steel. This caulk is more difficult to apply and requires more time and effort to get the job done correctly. They also tend to be more expensive than silicone or acrylic latex caulks, but they offer a stronger bond that will last for many years.
No matter which type of caulk is chosen for use on a stainless-steel kitchen sink, it is important to ensure that proper preparation of the area is done before application. This includes cleaning the surface thoroughly and sanding it down to provide a smooth finish for the caulk to adhere to. It is also important to make sure that the caulk used is compatible with the surface of the sink, which can be determined by checking the manufacturer’s specifications [3].
Why Should You Caulk a Stainless-Steel Kitchen Sink?
Caulking a stainless-steel kitchen sink helps to create a watertight seal between the sink and countertop. This will prevent any leaks or moisture from seeping underneath, which can damage the countertop and surrounding walls over time. Additionally, caulking around the edges of your stainless-steel kitchen sink will help protect it from dirt and bacteria, keeping it cleaner and more hygienic.
Finally, caulking your stainless-steel kitchen sink will give the area a finished look, making the space around your sink look much more polished. Therefore, caulking is an important part of maintaining a stainless-steel kitchen sink and should be done regularly to ensure its longevity.
What Can Be Done Instead of Caulking a Stainless-Steel Kitchen Sink?
Instead of caulking the sink, you could consider using a sealing strip or gasket to seal around the edges of the sink and countertop. This should provide a tight seal that will help keep out moisture, dirt, and debris. Additionally, you could also use a sink mat or liner to protect the bottom of your stainless-steel sink from scratches and other damage. A sink mat can also help to reduce noise caused by dishes and silverware being washed in the sink.
Another option is to use a heavy-duty adhesive sealant such as silicone caulk or epoxy glue to seal around the edges of the sink and countertop. This will provide a strong, waterproof barrier that won’t be affected by water or temperature changes. Finally, you could use a stainless steel sink tray or rack to help keep dishes and utensils from sitting directly in the sink. This will also add extra protection from scratches and wear. With these options, your stainless-steel kitchen sink should remain sealed and protected for years to come.
Finally, regularly cleaning your kitchen sink with mild detergent and warm water will help keep it looking its best and prevent any buildup of mold or mildew. You should also be sure to dry the sink and surrounding countertops after each use.
Caulking a Stainless Steel Kitchen Sink: Step-by-Step Guide
Caulking a stainless steel kitchen sink is essential for preventing water damage and maintaining a clean appearance. Here’s a step-by-step comparison of how to caulk a stainless steel kitchen sink properly.
| Step | Procedure | Tips for Success |
|---|---|---|
| Step 1: Gather Materials | Collect caulk, caulk gun, utility knife, masking tape, and a damp cloth for cleanup. | Choose a kitchen-grade silicone caulk that matches your sink color. |
| Step 2: Prepare the Area | Clear the sink and surrounding area. Clean and dry the sink and counter’s edge. | Remove any old caulk or debris for a clean surface. |
| Step 3: Apply Masking Tape | Place masking tape along the edge of the sink to create clean, straight lines for the caulk. | Use low-tack tape to avoid damaging the sink’s finish. |
| Step 4: Cut the Caulk Tip | Cut the caulk tip at a 45-degree angle and at a size that matches the gap between the sink and counter. | Start with a smaller opening and cut more if needed. |
| Step 5: Apply Caulk | Slowly apply caulk along the gap between the sink and counter. Maintain a consistent, even bead. | Work in sections and smooth the caulk with a wet finger for a neat finish. |
| Step 6: Remove Masking Tape | While the caulk is still wet, carefully remove the masking tape to reveal clean lines. | Dispose of the tape without smearing caulk onto surfaces. |
| Step 7: Clean Up | Use a damp cloth to wipe away excess caulk and smooth the bead. Allow the caulk to cure as per the manufacturer’s instructions. | Proper curing ensures a strong seal. Avoid using the sink during this time. |
Explanation of the table:
This table provides a step-by-step comparison of the procedure for caulking a stainless steel kitchen sink. It outlines each step, the procedure, and offers tips for success, such as selecting the right caulk and achieving a clean finish. Proper caulking not only maintains the sink’s integrity but also enhances its appearance.
FAQ
What kind of caulk to use for the stainless-steel sink?
The best type of caulk to use for a stainless-steel sink is a silicone-based caulk. Silicone caulk is highly durable and resistant to water, making it an excellent choice for bathrooms and kitchens. When using silicone caulk on a stainless-steel sink, make sure that the surface is clean, dry, and oil-free before applying the caulk. Additionally, you’ll want to use a mild detergent and water or mineral spirits to prepare the surface before application.
Can silicone caulk be used on wood?
Yes, silicone caulk can be used on wood. Silicone caulk is a waterproof sealant that can be applied to most surfaces, including wood, making it an excellent choice for outdoor projects such as decks and window frames. When using silicone caulk on wood, make sure that the surface is clean and free of dirt, dust, and other particles. Additionally, you’ll want to prime the wood with a stain-blocking primer before applying the caulk. This will help ensure that the surface is properly sealed and prevent any water or moisture from seeping through.
How do you caulk a metal kitchen sink?
Caulking a metal kitchen sink is similar to caulking any other type of sink, however, it’s important to use the right type of caulk for the job. The best type of caulk to use on a metal kitchen sink is silicone-based caulk. Silicone caulk is highly durable and resistant to water, making it an ideal choice for sinks. To caulk a metal kitchen sink, make sure that the surface is clean, dry, and oil-free before applying the caulk. The next step is to apply the caulk in a neat and continuous line around the sink. Once applied, you’ll want to smooth out any irregularities with a wet finger or rag. Lastly, allow the caulk to dry for at least 24 hours before exposing it to water. Doing so will ensure that your metal kitchen sink is properly sealed against water damage.
Can you caulk over an existing caulk?
Yes, you can caulk over existing caulk. While this is not recommended for the best results, it is possible to do so if necessary. If you plan on caulking over an existing caulk, make sure that the surface is clean and free of dirt, dust, and other particles. Additionally, you’ll want to use a quality caulk and apply it in a neat and continuous line. Doing so will help ensure that the new caulk adheres properly and provides a strong seal. However, if the existing caulk is cracked, peeling, or loose in any way, it should be completely removed before caulking over it. This will help ensure that your surfaces are properly sealed against water damage.
Can you paint over a silicone caulk?
Yes, you can paint over silicone caulk if necessary. However, it’s important to make sure that the caulk is completely dry before painting it. Additionally, you’ll need to use a paint specifically formulated for silicone surfaces. Doing so will help ensure that the paint adheres properly and prevents any damage from occurring. It’s also important to note that painting over a silicone caulk can change its color and texture, so keep that in mind when selecting a paint color. Ultimately, painting over silicone caulk is possible if done correctly, but it’s best to avoid it whenever possible.
Should you put 2 layers of caulk?
No, you should not put two layers of caulk. One layer of quality caulk is all that’s needed to provide an effective seal against water damage. Using multiple layers can create a bumpy surface and make the caulk more difficult to smooth out properly. Additionally, using too much caulk can cause it to crack or peel off over time, leading to water damage and other problems. So, it’s best to stick with one layer of caulk for the best results.
What else can be caulked in your house?
In addition to kitchen and bathroom fixtures, several other areas in your home can be caulked. Most notably, the seams around windows and doors should be sealed with caulk to prevent air and moisture from entering the home. Caulk can also be used to seal any cracks or gaps in walls, floors, and ceilings. Additionally, caulk can be used to fill any small holes in nails or screws that were removed. Ultimately, caulking is an important part of maintaining your home and preventing water damage. If done correctly, it can help keep your house in tip-top shape for years to come.
Can you use caulk to fill hairline cracks?
Yes, caulk can be used to fill hairline cracks. While the size of the crack will determine what type of caulk is best to use, a quality silicone-based caulk should do the trick. To fill hairline cracks with caulk, make sure that they are cleaned and free of any dust or debris. Then, apply the caulk in a neat and continuous line. Once applied, use a wet finger or rag to smooth out any irregularities and allow the caulk to fully dry before exposing it to water. This will help ensure that the cracks are properly sealed against water damage.
How do you seal a basin edge?
The best way to seal a basin edge is with caulk. Make sure that the surrounding area is clean and free of dirt, dust, and other particles before applying caulk. Then, select a quality silicone-based caulk and apply it in a continuous line at the edge of the basin. Once applied, use a wet finger or rag to smooth out any irregularities and allow the caulk to fully dry before exposing it to water. This will help ensure that your basin is properly sealed against water damage. Additionally, applying a sealant or waterproofing product may also be beneficial for added protection.
How do I fix the edges of my kitchen sink?
If the edges of your kitchen sink have become worn or damaged, they can easily be fixed with caulk. Another option is to use a sealant or waterproofing product such as a liquid sealant or epoxy. Start by cleaning the area around the sink and removing any old caulk. Then, select a quality silicone-based caulk and apply it in a continuous line at the edge of the sink. Once applied, use a wet finger or rag to smooth out any irregularities and allow the caulk to fully dry before exposing it to water. This will help ensure that your sink is properly sealed against water damage. Additionally, applying a sealant or waterproofing product may also be beneficial for added protection.
Can you use a flex seal to seal a sink?
No, Flex Seal should not be used to seal a sink. Flex Seal is designed as a coating, and while it can provide some water resistance, it is not meant to create an airtight seal. Moreover, Flex Seal is not designed to withstand regular exposure to water and can eventually crack or peel off if used in an area like a sink. If you need to seal your sink, it is best to use a quality silicone-based caulk instead.
What are the steps for properly caulking the seam between a stainless steel kitchen sink and the countertop?
To caulk the seam between a stainless steel kitchen sink and the countertop, follow these steps:
1. Clean the area thoroughly, removing any old caulk or debris.
2. Measure and cut the caulk tube nozzle at a 45-degree angle.
3. Apply a continuous bead of caulk along the seam, ensuring even coverage.
4. Use a caulk smoothing tool or your finger to smooth the caulk and remove excess.
5. Allow the caulk to dry and cure as per the manufacturer’s instructions.
What type of caulk is best for sealing a stainless steel kitchen sink, and how do I choose the right one?
For sealing a stainless steel kitchen sink, it’s best to use a kitchen and bath silicone caulk that is waterproof and mold-resistant. Choose a caulk color that matches your sink and countertop for a seamless look.
Can caulking a stainless steel kitchen sink help prevent water damage and maintain the sink’s integrity?
Yes, caulking a stainless steel kitchen sink helps prevent water from seeping into the seam between the sink and the countertop, reducing the risk of water damage and maintaining the sink’s integrity. Proper caulking also enhances the sink’s appearance.
What’s the recommended drying time for caulk used to seal a stainless steel sink, and when can I use the sink after caulking?
The drying time for caulk can vary, but it’s typically recommended to wait at least 24 hours before using the sink after caulking. However, refer to the specific caulk manufacturer’s instructions for the most accurate drying and curing times.
Are there any maintenance or care tips to ensure the caulk seal around the stainless steel sink remains effective over time?
To maintain the caulk seal around a stainless steel sink, avoid using abrasive cleaners that can damage the caulk. Regularly inspect the caulk for any signs of wear or damage and re-caulk as needed to keep the seal in good condition.
Useful Video: How To Caulk A Stainless Steel Kitchen Sink With Silicone Caulking DIY Hacks
Conclusion
Caulking a stainless-steel kitchen sink is an important task that should be done regularly to ensure a high level of hygiene and prevent damage caused by water leakage. Caulking is easy to do with the right supplies and can make a big difference in the long-term use of your sink. With just a few simple steps, you can have your sink properly caulked and sealed in no time. Taking the time to ensure your sink is properly caulked is a wise investment that will keep it looking great and lasting longer. Overall, caulking your stainless-steel kitchen sink can be a quick and easy process that requires few tools or materials. With just a few steps, you can have your sink sealed up and ready to use for years to come.
References:
- https://calfeutrageapex.com/caulkings/caulking-caulker-and-sealant-meaning-and-history/
- https://suggesthow.com/how-to-caulk-a-stainless-steel-kitchen-sink/
- https://adfastcorp.com/en/news/best-caulk-kitchen-sink/