To take out a kitchen sink that is glued down might be difficult. There are many factors to consider, such as the type of adhesive used and the condition of your countertop. In this comprehensive guide, we will answer all of your questions and provide useful tips on how to remove that stubborn sink!
The Tools You’ll Need To Remove A Kitchen Sink That Is Glued Down
The first is a putty knife. You will use this to help pry the sink up. The second is a hammer. You will use this to help break the sealant around the edge of the sink. The third is a screwdriver. You will use this to remove any screws that are holding the sink in place. The fourth is a drill. You will use this to make holes in the sink so you can insert the screwdriver and pry it up.
The fifth and final tool you will need is patience!
Now that you have gathered all of the necessary tools, it is time to get started!
How To Remove Your Glued Sink And Install A New One
Prepare The Kitchen Space
The first thing you want to do is clear off the countertop and empty out all the cabinets beneath the sink. You’ll also want to remove any items hanging on the walls or stored on shelves near the sink. Once the area is cleared, lay down a drop cloth or old towels to protect your floors from water damage.
Next, locate your shut-off valves for both hot and cold water and turn them clockwise to shut off the flow of water to your sink. If you don’t have shut-off valves, then you should shut off the main water supply line to your home. Once the water is turned off, open up your faucets to release any remaining water in the lines and allow them to drain.
Now would also be a good time to clear out any garbage disposals or dishwashers that are connected to your sink. You can do this by disconnecting the power supply and water lines. If you have a garbage disposal, there will likely be a ring located beneath it that you can unscrew with a wrench. For dishwashers, there should be screws along the side of the unit that you can remove.
With the area now prepped, you can move on to Step Two.
Remove Garbage Disposal And Dishwashers
Dishwashers are usually connected with a Phillips head screw. The garbage disposal might be held in place by one or two bolts. If your model has an electrical connection, be sure to unplug it as well. You will also need to disconnect the drainpipes from the sink before removing it.
Once all of these connections are severed, you should be able to lift the sink out of its hole. If it is still stuck, you can try gently prying it up with a putty knife or flathead screwdriver. Be careful not to damage the countertop as you do this. If the sink is still not coming loose, you may need to use a hairdryer or heat gun to loosen the adhesive. Be very careful when using this method, as too much heat can damage the countertop.
With the sink finally removed, you will be able to access the underside of the countertop and see how it is attached. In most cases, it will be held in place with screws or nails. Remove these fasteners and lift the countertop off of the base cabinets. You may need help from another person to do this, as countertops can be quite heavy. With the countertop removed, you should now have full access to the sink area and be able to proceed with your repair or replacement project.
Disconnect The Drain Line
This can be done by using a pair of pliers to loosen the fitting that secures the drain line to the sink. Remove all of the remaining water from the line using a plunger after placing it in position.
Then remove the P-trap. This is located under the sink and is what connects the drain line to the sewer line. Once these are loosened, you should be able to remove the P-trap without any issues.
The last thing you will need to do is disconnect the supply lines. These are the lines that connect the water supply to the sink. To do this, you will need to use a wrench to loosen the fittings that secure them in place. Once these are loosened, you should be able to remove the supply lines without any issues.
Drain The Excess Water
The next step is to eliminate the extra water from your sink. To do this, you should remove the plug that is located at the bottom of your sink. Once you have done this, you will need to place a bucket underneath the sink in order to catch any water that may drip out.
Then you should turn on the faucet and allow the water to drain out completely. Once the water has finished draining, you can then proceed to the next step.
Detach The Drain Pipe
The next thing you need to do is detach the drain pipe. To do this, simply unscrew the nut that is holding it in place. You may need to use a wrench or pliers to get it loose. Once you have removed the nut, you can pull the drain pipe away from the sink.
Now that you have removed the drain pipe, you should be able to see the P-trap.
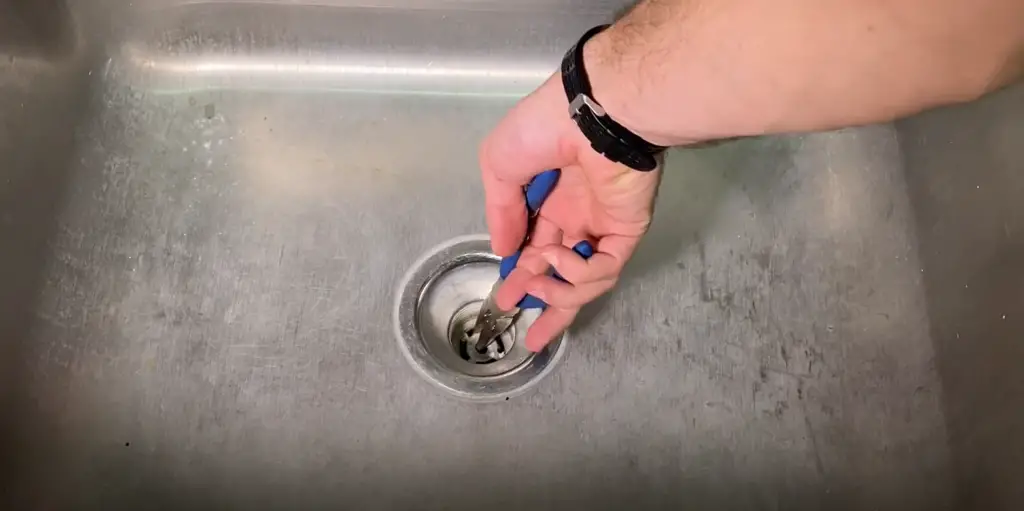
With the P-trap removed, you should now be able to see the sink strainer. The sink strainer is a metal screen that covers the drain opening and prevents debris from going down the drain. To remove the sink strainer, simply unscrew it from the drainpipe.

Now that you have removed the sink strainer, you should be able to see the stopper. The stopper is a plug that fits into the drain opening and prevents water from going down the drain. To remove the stopper, simply pull it out of the drain opening.
With the stopper removed, you should now be able to see inside the drain opening. If there is any debris or buildup inside, use a plunger or plumbers snake to clear it out. Once you have cleared the drain opening, you are ready to move on to the next step.
Disconnect The Faucet
Remove the faucet by unscrewing it from the top of the sink. Use a wrench to loosen any nuts or bolts that are holding it in place. You may need to use a pair of pliers to remove the washers and O-rings.
Once the faucet is removed, use a putty knife to scrape off any old plumber’s putty that is sealing the hole where the faucet was mounted. Be sure to clean off any residue so that you have a clean surface to work with when you install the new faucet.
If you have a sprayer hose attached to your sink, disconnect it at this time as well. There should be a coupling nut that you can unscrew with your hands.
With the faucet and sprayer hose removed, you should now have access to the sink’s drain pipes. There are two main types of drains – those with a stopper and those without. If your sink has a stopper, you will need to remove it before you can proceed.
To remove a drain stopper, simply pull it up and out of the drain opening. You may need to twist it back and forth a bit to loosen it from the sealant that is holding it in place. Once it is loose, you can lift it out and set it aside.
If your sink does not have a stopper, you will need to remove the drain cover. This is usually a simple matter of unscrewing a few screws. Once the cover is off, you should be able to see the top of the drain assembly.
There may be a lever on top of the drain assembly that you need to flip in order to release the drain. Alternatively, there may be a screw that you need to remove. Consult your sink’s manual for specific instructions on how to do this.
With the drain released, you should now be able to lift out the entire assembly and set it aside. Be careful not to lose any small parts like washers or O-rings. These will need to be replaced when you reassemble the sink later.
Loosen The Sink Clips
Use a putty knife or screwdriver to loosen the sink clips that are holding the sink in place. You may need to use a little force to get them started, but be careful not to damage the sink. Once the clips are loosened, you should be able to pull the sink away from the countertop.
If your kitchen sink is glued down, you’ll need to take a few extra steps to remove it. This comprehensive guide will show you how to remove a kitchen sink that is glued down, step by step.
Removing Liquid Nails
The next step is to remove the liquid nails that are holding your sink in place. You can do this with a putty knife or a chisel. Just insert the tool under the lip of the sink and pry it up. Work your way around the entire perimeter of the sink until it is loose.

Once you have removed all of the liquid nails, you should be able to lift the sink off of the countertop. If it is still stuck, you can try using a heat gun to loosen the adhesive. Be careful not to overheat the plastic or damage your countertop.
Removing The Sink
The next step is to remove the sink. You will need to use a utility knife to cut through the sealant around the edge of the sink. Be very careful not to damage the countertop as you do this. You should be able to remove the sink from the countertop once you’ve cut through the sealant.
Be careful not to damage the sink or countertop as you do this.If you are having trouble removing the sink, you may need to call a professional plumber for assistance.
Clean Up
Now that your kitchen sink is successfully unglued and removed, it is time to do a little bit of cleaning. With the help of a friend, carefully lift the sink and take it outside to clean it properly. You may need to use a putty knife or other tool to remove any remaining caulk or glue from the edges of the sink. Be sure to clean up any messes inside the cabinet as well. Once everything is clean, you can reinstall your kitchen sink according to the manufacturer’s instructions. [1]
How To Fit A New Kitchen Sink
The most difficult task in installing a new kitchen sink is usually removing the old one, particularly if it is glued down.
Fitting a new sink is not as difficult as you might think, but there are a few things that you need to know before you start.
Firstly you need to do is to turn off the water supply to your kitchen. This is usually done at the mains stopcock. When the water has been shut off, you can begin to remove the old sink.
If your sink is glued down, then you should use a putty knife or similar tool to loosen the glue. Start at one end of the sink and work your way around until the entire sink is free. Once the sink is free, you can lift it out and dispose of it properly.
Now that the old sink is removed, you can start to fit the new one. The first thing that you need to do is to place the new sink in position and mark out where it needs to be cut. Most sinks come with a template that you can use to mark the correct position.
Once you have marked the position of the sink, you can start to cut it out. Make sure that you follow the manufacturer’s instructions.
If your new sink comes with a sealant, then you need to apply this around the edges of the sink before you fit it in place. This will help to create a watertight seal and prevent any leaks. Once the sealant is in place, you can fit the clips and secure your sink in place. [2]
Turn on the water supply and check for any leaks. If there are any leaks, then you will need to apply more sealant. Once the sink is secure and there are no leaks, you can start to use it.
Comparison of Techniques for Removing a Kitchen Sink That is Glued Down
When faced with a kitchen sink that is firmly glued down, it can be a challenging task to remove it without causing damage. This table compares various techniques commonly used to remove a glued-down kitchen sink. The techniques are evaluated based on their effectiveness, level of difficulty, and potential risks involved.
| Technique | Effectiveness | Difficulty | Risk Level |
|---|---|---|---|
| Heat Gun | High | Moderate | Low |
| Chemical Solvents | Medium | Low | Medium |
| Handheld Scraper | Low | High | High |
| Plumber’s Putty Knife | Medium | Medium | Low |
| Wire Saw | High | High | Medium |
Explanation:
- Technique: The different techniques used to remove a glued-down kitchen sink.
- Effectiveness: Indicates the effectiveness of each technique in successfully removing the sink.
- Difficulty: Reflects the level of difficulty involved in implementing each technique.
- Risk Level: Describes the potential risks associated with each technique.
The table presents five common techniques for removing a kitchen sink that is glued down: Heat Gun, Chemical Solvents, Handheld Scraper, Plumber’s Putty Knife, and Wire Saw. The “Effectiveness” column rates the techniques as High, Medium, or Low based on how well they typically work in removing the sink. The “Difficulty” column rates the techniques as High, Medium, or Low based on the level of skill and effort required to use each technique. The “Risk Level” column evaluates the potential risks involved with each technique, indicating whether they are Low, Medium, or High.
The table aims to provide a comparative overview of these techniques to help individuals choose the most suitable approach based on their skill level, available tools, and desired level of risk.
FAQ
How do you remove a glued undermount sink?
The most popular approach is using a putty knife. Insert the putty knife into the sink where the tile is affixed, then try to pry it out. Once you have inserted the putty knife, you will need to twist it back and forth until the glue comes loose.
A heat gun is another option for removing a glued undermount sink. Place the heat gun on top of the glue. Before moving the heat gun to a new location, you must hold it in one position for around 30 seconds. Repeat it until the glue is melted and the sink may be removed.
The last way that you can remove a glued undermount sink is by using a chisel. The chisel should be placed on top of the glue. [3]
Once you have removed the glued undermount sink, you will need to clean up any residue that is left behind. You can use a putty knife or a heat gun to remove any residual glue. Once all of the glue has been removed, you can then install a new sink.
How do you remove a kitchen sink without damaging the counter?
You can use a putty knife. First, score the perimeter of the sink with the putty knife. This will help break the seal between the sink and counter. Next, insert the blade of the putty knife under the lip of the sink and pry up gently. Work your way around the entire sink until it is loose enough to lift off. Finally, use a razor blade to scrape away any remaining adhesive from the sink and tabletop. [4]
How do you remove a glued cast iron sink?
There are a few ways that you can go about removing your glued cast iron sink. You can either use a putty knife to pry it up, or you can use a heat gun to loosen the adhesive.
If you decide to use a putty knife, be sure to insert it between the sink and countertop at a 45-degree angle. Gently pry up the sink until it comes loose.
Once the sink is loose, you can then proceed to remove any remaining adhesive from both the sink and countertop. To do this, we recommend using a product like Goo Gone. Simply apply the Goo Gone to a clean rag and rub it over the adhesive until it comes up.
How do you remove a porcelain sink?
To remove a porcelain sink, you should use a putty knife or chisel to break the seal around the edge of the sink. Once the seal has been broken, you should be able to remove the sink from the countertop. You also may need to use a heat gun or hair dryer to soften the glue before attempting to remove it. [5]
If you have a pedestal sink, you will need to remove the pedestal base before removal the sink itself. To do this, simply unscrew the bolts that are holding it in place and then lift the pedestal off of the floor. With both types of sinks, it is important to disconnect any plumbing lines before attempting removal.
What tools are needed to remove a glued kitchen sink?
Here are the tools you will likely need to remove a glued kitchen sink:
- Adjustable wrench
- Plumber’s wrench or slip-joint pliers
- Utility knife
- Putty knife or scraper
- Screwdriver (if applicable for removing any clips or brackets)
Can I reuse a kitchen sink after removing it?
Whether you can reuse a kitchen sink after removing it depends on the sink’s condition and your personal preference. If the sink is still in good condition and you want to reuse it, make sure to thoroughly clean and inspect it for any damage. You may also need to remove any old adhesive or caulk from the sink before reinstalling it in a new location.
What should I do if the kitchen sink is stuck due to excessive adhesive or caulk?
If your kitchen sink is stuck due to excessive adhesive or caulk, try the following steps:
- Apply a solvent or adhesive remover specifically designed for the type of adhesive or caulk used.
- Allow the solvent to penetrate and soften the adhesive or caulk according to the manufacturer’s instructions.
- Use a putty knife or scraper to gently pry the sink away from the countertop.
- If necessary, repeat the process until the sink is freed.
- Be cautious not to use excessive force or tools that may damage the sink or countertop.
Should I hire a professional to remove a glued kitchen sink?
While removing a glued kitchen sink can be a DIY project for those with some experience, it’s always a good idea to consider hiring a professional if you’re unsure or if you encounter any difficulties. A professional plumber or contractor will have the necessary skills and tools to handle the removal process safely and efficiently, minimizing the risk of damage to the sink or countertop.
What precautions should I take before removing a glued kitchen sink?
Before removing a glued kitchen sink, it’s important to take the following precautions:
- Turn off the water supply to the sink to avoid any accidental leaks or water damage.
- Clear out the area under the sink to provide space for maneuvering and working.
- Wear protective gloves and safety glasses to protect yourself from any sharp edges or chemicals.
- If you’re unsure about any steps of the process, consult the manufacturer’s instructions or seek professional advice.
Can I remove a glued kitchen sink without damaging the countertop?
While removing a glued kitchen sink without damaging the countertop can be challenging, you can take certain precautions to minimize the risk of damage. Here are some tips:
- Use a utility knife to carefully cut through the adhesive or caulk, taking care not to scratch or gouge the countertop surface.
- Apply gentle and even pressure when lifting the sink to avoid putting excessive strain on the countertop.
- If necessary, use a putty knife or scraper to gently remove any remaining adhesive or caulk, being careful not to scratch the countertop.
- For delicate countertops, it may be advisable to seek professional assistance to ensure the removal is done safely and without damage.
How can I clean the area after removing a glued kitchen sink?
After removing a glued kitchen sink, you can clean the area using the following steps:
- Remove any debris or leftover adhesive from the countertop using a putty knife or scraper.
- Wipe down the countertop with a mild household cleaner or a mixture of warm water and dish soap.
- Rinse the area thoroughly with clean water and dry it with a clean cloth.
- Inspect the area to ensure it is free from any residue or debris before installing a new sink.
What should I do if I accidentally damage the countertop while removing the glued kitchen sink?
If you accidentally damage the countertop while removing a glued kitchen sink, consider the following options:
- If the damage is minor, you may be able to repair it using a suitable countertop repair kit or filler.
- If the damage is significant or beyond your ability to repair, you may need to consult a professional contractor or consider replacing the countertop.
- Take precautions to avoid further damage during the repair or replacement process.
Can I use heat to loosen a glued kitchen sink?
Using heat can be effective in loosening adhesive or caulk when removing a glued kitchen sink. However, the suitability of heat depends on the materials involved. Some sinks and countertops, such as those made of plastic or laminate, may be more sensitive to heat and can be damaged if excessive heat is applied. It is important to refer to the manufacturer’s instructions or consult a professional to determine if heat can be safely used in your specific situation.
Useful Video: How to Take out Sink Without Damaging the Countertop | How to Remove a Sink
Conclusion
With the right tools and a little elbow grease, removing a kitchen sink that is glued down is not an impossible task. Just be sure to take your time, work carefully, and be prepared for a bit of a mess. With these tips, you should be able to get the job done quickly and easily. Thanks for reading!
References:
- https://www.mrkitchenfaucets.com/how-to-remove-a-kitchen-sink-that-is-glued-down/
- https://www.diy.com/ideas-advice/how-to-fit-a-kitchen-sink/CC_npcart_400206.art
- https://homeguides.sfgate.com/remove-glued-undermount-bathroom-sink-marble-29751.html
- https://anytimeplumbing.net/can-you-replace-a-kitchen-sink-without-replacing-the-countertop/
- https://homeguides.sfgate.com/out-old-porcelain-kitchen-sink-75357.html